
First, start by planning your SharePoint communication site. In the planning stage you will learn how to think about site navigation, permissions, and customizations to prepare you to build a SharePoint communication site. Use this article to learn how to build a SharePoint communication site.
Need to create a team site? You can still follow the guidance in this article, but understand that a team site generally has a much smaller audience with very specific goals and tasks that need to be accomplished. Communication sites are designed for broad communication.
Build your site
You can create your communication site using one of the standard designs (Topic, Showcase, blank) or a custom site design created for your organization. If you have Admin permissions, you can also provision one of the site designs in the lookbook as a starting point for your site.
Review this guided walkthrough for creating a communication site.
Or, skip to creating a communication site.
Customize the look and feel
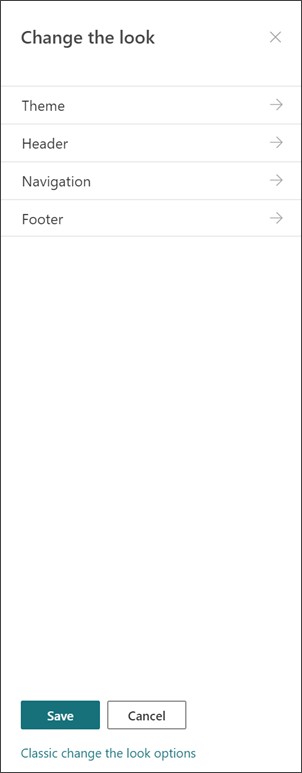
You can customize the theme, header, and site logo to align with your organization or site brand. Learn how to customize the look of your SharePoint site. If your site is part of a hub, you will not be able to change the site theme. If You do not see options to change the look of your site, your administrator may have disabled the ability to do so.
Access these changes in settings > Change the look
Specifications for logos:
-
Your site logo can be a JPG, GIF, or PNG. Using a PNG file allows for a transparent background
-
If you want a square logo for your site, the minimum dimensions are 64 x 64 pixels
-
For a rectangular logo, the dimensions are 192 x 64
-
Double these dimensions for the best display in high resolution
-
To minimize the impact on your site performance, do not use an image larger than 300 MB for your site logo
Set up the Site pages library
The Site Pages library is a special type of document library used to host all the pages on your site. You can only have one Site Pages library in your site. News posts are stored in the Site Pages library on your site – because they are just a special type of site page.
Tip: To make it easier to see which pages News and which pages are “regular” site pages, add the Promoted State column to the views in your Site Pages library. News posts are Promoted State = 2. “Regular” site pages are Promoted State = 0.
Tip: Make the All Pages view the default view for Site Pages. In this view, show the following columns in addition to Type and Name: Title (linked to item with edit menu), Promoted State, Version, Like Count, and Comment Count. You will be able to add all these columns except Version by selecting the dropdown for + Add column and choosing Show/hide columns. Select the columns you want to display and click Apply. To add Version to your view, select the view dropdown and choose Edit the current view. Then, check the box in front of Version and press OK to save the view.
Understanding site contents
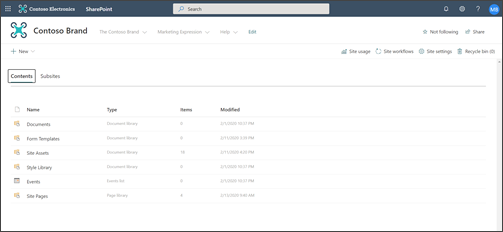
Every communication site includes several default lists and libraries:
-
Documents library – a location to upload files. Your site comes with one default library, but you can add more as needed.
-
Events list – the list where calendar entries are stored.
-
Site pages library – the library where all your Site Pages live.
-
Form templates and style library - these libraries are legacy libraries carried over from pervious versions of SharePoint
Tips for configuring site content:
-
Add the page title before you add an image to the page. If you don’t add the page title first, the Site Assets sub-folder name (found in Site Assets) for your page may be a string of random characters , making it much harder to find the images associated with your page later.
-
Do not upload documents using the Quick links web part. Always upload them to a document library, and then link to them from Quick links. If you upload a document while you are adding a link in Quick links, the document will be stored in the Site Assets library – which will make it much harder to find if you need to update it later.
-
Put spaces (not dashes or underscores) between words in file names to improve readability. File names and document titles should be meaningful to users because this information will become important when users search your site for content.
-
Avoid using dates and version numbers in file names. SharePoint will automatically keep track of versions for you. If you add a date to a file name and then add a newer copy of the file, your links to the old file will not automatically be updated. If you upload a new version of a file that has the same name as an existing file, your links are updated automatically.
-
Use recognizable labels for all hyperlinks. Do not invent terms when you are linking to content in your site. For additional guidance about link labels, review the guidance for labels in Planning navigation for the modern SharePoint experience. The label naming guidance in this article applies not only to top navigation labels, but for any link on your page.
Decide how you want users to engage with your pages
One key benefit of modern SharePoint experiences is that there are some built-in ways for visitors to engage in your site and on your pages:
-
Page comments. Each page is created with the page comments toggle enabled. You can choose to leave this enabled or disable it. If you leave page comments enabled, be sure that you are reviewing comments frequently to respond as needed.
-
Save for later. This feature allows any reader to save the page for later review. Saved pages are shown on the SharePoint start page or in the mobile app.
-
Likes. This feature allows visitors to indicate affinity with your page. The total number of likes is displayed for every page and news article.
-
Views. This feature tells site owners and visitors how many times the page has been viewed.
-
Yammer conversations. Adding the Yammer web part allows page visitors to view, start, and participate in a Yammer community conversation from your SharePoint page.
Target content to specific audiences
A great way to ensure that your site content is more relevant for visitors is to customize the way your visitors view pages and news by using audience targeting. Audience targeting enables content to be targeted to users who are part of a specific audience. Audience targeting also enables news to be prioritized to audience members on the SharePoint start page, news on the mobile app, and in News web part.
Audience targeting is configured first in the Site pages library and then in the News or Highlighted content web parts. If an audience is specified for a page, these web parts will only display the page to people who are members of the audience. A non-member could find the content using search, because targeting a page is not the same as security a page. However, the non-member will not be presented with the page or news article.
Audience targeting can also be added to the navigation for your site. This allows you to choose who sees which content in your site navigation using the same audiences available for pages.
Create automatic page approvals
Do you want someone or a group to approve pages before they are published? Major and minor versions are enabled by default in the Site Pages library. With this feature enabled, you can easily configure page approval from the Automate drop down in the Site Pages library. This can be a good idea if you plan to have multiple authors and you want to review final pages before they are published. Note that even without page approval enabled, only members and owners can view pages that are unpublished (although Visitors can view the last published version of the page).
Customize permissions for lists and libraries
Do you want to have some lists or libraries where site visitors can contribute? You can customize permissions for one or more lists or libraries on your site to assign Contribute permissions to your visitors group. As a best practice, try to avoid breaking permissions in the Site Pages library. Breaking permissions in the Site Pages library can result in complex and confusing user experiences and needs to be very carefully managed to make sure that you don’t accidentally remove permissions from a page that all users need. You can also use the Microsoft Forms web part to add a form to a page where visitors can contribute or the Power Apps web part to add an app that you have configured.
Special considerations for modernizing a classic site
If you are modernizing an existing classic SharePoint site to create your communication site or converting from a different platform to SharePoint, it is likely that you will have content to migrate to your new site.
Best practices for migrating:
-
Use the move to a new communication site to re-think your site’s story and ensure content is still relevant. Plan your new site using the guidance described previously. This doesn’t mean that you should forget about what you have already – especially if the content is being used and has been kept up-to-date. But, is this the case for all your current content?
-
Talk to your site visitors. Find out what they really need. Does the content on your former site still meet the goals for your new site? Look at usage data for the existing site. Use this information to determine which content should be migrated to your new site.
-
Create and review the content inventory for your current site. For each element in the inventory, identify whether it should be:
-
Deleted - if so, do it now!
-
Archived - because it is a business record
-
Migrated - because it is current, and you still need it
-
Updated and then migrated
-
Placed on another site and linked on your own site
-
-
Content should earn its place on your new site.
-
Is this content adding value to the business/visitor?
-
Am I committed to keeping it up-to-date?
-
Is my business group responsible for this content? If not, it’s time to say goodbye to the content. If it’s not yours, get the owner to add it to their site and create a link to the content on your site.
-
-
Find a “home” for new content. Make sure every element has a home and, if not, think about whether you may have missed a category in your planning.


