
Swimlanes are shapes that you can drag onto your drawing and place in any order in your flowchart. Drag to move them or change their size, and drag process step shapes into them to build the flowchart.
Note: The following procedure assumes that your drawing has the Cross-Functional Flowchart stencil available. For instruction in adding a stencil, see Add a stencil to a template in Visio.
-
In the Shapes window, in the Cross-Functional Flowchart Shapes stencil, drag a Swimlane shape (either horizontal or vertical) onto an empty area of the diagram.
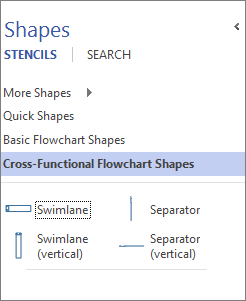
Each new swimlane comes with a label bar, which says Function by default; to change the label, double-click the bar.
-
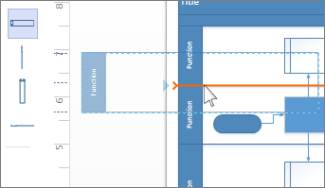
Drag more swimlane shapes from the Shapes window. Drop them when you see the orange connection indicator appear in the place you want the swimlane to go.
-
Drag any process shapes into the correct swimlanes. When the shape is contained in the swimlane, the swimlane shows a green highlight.
Note: If you drop a new swimlane onto a process shape that’s already on your drawing, the process shape is not associated, or grouped, with the swimlane, even though it might look like it. To group the process shape with a swimlane, move the shape so that Visio highlights the swimlane, and then drop the shape. Shapes that are grouped with a swimlane, move automatically with it when you move the swimlane.
Change a swimlane’s size or position
If you need to change the width of any swimlane, drag one of the swimlane’s separator lines until it is the width that you want.
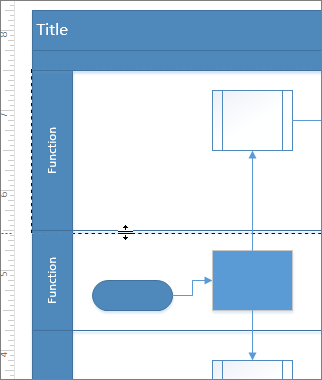
You can also drag the swimlane’s end line, if you want to make it longer or shorter.
To move a swimlane higher or lower on the flowchart, click its label bar so that a grey highlight appears around the swimlane. Then drag the swimlane until the orange connection indicator appears at the location where you want the swimlane to be. Shapes contained in the swimlane move along with it.
To delete a swimlane, click its label bar so that a grey highlight appears around the swimlane, then press Delete. Deleting a swimlane also deletes the shapes it contains.


