
-
Click the picture to select it. A Format tab with the heading Picture Tools appears in the ribbon.
-
On the Format tab under Picture Tools, in the Arrange group, click Crop Tool

-
Drag the selection handles until only the portion of the drawing, picture, or object that you want is visible.
-
To see a different portion of the picture (“pan” the drawing, picture, or object inside the cropped border), drag the picture to where you want it.
-
When you're done, click Crop Tool again to turn it off.
Visio doesn’t delete the cropped part of the picture automatically, so you can change how the picture is cropped later by clicking Crop Tool again. To reduce the size of your diagram file, delete the cropped areas of the picture permanently. On the Format tab under Picture Tools, click Compress Picture, select Delete cropped areas of pictures, and then click OK.
Crop an AutoCAD drawing
-
Unlock the AutoCAD drawing by doing the following:
-
Right-click the AutoCAD drawing, point to CAD Drawing Object, and then click Properties.
-
Click the General tab, clear the Lock size and position check box, and then click OK.
-
-
Select the CAD drawing. Use the tools on the Picture ToolsFormat tab to crop and adjust the image.
-
For DWG objects, right-click the object and then click Crop Tool.
-
When you’re done, click an empty place in the diagram to clear the selection.
To lock a CAD drawing so that you don't accidentally move or resize it while you are working, do the following:
-
Right-click the CAD drawing, point to CAD Drawing Object, and then click Properties.
-
Click the General tab, select the Lock size and position check box, and then click OK.
Modify a picture
-
Select the picture. The Format tab under Picture Tools appears.
-
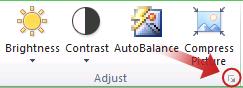
To change the appearance of the image, click AutoBalance to automatically adjust the image, or click Brightness or Contrast. You can see a preview of the effect by holding the pointer over a value.
-
To reduce the size of the image, click Compress Picture and make your selections.
-
Change the thickness (weight), color, and appearance of the border around the picture by clicking Line and setting your preferences.
-
Add effects to the picture, such as transparency, blur, sharpen, and denoise, by opening the Format Picture dialog box:
-
Click the Format Picture Dialog Box Launcher:
-
On the Image Control tab, use the sliders to set the amount of each effect you want.
-
-
Add shape effects, such as shadow and reflection, by clicking the Home tab and using the Effects menu in the Shape Styles group.


