There are several ways to display a Visio diagram on a Web page—such as on a blog, in SharePoint, or with a Web application. Floor charts, timelines, process flows, network diagrams, and so forth are more discoverable and useful when used on the Web. Moreover, saved changes to the original diagram in Visio are automatically reflected on the Web page, which means stakeholders and other viewers see up-to-date diagrams.
Important: By default. someone follows an embedded link by pressing Ctrl and clicking the link. However, if you prefer that your users only have to click a link to follow it, add &wdClickOnlyHyperlinks=true at the end of the iframe src attribute in the embed code.
Add a diagram to any Web page by using OneDrive - personal Embed code
-
If you don't have a OneDrive account, create one here.
-
If necessary, upload the Visio file to OneDrive - personal.
-
Navigate to the folder that has the Visio file, and then select it.
-
Select Embed, and then in the Embed pane, select Generate.
-
Optionally, adjust the size of the Zoom Level, and then copy the Embed code to the Web page or application.
Add a diagram to a SharePoint modern page by using Visio for the web Embed code
-
Navigate to the document library that has the Visio file.
-
To open the Visio diagram, select the file name.
-
Select Show more commands (...) > Embed.
-
In the Embed dialog box, copy the Embed code.
-
Optionally, adjust the Width and Height, and then copy the Embed code.
-
If necessary, create a modern SharePoint page where you want to insert the Visio diagram. For more information, see Add a page to a site.
-
Navigate to the modern SharePoint page, add the Embed web part, and then add the Embed code to it.
For more information, see Use the Embed web part on a modern page.
Add a diagram to a SharePoint modern page by using the File viewer web part
-
If necessary, create a modern SharePoint page where you want to insert the Visio diagram. For more information, see Add a page to a site.
-
Navigate to the modern SharePoint page.
-
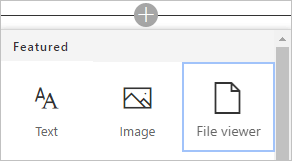
Click


-
Browse to the Visio diagram that you want to insert, and then choose Add Document.
For more information, see Using web parts on SharePoint Online pages.
Add a diagram to a SharePoint classic page by using the Embed Code command
-
Navigate to the document library that has the Visio file.
-
To open the Visio diagram in Visio for the web, select the Visio file.
-
Select Show more commands (...) > Embed.
-
In the Embed dialog box, copy the Embed code.
-
Navigate to the Web page for which you want to add the Visio diagram.
-
Select Page > Edit.
-
Click inside the editable area on the Web page.
-
Select Insert > Embed Code.
Follow a hyperlink in an embedded Visio diagram
To follow a hyperlink in a diagram, press Ctrl and click the hyperlink.
Create a Visio for the web mashup with the Visio JavaScript API
Visio JavaScript APIs enable programmatic access to Visio for the web diagrams on a SharePoint page. Use the APIs to first embed a Visio diagram in an HTML <Iframe> element, and then interact with the diagram elements using a script editor web part. For more information on key concepts and code examples to get you started, see Migrate from Visio Web Access to Visio for the web.


