
In video or audio that you've added to a PowerPoint slide, you can trim away unwanted content at the beginning or end of the clip, or both.
You can only trim videos that you've inserted from your computer. This feature isn't available for videos inserted from the web.
Trim a video
-
In Normal view, select the video border on the slide.
Once the video is selected, a Video Tools section appears on the toolbar ribbon, and it has two tabs: Format and Playback:

-
On the ribbon, under Video Tools, on the Playback tab, click Trim Video.
-
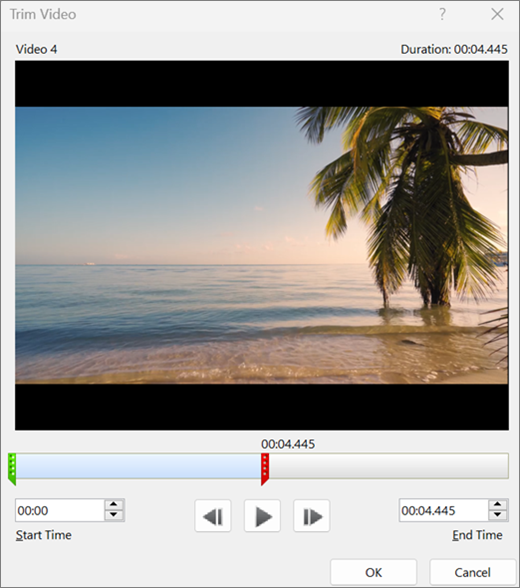
To determine where you want to trim your video footage, in the Trim Video dialog box, press the Play button.
-
When you reach the point where you want to make the cut, press the Pause button.
You can use the Next Frame and Previous Frame buttons to fine-tune the location for a marker.
-
In the Trim Video dialog box, do one or more of the following:
-
To trim the beginning of the clip, click the start point (shown in the image below as a green marker, on the left). When you see the two-headed arrow, drag it to a new starting position for the video.
-
To trim the end of the clip, click the end point (shown in the image below as a red marker, on the right). When you see the two-headed arrow, drag it to a new ending position for the video.
In this example, the end of the clip is trimmed, which changes the end time to 00:04.445.
-
Trim a music clip or sound clip
-
Select the audio clip on the slide.
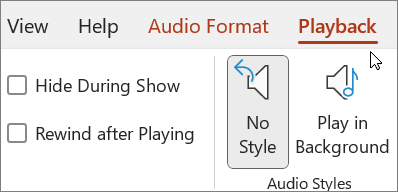
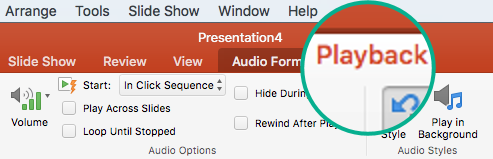
Once the audio clip is selected, an Audio Tools section appears on the toolbar ribbon, and it has two tabs: Format and Playback:
-
Under Audio Tools, on the Playback tab, click Trim Audio.
-
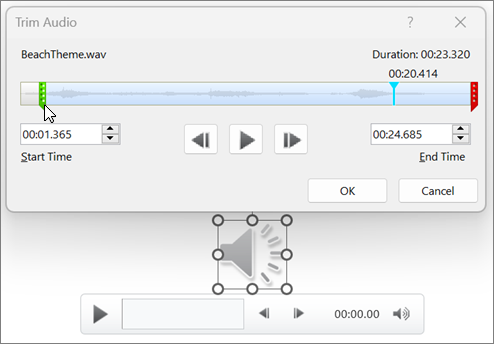
To determine where you want to trim your audio clip, in the Trim Audio box, click the Play button.
-
When you reach the point where you want to make the cut, click the Pause button.
You can use the Next Frame and Previous Frame buttons to fine-tune the location for a marker.
-
Do one or both of the following:
-
To trim the beginning of the clip, click the start point (green marker, on the left). When you see the two-headed arrow, drag it to the new starting position for the audio clip.
-
To trim the end of the clip, click the end point (red marker, on the right). When you see the two-headed arrow, drag it to the new ending position for the audio clip.
-
Save a copy of a trimmed media file
To save a separate copy of a trimmed media file for use outside of PowerPoint, you must compress the media and then use the Save Media as command:
-
Select File > Info.
-
Select Compress Media, and then choose an appropriate level of compression.
The Compress Media dialog box opens and the compression process begins.
-
When compression is finished, select the on-slide media that you've trimmed. Right-click it and select Save Media as.
-
Enter a name and a storage location for the file, then select Save.
The media file is saved in the folder that you selected.
For more information about inserting and playing music and other sound clips, see:
 |
On macOS, this feature is only available to Microsoft 365 subscribers. If you are an Microsoft 365 subscriber, make sure you have the latest version of Office. Another option is to use a different app, such as GarageBand, to trim an audio file before adding it to a presentation. |
Trim a video
-
In Normal view, select the video frame on the slide.
Once the video is selected, two extra tabs appear on the toolbar ribbon, named Video Format and Playback:

-
Select the Playback tab, and then select Trim Video.
-
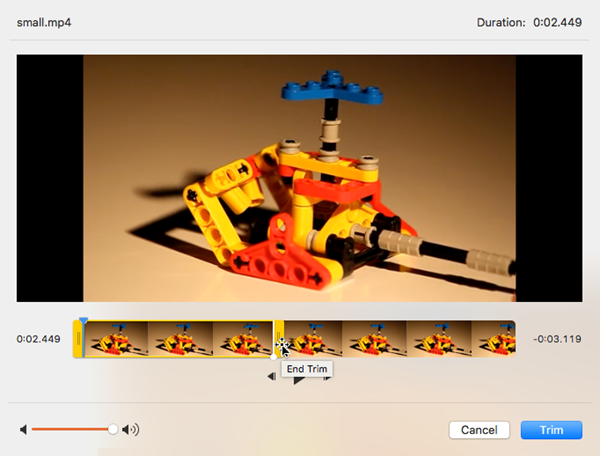
To determine where you want to trim your video footage, in the Trim Video dialog box, press the Play button.
-
When you reach the point where you want to make the cut, press the Pause button.
You can use the Nudge Forward


-
In the Trim Video dialog box, do one or more of the following:
-
To trim the beginning of the clip, click the start point (shown in the image below as a vertical yellow handle, on the left). Drag it rightward to a new starting position for the video.
-
To trim the end of the clip, click the end point (the vertical yellow handle). Drag it leftward, as has already been done in this picture below, to a new ending position for the video.
In this picture, the end of the clip is trimmed, which changes the duration of the clip to 00:02.449.
-
For more information about inserting and playing videos, see:
Trim a music clip or sound clip
-
Select the audio clip on the slide.
Once the audio clip is selected, an Audio Tools section appears on the toolbar ribbon, and it has two tabs: Format and Playback:
-
Under Audio Tools, on the Playback tab, click Trim Audio.
-
To determine where you want to trim your audio clip, in the Trim Audio box, click the Play button.
-
When you reach the point where you want to make the cut, click the Pause button.
You can use the Nudge Forward
-
Do one or both of the following:
-
To trim the beginning of the clip, click the start point (shown in the image below as a vertical yellow handle, on the left). Drag it rightward to a new starting position for the video.
-
To trim the end of the clip, click the end point (the vertical yellow handle). Drag it leftward, as has already been done in this picture below, to a new ending position for the video.
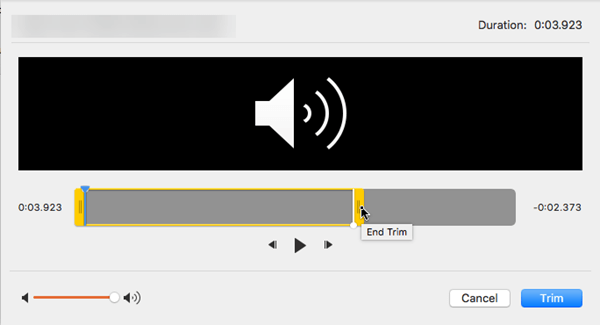
-
For more information about inserting and playing music and other sound clips, see:


