
Buttons can be added to a Microsoft InfoPath 2010 form to enable users to click them to initiate an immediate action, such as submitting the form or querying a database. You can associate a button with rules or custom code.
In this article
About buttons
Button
Buttons are controls that you click to perform an action on the form. You can use them to perform a basic action, such as submit, refresh, or update the form, or you can use them to perform more advanced actions through rules or custom code.
Use a button when you want to:
-
Submit data to one or more data sources.
-
Enable users to switch to another view of the form.
-
Refresh data from an external source of data.
-
Clear any queried data from the form.
-
Calculate data on the form.
Picture button
Picture buttons work like regular buttons, except that, instead of text on the button, indicating its function, you can use a picture. You can also set a hover picture, which causes the picture on the button to change when the user moves their mouse over the button.
Use a picture button when you want to:
-
Use a picture, instead of text, to represent the action that the button performs.
-
Display the image of a tab as a way of navigating between views on the form.
-
Create an image map that users can click.
-
Make buttons match the theme of the form and overall look and feel.
About button actions
By default, buttons have an empty Rules and Custom Code action associated with them. You will have to configure any associated rules or custom code that you want to run when you click the button. You can also configure the button to perform other actions, such as submit, refresh, or update the form. The following outlines each of the possible actions that you can select from:
-
Submit This action initiates the standard submit functionality for the form, just like if the user were to click Submit on the Home tab in the filler.
-
Refresh If the form is connected to one or more receive data connections, this action enables you to select one or more of those data connections to refresh the data from.
-
Rules and Custom Code This is the default action for a button when it is created and runs either a rule or custom code when the button is clicked. For example, you can create a rule that switches views, closes the form, or submits the form as an email message.
-
Update Form Only available for Web browser forms. The Update Form action refreshes all data in the form.
-
Run Query Only available if the form is connected to a database or Web service. The Run Query action queries a database or Web service based on the values entered in the fields that are used to query the data.
-
New Record Only available if the form is connected to a database or Web service. The New Record action clears the values on the form so that a user can enter new data.
Insert a button
The procedure for inserting a button is the same whether you are designing a new, blank form template or basing the design of your form template on a database or other external source of data. This is because buttons, unlike most other InfoPath controls, are not bound to fields. Instead, they are instead used to initiate an action.
-
On the form template, place the cursor where you want to insert the button.
-
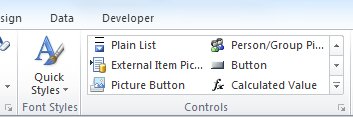
On the Home tab, in the Controls group, click the type of button to insert.
Add and configure the action of a button
Do the following to change the associated action of a button:
-
Select the button.
-
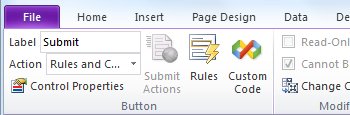
Under Control Tools, on the Properties tab, in the Button group, select the behavior from the Action box.
-
Configure the options associated with the selected action, as follows:
-
Submit Click Submit Actions then select the data connection and destination that data will be sent to, or indicate if rules or code will be used to control where the data from the form is submitted. Click Advanced and indicate what message will be displayed if the form submission fails or is completed successfully. Indicate what will happen after the form is submitted by selecting it from the After submit box.
-
Refresh A button with the Refresh action assigned refreshes all external sources of data. To specify only one, click ControlProperties, and then click Settings. Click One secondary data source, then select the data source you want.
-
Rules and Custom Code For instructions regarding adding an action rule to a button, see Add rules for performing other actions. For instructions regarding adding custom code to InfoPath, see InfoPath 2010 Developer Reference for Form Templates.
-
-
Update Form Update Form does not have any options associated with it.
-
Run Query Run Query does not have any options associated with it.
-
New Record New Record does not have any options associated with it.
-
Change the label of a standard button
For standard button controls, you can change the label to reflect the type of action that the button will perform.
-
Select the button.
-
Under Control Tools, on the Properties tab, in the Button group, enter the value in the Label field.
-
Press Enter.
Change the picture on a picture button
For picture button controls, you can set two pictures: the picture that is displayed on the button by default, and the picture that the button shows when you hover the cursor over it. Do the following to set the picture and hover picture on a picture button control:
-
Select the picture button control.
-
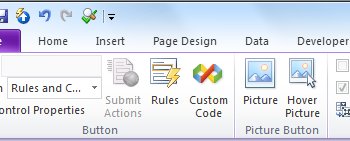
Under Control Tools, on the Properties tab, in the Picture Button group, click either Picture or Hover Picture, depending on which picture you want to set.
-
Select the picture that you want to use.
-
Click Insert.
Layout tips
Use the following tips to help you refine the appearance, size, and other aspects of a button control:
-
Use short, descriptive text for button labels.
-
To change the width of several buttons at once, select the desired controls then under Control Tools, on the Properties tab, in the Control Size group, in the Width box, enter the desired width, and then press ENTER on the keyboard.
-
To change the border or color of a button, select the button that you want to change, and then, under Control Tools, on the Properties tab, in the Colors group, click either Borders or Shading and make the desired adjustments.
-
If you use the same button in more than one view, try to place it in a similar location in each view and use the same button text for consistency.
-
For a more polished look, consider limiting the number of different widths that you use for the buttons in your form template. Also, try to avoid using narrow, short, or tall buttons, because non-standard button sizes often look unprofessional.


