If you want to customize how track changes markup appears in your documents, the Track Changes dialog box gives you control over every aspect of markup appearance.
You can set tracked changes to appear in different colors for different authors. But Word automatically picks which color represents each author—and that color might change when you reopen the document or someone else opens the document.
-
Go to Review > Tracking Dialog Launcher
-
Select Advanced Options.
-
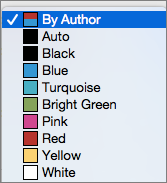
Select the arrows next to the Color boxes and choose By author.
You can also color-code text moves and changes made to table cells.

Tip: To see everyone’s changes in a single color, choose that color instead of By author. For example, to see all insertions as Turquoise, click the arrow by Color, and then choose Turquoise. Now everyone’s insertions are colored turquoise.
These color settings are for your computer only. Other people will see the tracked changes in whatever colors they set up. The By author colors will look different on different computers, too.
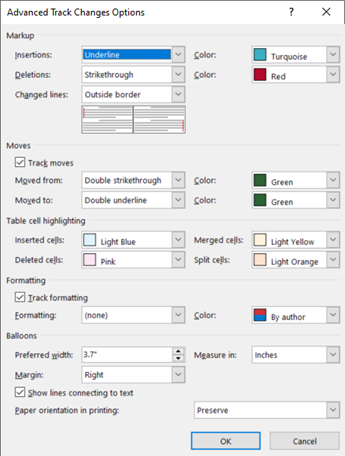
Advance Track Changes Options
-
Insertions Sets a format (default is Underline) and a color (default is By author) when you insert text into a document. You can change the color to a fixed value, or have no color at all in the Color field.
-
Deletions Sets a format (default is Strikethrough) and a color (default is By author) when you delete text from a document. You can change the color to a fixed value, or have no color at all in the Color field.
-
Changed lines shows lines that were changed with a vertical bar where you place it (none, left margin, right margin, or outside margin). This lets you see where changes have been made, even when you can't see them (like blank lines). The default is Outside border.
-
Track moves Set Word to track when you cut and paste text to another part of a document. The default is On.
-
Moved from Sets the format for cut text when pasted elsewhere. This can be set to several formats, or turned off with None. The default is Double strikethrough.
-
Moved to Sets format of text that's pasted from another part of the document. This can be set to several formats, or turned off with None. The default is Double underline.
-
Inserted cells Sets color of table cells when you insert new ones. The default is Light blue.
-
Deleted cells Sets color of table cells when you delete cells. The default is Pink.
-
Merged cells Sets the color of table cells when you merge multiple cells. The default is Light yellow.
-
Split cells Sets the color of table cells when you split a cell. The default is Light orange.
-
Track formatting This turns on or off track changes on for formatting, such as making something bold or changing font size. The default is On.
-
Formatting Sets how the text format changes are highlighted in track changes. Choices are changing the color only, or the color and it's formatting while in track changes. For example, you can highlight a format change with violet and a double underline.
-
Preferred width Sets the width of the formatting change note.
-
Margin Sets which side of the document the formatting change note appears. By default, this is on the Right of the document.
-
Color Sets the color that highlights the formatted text during change tracking, and the line on the margin that flags a change.
-
Measure in Sets the units to use for the preferred width measurement.
-
Show lines connecting to text Sets whether comments are connected to the text that was commented on in a sentence. The default is On.
-
Paper orientation in printing Sets whether printing orientation is:
-
Auto Automatically adjusts orientation based on content.
-
Preserve Keeps whatever the user has set for orientation in a document. This is the default.
-
Force landscape Forces the document to print in landscape mode when printing with track changes.
-
-
OK Saves changes and exits the dialog box.
-
Cancel Ignores changes, and exits the dialog box.
Change the way that markup is displayed
-
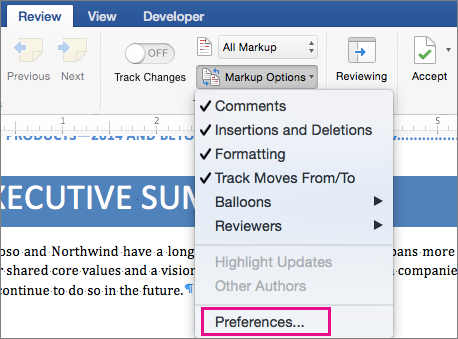
On the Review tab, click Markup Options > Preferences.
-
In the Track Changes dialog box, you can control how you want markup to appear in your document.

For example, to change the formatting that is displayed when someone inserts new text, click an option from the drop-down menu next to Insertions:

By default, Word assigns a different color for each reviewer’s insertions, deletions, and formatting changes.
Note: Assigned colors may change when the document is closed and reopened or when someone opens it on another computer.
You can’t choose which color Word assigns to reviewers, but you can choose colors for different types of markup. If you prefer to have colors determined by the type of markup, instead of by author, select a color from the drop-down menu.