
To help keep a large project more organized, you can link several project files together to create a master project/ subproject arrangement (also known as external dependencies). For example, a construction master project might have subproject files for plumbing, electrical, and carpentry work.
Linking Project files
-
Create separate Project files for each subproject, then open or create the project that you want to be the master project.
-
In the master project, click View > Gantt Chart.
-
In the Task Name field, click the row below which you want to insert the subproject. You can insert a subproject anywhere in the task list of the master project.
-
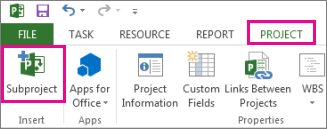
Click Project > Subproject.
-
In the Insert Project box, select the subproject you want to insert.
-
To insert multiple subprojects, hold down Ctrl and select the subprojects in the order that you want to insert them.
-
In most cases, you’ll want to leave the Link to project box checked, so that changes in the subproject are reflected in the master project, and vice-versa. But if you just want to copy the subproject into the master project without the files being dynamically linked, uncheck the box.
-
-
Select Insert, or to insert a project in read-only format, select the arrow on the Insert button, and then select Insert Read-Only. Inserting a project read-only creates a link between the two projects but prevents you from updating the subproject from within the master project. If you update the subproject file directly, however, its changes are reflected in the master project. The Insert Read-Only option is only available when the Link to project box is checked.
Avoiding duplicate resource names in linked projects
If you link projects that have resources with the same name, you’ll create duplicate resource names, which could be confusing. To avoid this, uncheck the Link to project box in the Insert Project dialog box. Doing this will ensure that the resource information in the master project (such as pay rates, resource calendars) will be honored over the subproject resource information.
Note: When you update an unlinked subproject from within the master project, the original subproject file will not show this change.
Reorganizing subprojects in the master project
If you have inserted a subproject into a master project and want to rearrange the task list, you can move the inserted project up or down the task list.
-
Choose View > Gantt Chart.
-
Select the ID number of the summary task that represents the inserted project you want to move.
-
Right-click and choose Cut to remove the inserted project.
Note: By cutting and pasting the task, you change the task's unique ID (different from the task ID located in the far-left column of the Entry table) when it is pasted back into the task list in a different location. To move the task without changing the unique ID, you can drag the task to the new position in the task list. To drag the task, place the pointer over the Task ID in the ID field. When it changes into a four-way arrow, drag the task to its new location. The information is only removed from the project plan, not deleted, until you paste it back in.
-
Select the ID number of the task below where you want the project to appear in the task list.
Note: If you insert or paste a project below another inserted project that has only the project summary task displayed, the project you are inserting or pasting is added at the same level as the inserted project above it. If, however, you insert or paste below an inserted project that has all of its tasks displayed, then the project you are inserting or pasting becomes a subproject of the inserted project above it.
-
Select Paste to paste the project above the selected row.


