Nota: Riteniamo importante fornire il contenuto della Guida più recente non appena possibile, nella lingua dell'utente. Questa pagina è stata tradotta automaticamente e potrebbe contenere errori di grammatica o imprecisioni. L'intento è quello di rendere fruibile il contenuto. Nella parte inferiore della pagina è possibile indicare se le informazioni sono risultate utili. Questo è l' articolo in lingua inglese per riferimento.
If you have a section on your Microsoft Office InfoPath form template that is relevant only to certain users, consider making it an optional section. An optional section does not appear on the user's form by default. Users insert and fill out the optional section only if they need it.
In questo articolo
When to use an optional section
Use an optional section when you want to offer users the choice to fill out a particular section of the form. For example, on a status report form template, you can include an optional Notes section. Users who want to add supplementary notes can insert and fill out this optional section. Everybody else can leave the section hidden.
When you insert an optional section onto your form template, you are essentially inserting an empty container. For the section control to be useful, you must insert other controls inside it. In the previous example, the form designer inserted a rich text box inside the optional section, along with a Notes heading.
Controlli correlati
InfoPath includes other controls that are similar to optional sections but that serve different purposes. To decide which of these controls works best on your form template, refer to the following list:
Section Sections are used to organize groups of related controls. Sections appear on the form template by default. You can't choose to hide them as you can with optional sections.
Repeating section To create a section that users can insert onto a form multiple times (such as a record in a database), use a repeating section or another repeating control.
Choice group To insert a section that can be replaced with another section, use a choice group. A choice group contains two or more sections. By default, one of these sections appears on the form. Users can choose to replace it with a different section. Choice groups can also be inserted on a form multiple times by the user.
Esperienza utente
If you left the default settings enabled for your optional section, users will see a small orange arrow icon next to some hint text when they open a form that is based on your form template. You can customize the hint text when designing your form template.
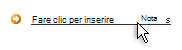
If they click either the icon or the hint text, InfoPath replaces the hint text and icon with the optional section. The user can then enter data into the controls inside the optional section.
To remove an optional section, users move their pointer over the section until an orange shortcut menu button appears in the upper-left corner. Users click this button to see a menu of options for working with the section. You can customize the menu commands when designing your form template.
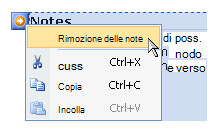
Nota: If a user removes an optional section after filling it out, the data in that section is lost, not hidden.
Insert an optional section
The procedure for inserting an optional section differs slightly depending on whether you are designing a new, blank form template or basing the design of your form template on a database or other external data source.
The following illustration shows how an optional section looks when it is selected in modalità progettazione.
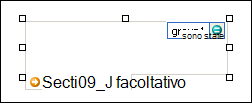
I controlli possono essere associati o non associati. I controlli associati sono connessi a un campo o a un gruppo nell'origine dati, in modo che i dati immessi al loro interno vengano salvati in un file di modulo (con estensione xml) sottostante. I controlli non associati non sono connessi a un campo o a un gruppo, quindi i dati immessi al loro interno non vengono salvati. Se si seleziona o si sposta il puntatore su un controllo, nell'angolo superiore destro del controllo vengono visualizzati il testo e un'icona di associazione. Il testo indica il gruppo o il campo a cui il controllo è associato nell'origine dati. L'icona indica se il controllo è correttamente associato a tale gruppo o campo. Se l'associazione è corretta, viene visualizzata un'icona verde. Se invece c'è un errore, verrà visualizzata un'icona blu o rossa.
The data source for the form template consists of fields and groups that appear in a hierarchical view in the Data Source task pane. Optional sections are always bound to groups in the form template's data source. Each control in an optional section is bound to a field that is part of the section's group.
In the following example, the Notes optional section on the form template is bound to the notes group in the Data Source task pane.

Insert an optional section on a new, blank form template
Quando si progetta un nuovo modello di modulo vuoto, per impostazione predefinita è selezionata la casella di controllo Crea automaticamente origine dati del riquadro attività Controlli. In questo modo InfoPath può creare automaticamente campi e gruppi nell'origine dati quando vengono aggiunti controlli al modello di modulo. Questi campi e gruppi sono rappresentati da icone di cartelle e file nel riquadro attività Origine dati.
-
Nel modello di modulo inserire il cursore nel punto in cui aggiungere il controllo.
-
Se il riquadro attività Controlli non è visibile, fare clic su Altri controlli nel menu Inserisci oppure premere ALT+I, C.
-
Under Insert controls, click Optional Section.
-
To add controls to the section, drag the controls that you want from the Controls task pane into the optional section on your form template.
Nota: You should not move a control that is already on the form template into the section, unless the control's field is already part of the section's group in the data source. Otherwise, the binding for the control may break.
-
To add a label to the control, type text above it.
Insert an optional section on a form template that is based on an existing data source
If you base the design of your form template on an existing Extensible Markup Language (XML) file, database, or Web service, InfoPath derives the fields and groups in the Data Source task pane from that existing data source. In this scenario, you can add an optional section either by dragging a group from the Data Source task pane to the form template or by inserting the section by using the Controls task pane, as described in the following procedure:
-
Nel modello di modulo inserire il cursore nel punto in cui aggiungere il controllo.
-
Se il riquadro attività Controlli non è visibile, fare clic su Altri controlli nel menu Inserisci oppure premere ALT+I, C.
-
Under Insert controls, click Optional Section.
-
In the Optional Section Binding dialog box, select the group in which you want to store optional section data, and then click OK.
-
Add controls to the section, and then bind them to the appropriate fields in the data source.
Customize the hint text that users click to insert the optional section
When you insert an optional section on your form template, "Click here to insert" hint text appears on the form. This text informs users that there is an optional section available for them to insert. Do the following to customize this text:
-
Double-click the optional section.
-
Fare clic sulla scheda Dati.
-
Select the Show insert button and hint text check box, and then replace the default text in the box with text of your own.
Show the optional section on the form by default
By default, optional sections are hidden when users first open a form. If you want to, you can choose to show an optional section instead. If you do this, InfoPath hides the "Click here to insert" hint text, because the optional section is already visible on the form.
-
Double-click the optional section.
-
Fare clic sulla scheda Dati.
-
Under Default settings, click Include the section in the form by default.
-
Select the Allow users to delete the section check box.
Suggerimenti per il layout
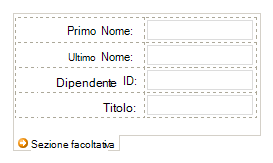
Before you insert controls onto an optional section on your form template, think about how you want to arrange those controls. You can add text boxes and other controls by dragging them into the optional section wherever you want. Or, if you want more control over the layout, you can add a tabella layout inside the optional section and then insert labels and controls inside the individual cells so that they align nicely. In the following illustration, a four-row, two-column layout table is used to arrange labels and controls in the optional section.
In addition to using layout tables, you can do one or more of the following:
-
To change the size of several sections at once, select the sections whose size you want to change, press ALT+ENTER, click the Size tab, and then make the necessary adjustments.
-
To change the border or color of a section, select it on the form template, on the Format menu, click Borders and Shading, click the Borders tab, and then make the necessary adjustments.
-
To see how the controls in your section will look with actual text in them, click Sample Data on the View menu. This helps you get a sense of what a form based on your form template will look like when a user fills it out.
-
On occasion, the text inside the controls in a section and the labels to the left of those controls may appear to be slightly out of alignment. To quickly realign them, double-click the control, click Align on the Size tab, and then click Apply. If the label and control are in different cells in a layout table, right-click the cell that contains the label, click Table Properties on the shortcut menu, and then click Center under Vertical alignment on the Cell tab.