
A Publisher text box starts with a single column, but you can add more without creating a new text box.
-
Click the text box, go to Text Box Tools Format > Columns and pick two or three columns.
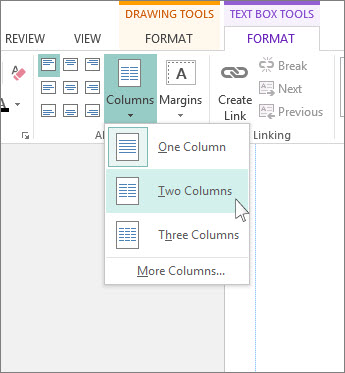
For more columns:
-
Click the text box.
-
Click Text Box Tools Format > Columns > More Columns.
-
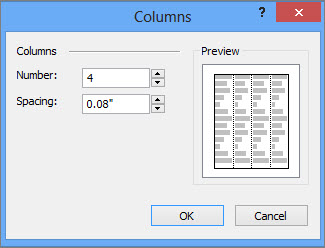
In the Number box, type the number of columns, up to 63.
-
In the Spacing box, use the arrow buttons to increase or decrease the space between columns.
Sometimes a template can help you design a publication with columns designed to look great right away. See Office.com to find templates for Publisher newsletters and brochures.
-
Right-click the text box that you want to change, and then click Format Text Box.
-
In the Format Text Box dialog box, click the Text Box tab, and then click Columns.
-
In the Columns dialog box, type or select the number of columns you want in the Numbers box, and then use the arrow buttons to increase or decrease the space between columns in the Spacing box.
-
Click OK twice.


