To import and export XML data in Excel, an XML Map that associates XML elements with data in cells to get the results you want will be useful. To create one, you need to have an XML schema file (.xsd) and an XML data file (.xml). After creating the XML Map, you can map XML elements the way you want.
Sugerencia: You'll find more information about using XML with Excel in this overview of XML in Excel.
Locate or create XML schema and XML data files
If another database or application created an XML schema or XML data file, you might already have them available. For example, you might have a line-of-business application that exports data into these XML file formats, a commercial web site or web service that supplies these XML files, or a custom application developed by your IT department that automatically creates these XML files.
If you don’t have the necessary XML files, you can create them by saving the data you want to use as a text file. You can then use both Access and Excel to convert that text file to the XML files you need. Here’s how:
Acceso
-
Import the text file you want to convert and link it to a new table.
-
Haga clic en Archivo > Abrir.
-
In the Open dialog box, select and open the database in which you want to create a new table.
-
Click External Data > Text File, and follow the instructions for each step, making sure that you link the table to the text file.
Access crea la nueva tabla y la muestra en el panel de navegación.
-
-
Exporte los datos de la tabla vinculada a un archivo de datos XML y a un archivo de esquema XML.
-
Click External Data > XML File (in the Export group).
-
In the Export - XML File dialog box, specify the file name and format, and click OK.
-
-
Salga de Access.
Excel
-
Create an XML Map based on the XML schema file you exported from Access.
If the Multiple Roots dialog box appears, make sure you choose dataroot so you can create an XML table.
-
Create an XML table by mapping the dataroot element. See Map XML elements for more information.
-
Import the XML file you exported from Access.
Notas:
-
There are several types of XML schema element constructs Excel doesn't support. The following XML schema element constructs can't be imported into Excel:
-
<cualquier> Este elemento le permite incluir elementos no declarados por el esquema.
-
<>anyAttribute Este elemento le permite incluir atributos no declarados por el esquema.
-
Recursive structures A common example of a recursive structure is a hierarchy of employees and managers in which the same XML elements are nested several levels. Excel doesn't support recursive structures more than one level deep.
-
Elementos abstractos Estos elementos se han diseñado para declararse en el esquema, pero nunca para usarse como elementos. Los elementos abstractos dependen de otros elementos que se van a sustituir por el elemento abstracto.
-
Grupos de sustitución Estos grupos permiten intercambiar un elemento siempre que se haga referencia a otro. Un elemento indica que es un miembro del grupo de sustitución de otro elemento mediante el atributo <substitutionGroup>.
-
Contenido mixto Este contexto se declara mediante mixed="true" en una definición de tipo complejo. Excel no es compatible con el contenido sencillo del tipo complejo, pero sí lo es con las etiquetas secundarias y los atributos definidos en dicho tipo complejo.
Use sample XML schema and XML data files
The following sample data has basic XML elements and structures you can use to test XML mapping if you don't have XML files or text files to create the XML files. Here’s how you can save this sample data to files on your computer:
-
Select the sample text of the file you want to copy, and press Ctrl+C.
-
Start Notepad, and press Ctrl+V to paste the sample text.
-
Press Ctrl+S to save the file with the file name and extension of the sample data you copied.
-
Press Ctrl+N in Notepad and repeat step 1-3 to create a file for the second sample text.
-
Salga del Bloc de notas.
Datos XML de muestra (Expenses.xml)
<?xml version="1.0" encoding="UTF-8" standalone="no" ?>
<Root>
  <EmployeeInfo>
    <Name>Jane Winston</Name>
    <Date>2001-01-01</Date>
    <Code>0001</Code>
  </EmployeeInfo>
  <ExpenseItem>
    <Date>2001-01-01</Date>
    <Description>Airfare</Description>
    <Amount>500.34</Amount>
  </ExpenseItem>
  <ExpenseItem>
    <Date>2001-01-01</Date>
    <Description>Hotel</Description>
    <Amount>200</Amount>
  </ExpenseItem>
  <ExpenseItem>
    <Date>2001-01-01</Date>
    <Description>Taxi Fare</Description>
    <Amount>100.00</Amount>
  </ExpenseItem>
  <ExpenseItem>
    <Date>2001-01-01</Date>
    <Description>Long Distance Phone Charges</Description>
    <Amount>57.89</Amount>
  </ExpenseItem>
  <ExpenseItem>
    <Date>2001-01-01</Date>
    <Description>Food</Description>
    <Amount>82.19</Amount>
  </ExpenseItem>
  <ExpenseItem>
    <Date>2001-01-02</Date>
    <Description>Food</Description>
    <Amount>17.89</Amount>
  </ExpenseItem>
  <ExpenseItem>
    <Date>2001-01-02</Date>
    <Description>Personal Items</Description>
    <Amount>32.54</Amount>
  </ExpenseItem>
  <ExpenseItem>
    <Date>2001-01-03</Date>
    <Description>Taxi Fare</Description>
    <Amount>75.00</Amount>
  </ExpenseItem>
  <ExpenseItem>
    <Date>2001-01-03</Date>
    <Description>Food</Description>
    <Amount>36.45</Amount>
  </ExpenseItem>
  <ExpenseItem>
    <Date>2001-01-03</Date>
    <Description>New Suit</Description>
    <Amount>750.00</Amount>
  </ExpenseItem>
</Root>
Esquema XML de muestra (Expenses.xsd)
<?xml version="1.0" encoding="UTF-8" standalone="no" ?>
<xsd:schema xmlns:xsd="http://www.w3.org/2001/XMLSchema">
  <xsd:element name="Root">
    <xsd:complexType>
      <xsd:sequence>
        <xsd:element minOccurs="0" maxOccurs="1" name="EmployeeInfo">
          <xsd:complexType>
            <xsd:all>
              <xsd:element minOccurs="0" maxOccurs="1" name="Name" />
              <xsd:element minOccurs="0" maxOccurs="1" name="Date" />
              <xsd:element minOccurs="0" maxOccurs="1" name="Code" />
            </xsd:all>
          </xsd:complexType>
        </xsd:element>
        <xsd:element minOccurs="0" maxOccurs="unbounded" name="ExpenseItem">
          <xsd:complexType>
            <xsd:sequence>
              <xsd:element name="Date" type="xsd:date"/>
              <xsd:element name="Description" type="xsd:string"/>
              <xsd:element name="Amount" type="xsd:decimal" />
            </xsd:sequence>
          </xsd:complexType>
        </xsd:element>
      </xsd:sequence>
    </xsd:complexType>
  </xsd:element>
</xsd:schema>
Crear una asignación XML
You create an XML Map by adding an XML schema to a workbook. The schema can be copied from an XML schema file (.xsd), or Excel can try to infer one from an XML data file (.xml).
-
Click Developer > Source.
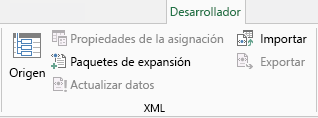
Si no se muestra la pestaña Programador, vea Mostrar la pestaña Programador.
-
In the XML Source task pane, click XML Maps, and then click Add.
-
En la lista Buscar en, haga clic en la unidad, carpeta o ubicación de Internet que contenga el archivo que desee abrir.
-
Haga clic en el archivo y en Abrir.
-
For an XML schema file, XML will create an XML Map based on the XML schema. If the Multiple Roots dialog box appears, choose one of the root nodes defined in the XML schema file.
-
For an XML data file, Excel will try to infer the XML schema from the XML data, and then creates an XML Map.
-
-
Haga clic en Aceptar.
The XML Map appears in the XML Source task pane.
Asignar elementos XML
Los elementos XML se asignan a celdas de asignación única y a celdas de repetición en las tablas XML para que pueda crear una relación entre la celda y el elemento de datos XML en el esquema XML.
-
Click Developer > Source.
Si no se muestra la pestaña Programador, vea Mostrar la pestaña Programador.
-
In the XML Source task pane, select the elements you want to map.
To select nonadjacent elements, click one element, and then hold down Ctrl and click each element you want to map.
-
Para asignar los elementos, realice las siguientes acciones:
-
Right-click the selected elements, and click Map element.
-
In the Map XML elements dialog box, select a cell and click OK.
Sugerencia: Asimismo, puede arrastrar los elementos seleccionados a la ubicación de la hoja de cálculo en la que desee que aparezcan.
Cada elemento aparece en negrita en el panel de tareas Origen XML para indicar que se ha asignado el elemento.
-
-
Decida cómo desea utilizar las etiquetas y los encabezados de columnas:
-
Al arrastrar un elemento XML no extensible a la hoja de cálculo para crear una celda de asignación única, aparece una etiqueta inteligente con tres comandos, que puede usar para controlar la colocación del encabezado o etiqueta:
Los datos ya tienen un encabezado Haga clic en esta opción para ignorar el encabezado del elemento XML, puesto que la celda ya tiene un encabezado (a la izquierda de los datos o sobre estos).
Colocar encabezado XML a la izquierda Haga clic en esta opción para usar el encabezado del elemento XML como etiqueta de la celda (a la izquierda de los datos).
Colocar encabezado XML encima Haga clic en esta opción para usar el encabezado del elemento XML como encabezado de la celda (sobre los datos).
-
Al arrastrar un elemento XML de repetición a la hoja de cálculo para crear celdas de repetición en una tabla XML, los nombres de los elementos XML se usan automáticamente como encabezados de las columnas en la tabla. No obstante, puede modificar los encabezados de las columnas por cualquier otro que desee mediante la edición de las celdas de los encabezados de las columnas.
En el panel de tareas Origen XML, puede hacer clic en Opciones para controlar en mayor medida el comportamiento de la tabla XML:
Combinar elementos automáticamente al asignar Si esta casilla está activada, las tablas XML se expanden automáticamente al arrastrar un elemento a una celda adyacente a la tabla XML.
Mis datos tienen título Cuando esta casilla está activada, se pueden usar los datos existentes como títulos de las columnas al asignar elementos de repetición a la hoja de cálculo.
Notas:
-
If all XML commands are dimmed, and you can't map XML elements to any cells, the workbook might be shared. Click Review > Share Workbook to verify that and to remove it from shared use as needed.
If you want to map XML elements in a workbook you want to share, map the XML elements to the cells you want, import the XML data, remove all of the XML maps, and then share the workbook.
-
If you can't copy an XML table that contains data to another workbook, the XML table might have an associated XML Map that defines the data structure. This XML Map is stored in the workbook, but when you copy the XML table to a new workbook, the XML Map isn't automatically included. Instead of copying the XML table, Excel creates an Excel table that contains the same data. If you want the new table to be an XML table, do the following:
-
Add an XML Map to the new workbook by using the .xml or .xsd file you used to create the original XML Map. You should save these files if you want to add XML Maps to other workbooks.
-
Asigne los elementos XML a la tabla para convertirla en una tabla XML.
-
-
When you map a repeating XML element to a merged cell, Excel unmerges the cell. This is expected behavior, because repeating elements are designed to work with unmerged cells only.
You can map single, nonrepeating XML elements to a merged cell, but mapping a repeating XML element (or an element that contains a repeating element) to a merged cell isn't allowed. The cell will be unmerged, and the element will be mapped to the cell where the pointer is located.
-
-
Sugerencias:
-
Puede anular la asignación de elementos XML que no desee usar o evitar que el contenido de las celdas se sobrescriba al importar datos XML. For example, you could temporarily unmap an XML element from a single cell or repeating cells that have formulas you don't want to overwrite when you import an XML file. Una vez completada la importación, puede volver a asignar el elemento XML a las celdas de fórmula para poder exportar los resultados de las fórmulas al archivo de datos XML.
-
To unmap XML elements, right-click their name in the XML Source task pane, and click Remove element.
Mostrar la pestaña Programador
Si no aparece la pestaña Programador, realice las siguientes acciones para mostrarla:
-
En Excel 2010 y versiones más recientes:
-
Haga clic en Archivo > Opciones.
-
Haga clic en la categoría Personalizar cinta de opciones.
-
Under Main Tabs, check the Developer box, and click OK.
-
-
En Excel 2007:
-
Haga clic en el botón Microsoft Office

-
Click the Popular category.
-
Under Top options for working with Excel, check the Show Developer tab in the Ribbon box, and click OK.
-
Vea también
Eliminar información de asignación XML de un libro
Anexar o sobrescribir datos XML asignados