
The usual reason borders don't print is something called your “printer’s minimum margin setting.”
There are a couple of ways to figure that out so that you can adjust your margins accordingly before you print.
-
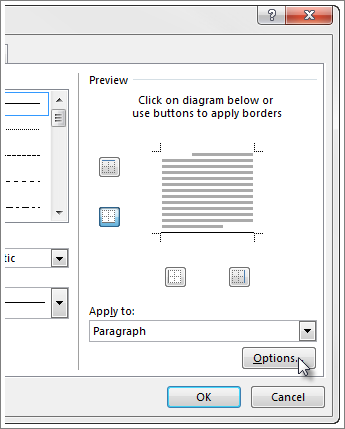
Go to Design > Page Borders.
-
Select Options.
-
Make sure that Edge of page is selected from the Measure from drop-down.

-
You can also select Text from the Measure from drop-down and view how it will look in the preview below.

-
If the borders are still not showing when you print, adjust the margins to give more space between the borders and the edge of the page on the document.
Go to Layout > Margins, and select Custom Margins. Increase the border that corresponds with the one that's missing when you print.
Check your printer manufacturer's support site for information on your printer's minimum margin setting.


