
When you add a modern page to a site, you add and customize web parts, which are the building blocks of your page. This article focuses on the Saved for later web part.
Users can "save" pages, news posts, and documents to view later in SharePoint. They can then easily view what they saved with the Saved for later web part.
Notes:
-
Only pages and news posts can be saved for later in the browser. In the SharePoint mobile app, you can also save documents for later.
-
Save for later is not supported for Guest users. They may be able to select Save for later, but the item won't be saved.

To remove saved items, page viewers can select the Saved for later button in the Saved for later web part. Items can also be removed by selecting the Saved for later button at the bottom of a SharePoint page or by selecting the option in a Document Library. Any of these options removes the items from their list of saved items, not just the items shown in the web part.
Note: This web part is not available in SharePoint Server, U.S. Government GCC High and DoD, and Office 365 operated by 21Vianet.
Add the Saved for later web part to a page
-
Go to the page where you want to add the web part.
-
If you're not in edit mode already, click Edit at the top right of the page.
-
Hover your mouse above or below an existing web part or under the title region, and select

-
In the web part toolbox, use the search box to search for Saved for later. Then, select the Saved for later web part.
-
Click Edit web part

-
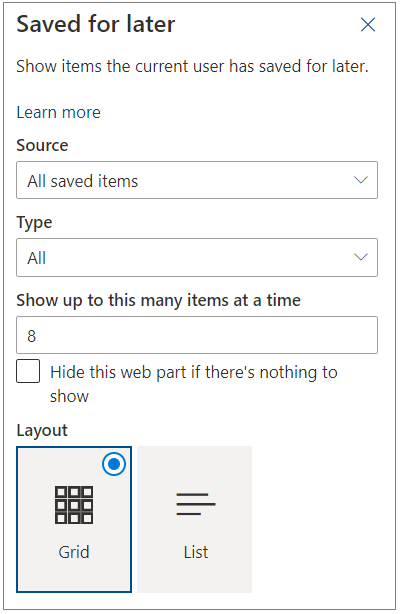
Under Source, choose either All saved items (to show all of the page viewer's items across SharePoint) or Saved items from this site (to show all of the user's saved items from the site on which the page is located).
-
Under Type, choose the type of items to show: all items, pages, or documents.
-
Enter a number in the Show this many items at a time box to limit the number of saved items shown. You can show up to 50 items at a time.
-
Select the checkbox for Hide this web part if there's nothing to show if you don't want the web part to appear when a user doesn't have any saved items. The space that the web part occupies will also be hidden until there are items to show.
-
Select a layout.


