
When you add a modern page to a site, you add and customize web parts, which are the building blocks of your page. This article describes the Quick links web part.
Note: Some functionality is introduced gradually to organizations that have opted in to the Targeted Release program. This means that you may not yet see this feature or it may look different than what is described in the help articles.
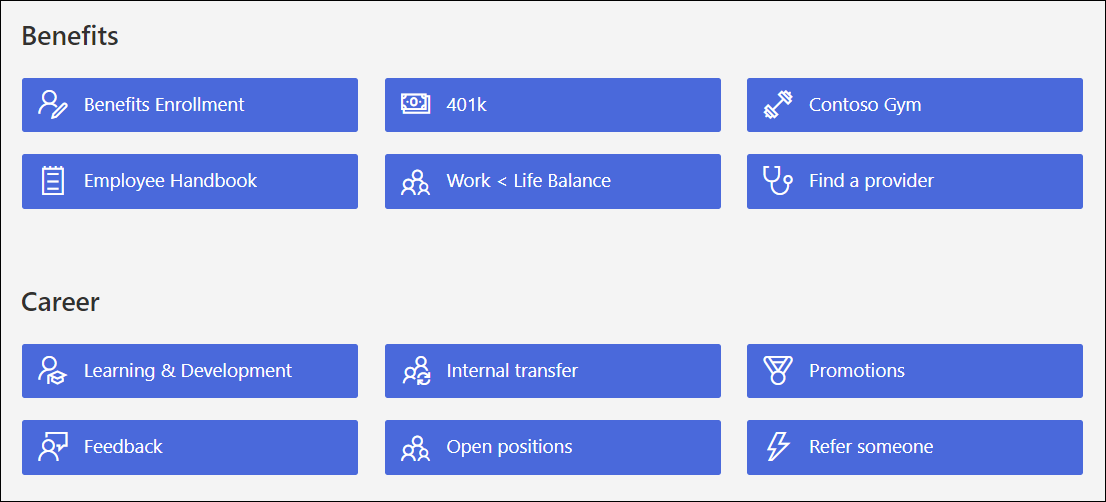
With Quick links, you can "pin" items to your page for easy access.
What would you like to do?
Add the Quick links web part
-
If your page is not already in edit mode, select Edit at the top right of the page.
-
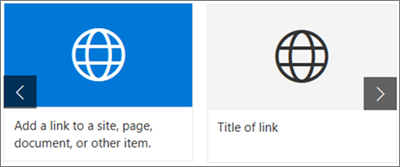
Hover your mouse above or below an existing web part and you'll see a line with a circled +, like this:

-
Select

-
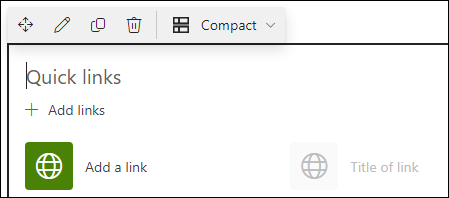
Type over the Quick links title to add your own title.
-
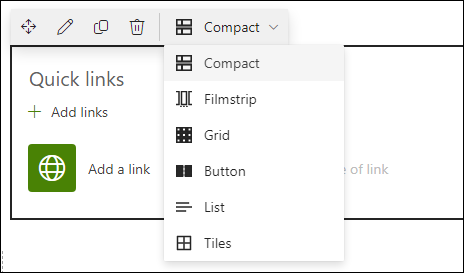
Click the layout options above the Quick links to select your layout.
-
Select the Edit web part


Here's a comparison of how each of the layouts look:
Compact
The compact layout is designed to show icons at 48 x 48 px.
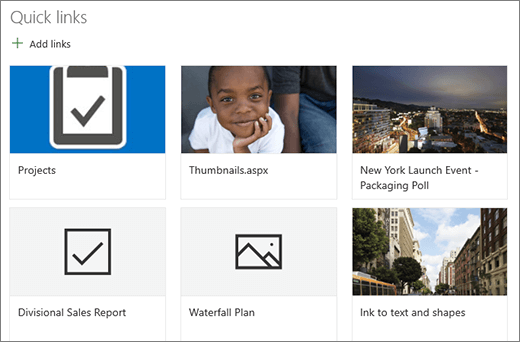
Filmstrip
The Filmstrip layout is designed to show images that at 212 to 286 px in width, with an aspect ratio of 9/16 where height is 9 and width is 16.
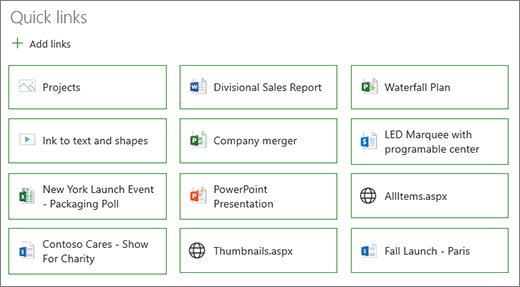
Grid
SharePoint only
Button
SharePoint only
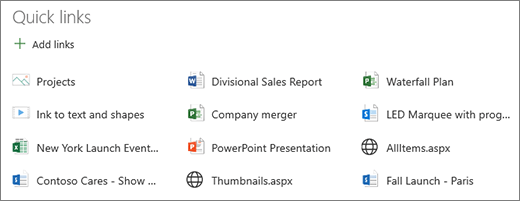
List
SharePoint only
Tiles
SharePoint only
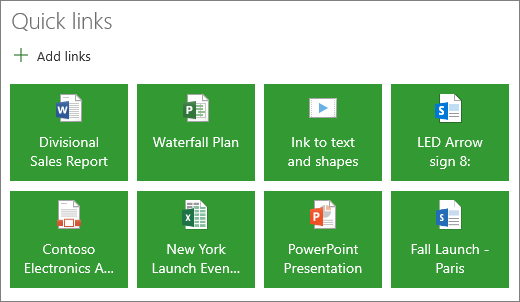
Add links
-
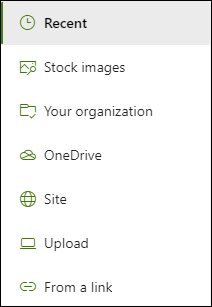
Select + Add.
-
Choose a recent file or get a file or image from one of the following locations:
-
Stock images provided by Microsoft
-
A site
-
Your OneDrive account
-
Your computer
-
A link
-
If your organization has specified a set of approved images, you'll be able to choose from that set under Your organization.
Notes:
-
Web search uses Bing images that utilize the Creative Common license. You are responsible for reviewing licensing for an image before you insert it on your page.
-
If you're a SharePoint Admin and want to learn how to create an asset library for Your organization, see Create an organization assets library.
-
If you're a SharePoint admin, we recommend enabling a Content Delivery Network (CDN) to improve performance for getting images. Learn more about CDNs.
-
-
-
Select your image, page, or document and select Insert.
-
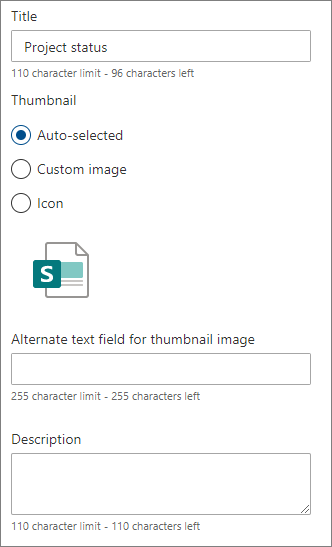
In the toolbox on the right, you'll have options for each link. The options depend on the settings you've chosen for the layout. For example, if you chose to Show descriptions for a list layout, you can add a description for the individual link. Other types of options for individual links, depending on the layout options, include changing the image, formatting icons, adding descriptions, and adding alternative text.
Edit links
-
If your page is not already in edit mode, select Edit at the top right of the page.
-
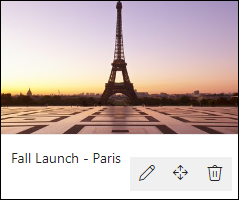
Hover over the item you want to edit then select the Edit item pencil at the bottom of the item you want to edit.
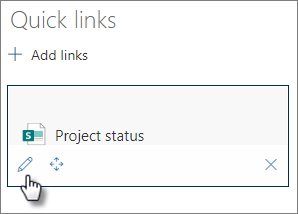
This will open the toolbox for that item where you'll have options for that link. The options depend on the settings you've chosen for the layout. For example, if you chose to Show descriptions for a list layout, you can add a description for the individual link. Other types of options for individual links, depending on the layout options, include changing the image, formatting icons, adding descriptions, and adding alternative text.
-
To remove links, select the trashcan icon

-
To reorder links, drag and drop items to new positions using the Move icon

Note: You cannot reorder links in the Filmstrip layout.
Audience targeting
By using audience targeting, you can promote links to specific groups of people. This is useful when you want to present information that is especially relevant to a particular group of people. For example, you can target links for specific project information to team members and stakeholders of the project. To use audience targeting, you must first enable audience targeting in the web part property pane, and then edit each quick link to specify the audience to target.
Note: If you've selected an audience group that you recently created or changed, it may take some time to see targeting applied for that group.
Enable audience targeting
-
If your page is not already in edit mode, select Edit at the top right of the page, and select the Quick links web part.
-
Select the Edit web part
-
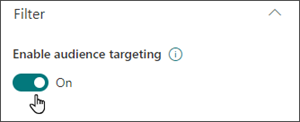
In the Filter section, slide the toggle for Enable audience targeting to On.
Set the target audiences for each link
-
If your page is not already in edit mode, select Edit at the top right of the page, and select the Quick links web part.
-
Hover over the link you want to edit then select the Edit item pencil at the bottom of the item you want to edit.
-
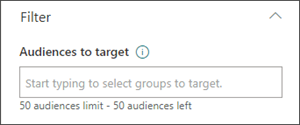
Under Audiences, type or search for the group(s) you want to target.
On the page, while you're in edit mode, you can see which links have audiences selected by looking for the audience icon 
Once your page is published, audience targeting will take effect.


