
When you add a modern page to a site, you add and customize web parts, which are the building blocks of your page. This article describes the Image gallery web part.
Note: Some functionality is introduced gradually to organizations that have opted in to the Targeted Release program. This means that you may not yet see this feature or it may look different than what is described in the help articles.
Use the Image gallery web part to share collections of pictures on a page. Select your images with the file picker or drag them onto the web part.
Add the Image gallery web part
-
If you're not in edit mode already, click Edit at the top right of the page.
-
Hover your mouse above or below an existing web part or under the title region, click

-
Click Add a title to enter a title for your Image gallery.
-
Click the Edit web part button

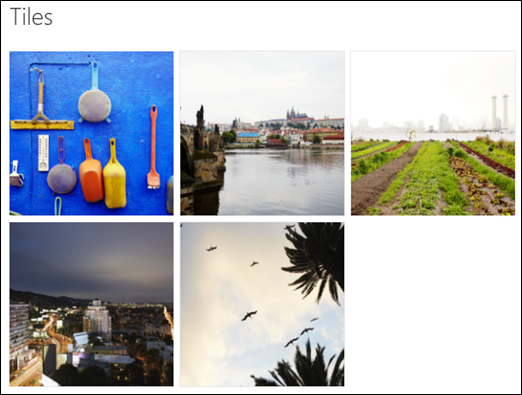
With the Tiles layout, you can choose an aspect ratio (1:1,16:9, or 4:3), and you can drag and drop images within the web part to reorder them.
With the Carousel layout, users can cycle through images by pressing the arrows on either side. You cannot reorder images in this layout.
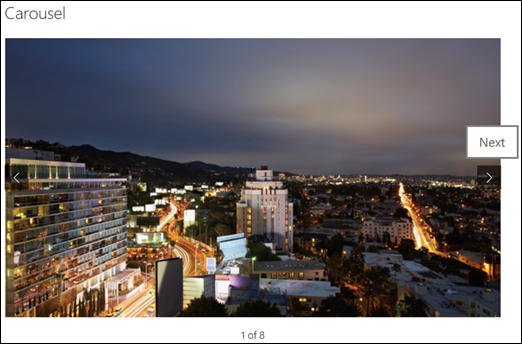
Note: If you have opted in to the Targeted Release program , and you have Content Network Delivery (CDN) enabled on your library, you can also set whether to automatically cycle through images, and the speed at which to cycle. This feature will be generally available later.
-
With SharePoint in Microsoft 365 or SharePoint Server Subscription Edition using the Bricks layout, you can show several images of various sizes, automatically "layered" in a pattern like that of a brick wall.

Select individual images
-
Drag images onto the web part, or click + Add.
-
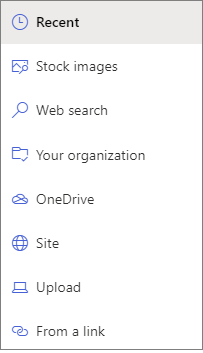
Choose a recent image or an image from one of the following:
-
Stock images provided by Microsoft
-
A web search
-
A site
-
Your computer
-
A link
-
If your organization has specified a set of approved images, you'll be able to choose from that set under Your organization.
Notes:
-
Web search uses Bing images that utilize the Creative Common license. You are responsible for reviewing licensing for an image before you insert it on your page.
-
If you're a SharePoint Admin and want to learn how to create an asset library for Your organization, see Create an organization assets library.
-
If you're a SharePoint admin, we recommend enabling a Content Delivery Network (CDN) to improve performance for getting images. Learn more about CDNs.
-
-
-
Click Open to add the images you've selected.
-
For each image, you can include a title, description, and alternative text by clicking the edit button
-
To add more images, either drag and drop the images onto the page or click + Add to select additional images.
Tip: To learn more about how images are sized in different layouts, see Image sizing and scaling in SharePoint modern pages.


