
Top questions about check out, check in, and versions
How to check out, check in, or discard changes to files in a library.
No, checking out a file only changes the condition of the file to allow only you to edit the file.
If you check a file out and don't save it back, your changes will not be saved. If you want to keep changes, always save the file.
How you save the file depends on the editor or tool you're using. If you edit a text file online, you need to explicitly click Save. However, if you edit in a Microsoft 365 app, such as in Word or Excel, you can close the document and it will automatically save.
If you check a file out, save it, and then discard the check out, your changes will not be saved back to the library.
By default, anyone with edit permission in a document library can change a file. However, you can set the library to require someone to check the file out first before changing it.
You need to be the document library owner or site administrator or have comparable permissions to do this setting.
-
Open the library you want to require check out.
-
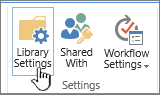
In SharePoint, click Settings


In SharePoint 2013 and SharePoint 2016, select Page, and then Library Settings.
-
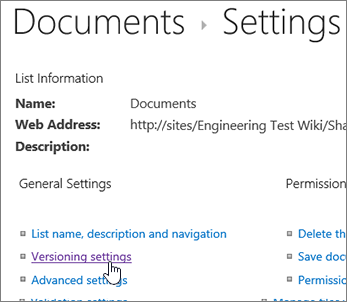
In the Settings page, select Versioning settings.
-
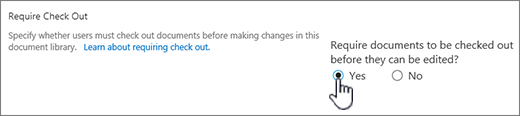
In the Versioning Settings page, scroll down and click Yes for Require documents to be checked out before they can be edited.
By default, a document library lets members with edit permission modify and edit files without checking them out. To prevent this, enable check out required in the library. You need to be the document library owner or site administrator or have comparable permissions to do this setting.
-
Open the library you want to require check out.
-
In SharePoint, click Settings
In SharePoint 2013 and SharePoint 2016, select Page, and then Library Settings.
-
In the Settings page, select Versioning Settings.
-
In the Versioning Settings page, scroll down and click Yes for Require documents to be checked out before they can be edited.
A quick way to see who has a column checked out is to hover over the Checked Out icon 
You can also add the Checked Out By column to the default view of the library. This way, everyone can easily see who has a document checked out. To learn how to add a Checked Out By column in SharePoint, see Create a column in a list or library.
More information
-
For SharePoint 2013 and SharePoint 2016, see Create, change, or delete a view of a list or library.
-
For SharePoint see Create a custom view of a document library
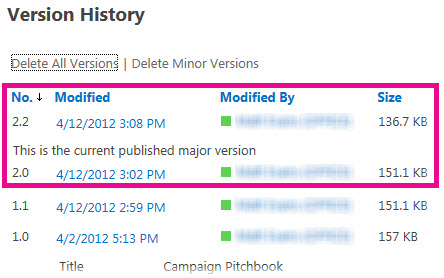
Versioning is a way to create a history of changes to a document that requires a controlled publishing cycle of major versions, or major and minor versions.
Turn on versioning
Using drag and drop
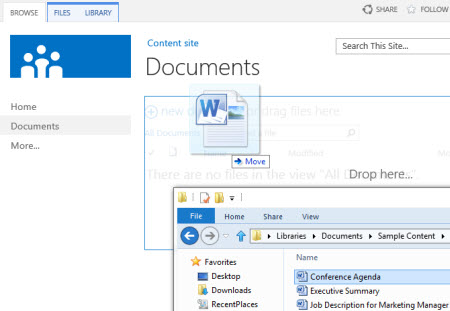
The most common way to upload files is by dragging them from a computer or network folder to the document library. First, open the library on your site. Then find the documents on your computer that you want to upload, select them, and drag them to the space in your library where it says, drag files here.
If you don’t see the option to drag and drop files, install the latest version of your browser software or Microsoft Office. This feature requires a minimum of Office 2013, or the latest version of Microsoft Edge, Internet Explorer, Firefox, or Chrome.
Using the Open with Explorer command
This command opens Windows Explorer on your computer, but it displays the folder structure on the server computer that underlies the site. From time to time, you might need to copy or move many documents in a library to another library.
Note: Open with Explorer in SharePoint 2013 and SharePoint 2016, or View in File Explorer with SharePoint only work in Internet Explorer 10 or 11. It is not supported by Microsoft Edge, Google Chrome, or Mozilla FireFox.
For example, you might want to move all documents created over a year ago in one library to another library to archive the information. Or, you might want to copy documents from a library that you own from one site to another library in a subsite as you change workgroups.
You can also manipulate the files in the folder, such as copying, renaming, deleting, and so on.
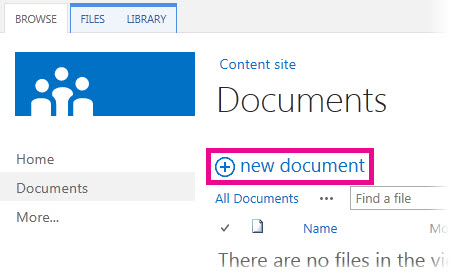
Using the new document command
In the Create a new file callout, click UPLOAD EXISTING FILE. In the dialog box that appears, click Browse to upload individual files.
The advantage to this approach is that it works no matter what browser or browser version you currently have.
Related tips about check out, check in, and versions
Whichever way you upload, keep in mind the following about check out, check in, and versions when they are enabled:
-
If you are uploading a file to a library that requires files to be checked out, the file is initially checked out to you. You still need to check the file in before other people can view and edit it.
-
If the library is configured to track versions of files, you typically add the uploaded file as a new version, which then becomes part of the version history of the file.
-
If the library requires you to add values to one or more library columns, such as a department name or project number, you must still edit the values and check in the document before the upload operation is completed.
More information
-
For SharePoint 2013 and SharePoint 2016, see Upload files or create files in a library
-
For SharePoint and Microsoft 365, see Upload files and folders to a document library
You can get a new document to be added as a new version is to check out the exiting one, and replace all content with the new version. Once the checked out version is modified, check it back in. SharePoint will make a new copy, keeping earlier versions (providing you have it configured for that). For more info on versioning, see How does versioning work in a list or library?.
No, unfortunately from the SharePoint environment there isn't a way to set a reminder or to get the date that a document was checked out. There are Application Programming Interfaces (APIs) that will allow it, but they require a custom program to be written. Talk to your administrator or site designer.
As a visual work around, watch for the checked out icon 
If you upload files to a library that requires files to be checked out, the file is initially checked out to you. You can see the files, but others cannot and that’s easy to overlook. Before others can view or edit the files, make sure you fill in any required properties and then check in the files.
More information
-
For more details on file check in and out in SharePoint, see Check out or check in files in a document library.
-
For more details on file check in and out in SharePoint 2013 and SharePoint 2016, see Check out, check in, or discard changes to files in a library .
-
For uploading files to SharePoint 2013 and SharePoint 2016, see Upload files or create files in a library.
-
For uploading files to SharePoint, see Upload files and folders to a document library.
If someone sends you a link to a SharePoint file and you click it, always make sure to read the title bar to see if it says read-only before you start editing. If it does and the library has checkout enabled, you need to check out the file. You can always navigate to the library by inspecting the URL to locate the library.
But if the file is an Office document, such as Word, Excel, or PowerPoint, it’s much easier. First, put the document in Edit mode, click the File tab, and then locate the Manage Versions button, which you can use to check out the file.
But note that it’s also possible that someone already has the file checked out, so in this case the Check Out command would not be available.
How often have you seen this?
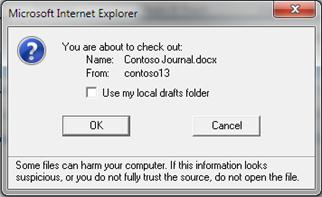
The local drafts feature has been around for several versions. Selecting Use my local drafts folder lets you take the file offline and makes the file easier to find on your computer, if you need to open it later while you are not connected to a network. By default, the folder is called SharePoint Drafts and it’s located in your Documents or My Documents folder. By the way, you don’t see this dialog box if you select two or more files for check out.
But times have changed. If you want to work with files offline, then your best bet these days is to use OneDrive for work or school which makes it a snap to take any document library offline and to automatically synchronize changes. OneDrive for work or school comes with Office 2013 and there is also a stand-alone version.
More information
A library organized into folders often has a default view that displays all the folders. If you want to check in lots of files in lots of folders, create a new view that “flattens” the library so you can see all the files in one view without folders. To do this, select Show all items without folders under Folders on the Edit View page. While you’re at it, you might increase the file limit so you can see all the files at once by also increasing the Number of items to display under Item Limit. This makes it much easier in one operation to select all the files you need to check in.
More information
-
For SharePoint 2013 and SharePoint 2016, see Create, change, or delete a view of a list or library.
-
For SharePoint see Create a custom view of a document library.
If you've synced a library with OneDrive for work or school, you can still check out files in the browser. You can see the Checked Out icon
However, in your local folder you can do the following:
-
Right click the file name.
-
Select View Online or select OneDrive for work or school, and then click Go to browser.
You can now quickly see the SharePoint library and the check-out/check in state of any file in the library.
You don’t have to wait for them to come back.
A site or library administrator can use the Override Check Out permission which enables check in of a document or discard check out of a document by another user. But be aware of the consequences of doing this. Your colleague on vacation may want to add the local copy of his changes back to the document in the library and the two versions need to be reconciled, either manually or by using comparison tools, such as the ones provided by Word and Excel.
More information
Simply put, checking out and checking in files is a way to lock a file for exclusive editing and then to release the lock for others. Consider your collaboration style when creating libraries, organizing your files, and deciding how best to collaborate. There are several ways to collaborate with others on documents. The following table can help you decide what’s best for you.
|
Collaboration style |
Typical uses |
Best practice |
|---|---|---|
|
Informal |
Everyday team documents, light or infrequent editing, and occasional editing conflicts |
Disable check out requirement (This is the default library setting) but you can still check out individual files as needed. |
|
Co-authoring |
Easy, real-time document collaboration with Office products on client computers and by using Office for the web |
Disable check out requirement and avoid checking out a file because it’s incompatible with co-authoring |
|
Formal |
Sequential comment and review and document approval |
Enable required check out |
Here are some additional tips and tricks if you enable check out in a library:
-
Avoid keeping files checked out for too long.
-
Add the Checked Out By column to the default view of the library. This way, others can easily see who has a document checked out. If this column is not in a view, you can still hover over the Checked Out icon
-
Ask before overriding someone else's check out.
-
Avoid editing files that are already checked out.
-
Remember that changes are not visible to others until checked in.
More information
If you still have problems or encounter unexpected behavior, it may be time to file a service request.


Need more help?
Want more options?
Explore subscription benefits, browse training courses, learn how to secure your device, and more.


Communities help you ask and answer questions, give feedback, and hear from experts with rich knowledge.


