
When you delete items (including OneDrive files) from a SharePoint site, they're sent to the site Recycle Bin (also called the first-stage Recycle Bin), where you can restore them if you need to. When you delete items from a site Recycle Bin, they're sent to the site collection Recycle Bin (also called the second-stage Recycle Bin). The first-stage Recycle Bin contributes to the storage used metric while the second-stage Recycle Bin does not.
Note: Web items (subsites) go directly to the second-stage Recycle Bin and still count toward the storage used metric. The quota is returned when the web items are purged from the second-stage Recycle Bin.
A SharePoint site collection administrator can view and restore deleted items from the site collection Recycle Bin to their original locations. If an item is deleted from the site collection Recycle Bin, or it exceeds the retention time, it is permanently deleted.
Important: The SharePoint Recycle Bin is different from the Recycle Bin in Windows. If you delete files or folders that you're syncing, you can restore them from the Windows Recycle Bin on your PC. To put your Windows Recycle Bin on your desktop, see Show or hide the Recycle Bin.
Restore an item from the SharePoint in Microsoft 365 site collection Recycle bin
-
On modern team sites and classic sites (subsites), in the left pane, select Recycle bin.

On modern communication sites, select Site contents, and then select Recycle bin in the top navigation bar. If you don't see the Recycle Bin, follow these steps:
-
Select Settings

Note: If you don't see Site settings, select Site information and then select View all site settings. Some pages might require you to select Site contents and select Site settings.
-
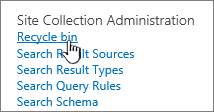
Under Site Collection Administration, select Recycle bin.
-
-
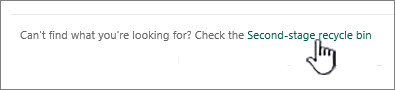
At the bottom of the Recycle Bin page, select second-stage recycle bin.
Note: You need administrator or owner permissions to use the site collection Recycle Bin. If you don't see it, it might have been disabled or you don't have permission to access it.
-
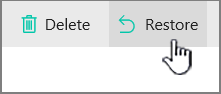
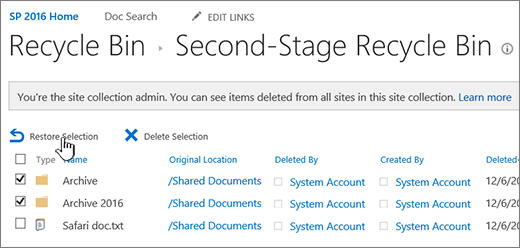
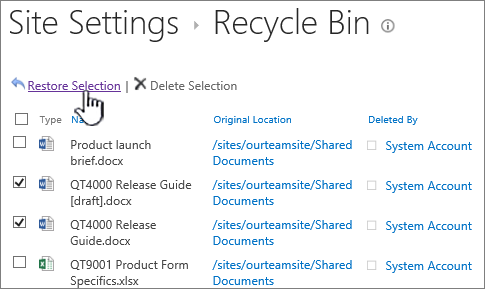
Point to the items you want to restore, select the check icon to the right of each one, and then select Restore.
Note: If you restore an item that was originally located in a deleted folder, the folder is recreated in its original location and the item is restored in that folder.
Restore an entire site collection
If you're a global admin or SharePoint admin in Microsoft 365, you can also restore entire site collections from the site collection Recycle Bin. For info, see Restore a deleted site collection.
How long are deleted items kept in the Recycle Bin?
In SharePoint in Microsoft 365, items are retained for 93 days from the time you delete them from their original location. They stay in the site Recycle Bin the entire time, unless someone deletes them from there or empties that Recycle Bin. In that case, the items go to the site collection Recycle Bin, where they stay for the remainder of the 93 days unless:
-
The site collection Recycle Bin exceeds its quota and starts purging the oldest items.
-
The items are manually deleted by the site collection administrator from the site collection Recycle Bin (for info about doing this, see Delete items from the site collection Recycle Bin).
The site Recycle Bin storage counts against your site collection storage quota and the List View Threshold. The amount of space allocated to the site collection Recycle Bin is 200% of the site collection quota. These values are not configurable.
SharePoint Online retains backups of all content for 14 additional days beyond actual deletion. If content can't be restored via the Recycle Bin or Files Restore, an administrator can contact Microsoft Support to request a restore any time inside the 14-day window.
Note: Restorations from backups can only be completed for site collections, not for specific files, lists, or libraries. If you need to recover a specific item, find it in the Recycle Bin, right-click it, and choose Restore.
In addition to the above, customers also have the option to utilize Microsoft 365 Backup for data recovery. Microsoft 365 Backup offers a longer protection time and provides uniquely fast recovery from common business continuity and disaster recovery (BCDR) scenarios like ransomware or accidental/malicious employee content overwrite/deletion. Additional BCDR scenario protections are also built directly into the service, offering an enhanced level of data protection.
Restore an item from SharePoint Servers 2019 and 2016 Site Collection Recycle Bin page
-
On the left Quick Launch pane of the Site page, choose Recycle Bin.
If you don't see the Recycle Bin, try the following steps:
-
Select Settings

-
Select Recycle bin under Site Collection Administration.
Important: You need administrator or owner permissions to use the site collection Recycle Bin. If you don't see it, it might have been disabled or you don't have permission to access it. If you're the SharePoint administrator, see Configure SharePoint Recycle Bin settings. If not, talk with your farm or server administrator.
-
-
At the bottom of the Recycle Bin page, select second-stage recycle bin.

-
Select the box next to the item(s) you want to restore and then select Restore.
Note: If you restore an item that was originally located in a deleted folder, the folder is recreated in its original location and the item is restored in that folder.
-
Select OK.
Restore a deleted site
Deleted sites are retained in the site collection Recycle Bin. From there, a site collection administrator can restore them to their original site collection.
Note: SharePoint Server 2019 users can restore items that they've deleted themselves, and also items that other users in the site have deleted. Users need edit permission on the deleted items so they're visible in their SharePoint recycle bin.
Before you restore, you should be aware that:
-
Any content types that are added while a site is in the site collection Recycle Bin are not added to that site. Thus, field definitions might not be up to date.
-
Content deployment does not affect a deleted site in the site collection Recycle Bin. To resolve this issue, run scoped deployment for the site after you restore it.
-
When update packages are installed, including Microsoft quick fix engineering (QFE) updates, the update packages are not applied to sites in the site collection Recycle Bin. To resolve this issue, manually upgrade the site collection by using the Upgrade-SPContentDatabase cmdlet on the content database that contains that site collection.
Note: If you don’t see the site you want to restore, it might already have been permanently deleted, either manually or automatically. If you have questions about the automatic deletion settings, talk with your farm or server administrator.
Restore an entire site collection
If you're a SharePoint administrator, you can restore a site collection using PowerShell. For info, see Restore-SPDeletedSite.
How long are deleted items kept in the Recycle Bin?
There are two Recycle Bins, the site Recycle Bin (first-stage) and site collection Recycle Bin (second-stage). The default retention period for any item is 30 days. The retention period begins as soon as the item is deleted and doesn't change even if it is moved from the site Recycle Bin to the site collection Recycle Bin. This period can be increased up to as many as 10,000 days from the date that the original deletion event occurred.
You may also configure items in your Recycle Bin to not be automatically discarded after a set period of time, if desired. Items in the site Recycle Bin count against the site's storage quota and the List View Threshold. The default amount of space available in the Site Collection Recycle Bin is 50% of the site quota, but can be configured for up to 500% of the site quota. These values can be configured by your farm administrator.
For more info, see Configure SharePoint Recycle Bin settings.
Restore an item from the SharePoint Server 2013 Site Collection Recycle Bin page
-
On the left Quick Launch pane of the Site page, choose Recycle Bin.
If you don't see the Recycle Bin, try the following steps:
-
Select Settings

-
Select Recycle bin under Site Collection Administration.
Important: You need administrator or owner permissions to use the site collection Recycle Bin. If you don't see it, it might have been disabled or you don't have permission to access it. If you're the SharePoint administrator, see Configure SharePoint Recycle Bin settings. If not, talk with your farm or server administrator.
-
-
In the Recycle dialog, select Deleted from end user Recycle Bin.

-
Select the box next to the item(s) you want to restore and then select Restore.
Note: If you restore an item that was originally located in a deleted folder, the folder is recreated in its original location and the item is restored in that folder.
-
Select OK.
Restore a deleted site
Deleted sites are retained in the site collection Recycle Bin. From there, a site collection administrator can restore them to their original site collection.
Before you restore, you should be aware that:
-
Any content types that are added while a site is in the site collection Recycle Bin are not added to that site. Thus, field definitions might not be up to date.
-
Content deployment does not affect a deleted site in the site collection Recycle Bin. To resolve this issue, run scoped deployment for the site after you restore it.
-
When update packages are installed, including Microsoft quick fix engineering (QFE) updates, the update packages are not applied to sites in the site collection Recycle Bin. To resolve this issue, manually upgrade the site collection by using the Upgrade-SPContentDatabase cmdlet on the content database that contains that site collection.
Note: If you don’t see the site you want to restore, it might already have been permanently deleted, either manually or automatically. If you have questions about the automatic deletion settings, talk with your farm or server administrator.
Restore an entire site collection
If you're a SharePoint administrator, you can restore a site collection using PowerShell. For info, see Restore-SPDeletedSite.
How long are deleted items kept in the Recycle Bin?
There are two Recycle Bins, the site Recycle Bin (first-stage) and site collection Recycle Bin (second-stage). The default retention period for any item is 30 days. The retention period begins as soon as the item is deleted and doesn't change even if it is moved from the site Recycle Bin to the site collection Recycle Bin. This period can be increased up to as many as 10,000 days from the date that the original deletion event occurred.
You may also configure items in your Recycle Bin to not be automatically discarded after a set period of time, if desired. Items in the site Recycle Bin count against the site's storage quota and the List View Threshold. The default amount of space available in the Site Collection Recycle Bin is 50% of the site quota, but can be configured for up to 500% of the site quota. These values can be configured by your farm administrator.
For more info, see Configure SharePoint Recycle Bin settings.
A few basics about restoring from the Recycle Bin
-
Securable objects bring all their contents back with them When you restore any securable object (any object to which access can be controlled), it is restored with all of the objects that it contained when it was deleted. For example, if you restore a list, library, folder, or Document Set, the restored version contains all the documents and other items that it contained when it was deleted. If you restore a file or other item that has multiple versions, the restored file or item includes all the versions it contained when it was deleted.
-
Most objects can’t be restored if their container objects aren’t present If you delete an object and then delete the object that contained it, you must restore the container before you can restore the object. For example, if you delete a file and then delete the library in which it was stored, you must restore the library before you can restore the file. If you delete an earlier version of a file and then delete the current version of the file itself, you must restore the file itself before you can restore the earlier version.
-
Exception: An object deleted from a folder can be restored without first restoring the folder The folder is automatically re-created in its former location, but now contains only the object that you restored. (Alternatively, you can also restore the folder manually from the Recycle Bin, in which case it’s restored with all the contents that it had when it was deleted.)
Leave us a comment
Was this article helpful? If so, please let us know at the bottom of this page. Let us know what was confusing or missing. If you got here from a search and it wasn't the information you wanted, let us know what you searched for. Please include your version of SharePoint, OS, and browser. We'll use your feedback to double-check the steps and update this article.


