
To prevent other users from viewing hidden worksheets, adding, moving, deleting, or hiding worksheets, and renaming worksheets, you can protect the structure of your Excel workbook with a password.
Note: The screen shots in this article were taken in Excel 2016. If you have a different version your view might be slightly different, but unless otherwise noted, the functionality is the same.

Notes: Protecting the workbook is not the same as protecting an Excel file or a worksheet with a password. See below for more information:
-
To lock your file so that other users can't open it, see Protect an Excel file.
-
To protect certain areas of the data in your worksheet from other users, you have to protect your worksheet. For more information, see Protect a worksheet.
-
To know the difference between protecting your Excel file, workbook, or a worksheet, see Protection and security in Excel.
Protect the workbook structure
To protect the structure of your workbook, follow these steps:
-
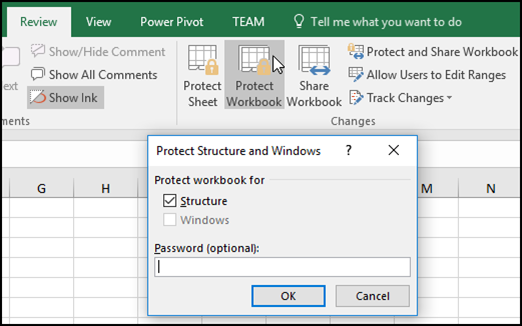
Click Review > Protect Workbook.
-
Enter a password in the Password box.
Important: The password is optional. If you do not supply a password, any user can unprotect and change the workbook. If you do enter a password, make sure that you choose a password that is easy to remember. Write your passwords down and store them someplace safe. If you lose them, Excel cannot recover them for you.
-
Select OK, re-enter the password to confirm it, and then select OK again.
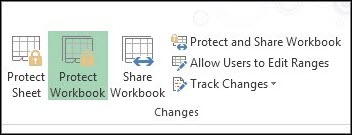
On the Review tab , see the Protect Workbook icon. If it’s highlighted, then the workbook is protected.
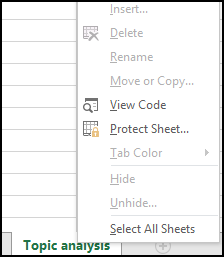
If you click on the bottom of a sheet inside your workbook, you will notice that the options to change the workbook structure, such as Insert, Delete, Rename, Move, Copy, Hide, and Unhide sheets are all unavailable.
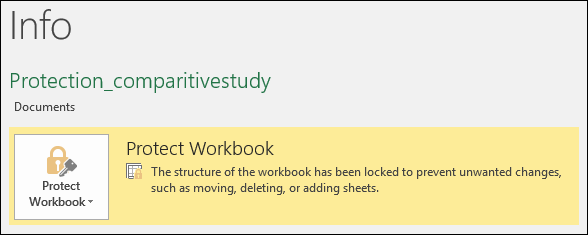
The Protect Workbook option in the Info menu also indicates that the workbook's structure is protected. To view this option, click File > Info > Protect Workbook.
Click Review > Protect Workbook. Enter the password and then click OK.
To prevent other users from viewing hidden worksheets, adding, moving, deleting, or hiding worksheets, and renaming worksheets, you can protect the structure of your Excel workbook with a password.
Note: The screen shots in this article were taken in Excel 2016. If you have a different version your view might be slightly different, but unless otherwise noted, the functionality is the same.
Notes: Protecting the workbook is not the same as protecting an Excel file or a worksheet with a password. See below for more information:
-
To lock your file so that other users can't open it, see Protect an Excel file.
-
To protect certain areas of the data in your worksheet from other users, you have to protect your worksheet. For more information, see Protect a worksheet.
-
To know the difference between protecting your Excel file, workbook, or a worksheet, see Protection and security in Excel.
Protect the workbook structure
To protect the structure of your workbook, follow these steps:
-
Click Review > Protect Workbook.
-
Enter a password in the Password box.
Important:
-
The password is optional. If you do not supply a password, any user can unprotect and change the workbook. If you do enter a password, make sure that you choose a password that is easy to remember. Write your passwords down and store them someplace safe. If you lose them, Excel cannot recover them for you.
-
Passwords in Excel for Mac have a 15-character limit. You cannot open a workbook or document that has been password-protected in the Windows-based version of Excel or if the password is longer than fifteen characters. If you want to open the file in Excel for Mac, ask the Windows-based author to adjust the password length.
-
-
Retype the password and click OK.
On the Review tab , see the Protect Workbook icon. If it’s highlighted, then the workbook is protected.
If you click on the bottom of a sheet inside your workbook, you will notice that the options to change the workbook structure, such as Insert, Delete, Rename, Move, Copy, Hide, and Unhide sheets are all unavailable.
Click Review > Protect Workbook. Enter the password and then click OK.
To unprotect a sheet, follow these steps:
-
Go to the worksheet you want to unprotect.
-
Go to File > Info > Protect > Unprotect Sheet, or from the Review tab > Changes > Unprotect Sheet.
-
If the sheet is protected with a password, then enter the password in the Unprotect Sheet dialog box and click OK.
Excel for the web can open workbooks protected by a password but these files cannot be edited in web. Passwords can’t be added, changed, removed, or recovered from Excel for the web.
If you want to add a password to a workbook you are working on in Excel for the web, and you have Excel desktop application, use the Open in Excel button to open the workbook and password protect the workbook. But going forward, you’ll only be able to view the file on web -- to make changes to the workbook, open it in your desktop version of Excel.
-
Select Open in Excel and password protect the workbook.
Need more help?
You can always ask an expert in the Excel Tech Community or get support in Communities.
See Also
Protection and security in Excel
Collaborate on Excel workbooks at the same time with co-authoring


