
Microsoft Lens (formerly “Office Lens”) is a great way to capture information from documents, whiteboards, business cards, receipts, menus, signs, handwritten memos, or anything else containing text that you want to import but not manually type out yourself. With Microsoft Lens, you don’t need to jot down any notes by hand, rely on blurry cell phone images, or worry about misplacing anything.
Microsoft Lens is great for capturing sketches, drawings and equations too — even images without text. When capturing images, Microsoft Lens gets rid of shadows and odd angles, so your final captures are easier to see.
You can upload your captured document and whiteboard images to Microsoft OneNote, Word, PowerPoint, or OneDrive, and you can also save them as PDF files or send them in email.
Note: Microsoft Lens does not support these features for GCC accounts: Business Card, Image to Text, Image to Table, Image to Word, Image to PPT and Upload to OneNote.
If you haven't already, download the latest version of Microsoft Lens for free from the Google Play Store.
Step 1: Choose what to capture
As soon as you open Microsoft Lens, you can choose a capture mode.
Swipe left or right near the bottom of the screen to select either Whiteboard, Document, Actions, Business Card, or Photo.
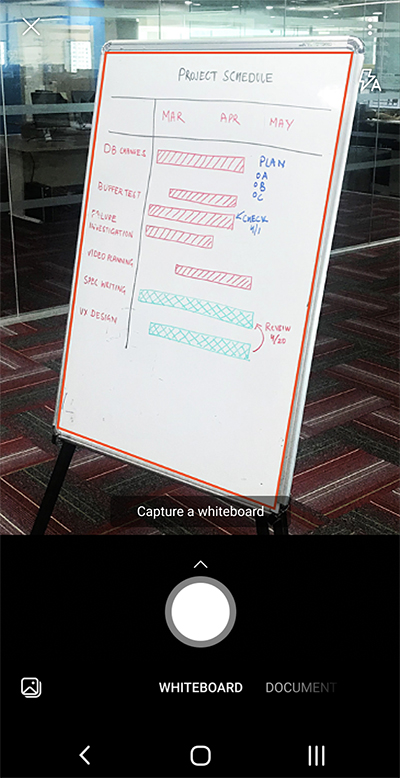
Whiteboard This mode is best used for capturing handwritten notes and sketches on a dry erase board or a similar surface. Microsoft Lens will adjust your images so that the background isn’t too bright and the ink strokes are easier to see.
Document This mode is optimized for small words that are written or typed on a page or on a note. It’s also great for things like forms, receipts, posters, fliers, or restaurant menus.
Actions This mode is a collection of the following available sub-modes:
-
Text can be used to extract text from your image, which you can copy or share.
-
Table can be used to extract a printed table from your image which you can copy and share
-
Read can be used to read out loud any text in your image in the Immersive Reader.
-
Contact can be used to extract information from a business card and save it as a Contact on your device.
-
QR Code can be used to scan a QR code to view, copy, and share the information that the code displays.
Business Card This mode captures contact information from a business card and saves it to the Contacts app on your Android device, as well as to Microsoft OneNote. This feature currently works best with business cards in English, German, Spanish, or Simplified Chinese.
Photo This mode is best used for capturing photographs and images containing scenery or people.
Step 2: Take a picture
After you’ve selected your capture mode in Step 1, you can either take a new picture with your camera, or import an existing image from your device.
Do either of the following:
-
To take a picture with your Android device, point the camera at the item you want to capture and make sure that the orange frame in the camera outlines the item you want to capture. Your camera’s flash is set to go off automatically (if needed), but you can change this setting by tapping the Flash icon in the upper right corner of the capture window. When you’re ready to take the picture, tap the round Camera button at the bottom of your screen.
Tip: People who are blind or have low vision can use the TalkBack screen reader in Android to get real-time voice guidance, such as “move right,” “move up,” and more. For more information, see Basic tasks using a screen reader with Microsoft Lens.
-
If you prefer, you can import an existing image from the Gallery on your Android device. In the Microsoft Lens capture screen, tap the Picture button near the lower left corner of the capture window. Navigate to the photo album containing the picture you want to use, and then tap it to import it into Microsoft Lens.
Note: When installed on Android devices with more than 3GB RAM, the latest version of Microsoft Lens lets you capture and import up to 100 images in a single scan for locally stored images and PDF files. You can choose to review each image after you take it, or review and edit them later.
Step 3: Review and edit
Microsoft Lens lets you edit captured images before you save them, so they look exactly how you want. You have the option to adjust the borders of each image after you capture it, or you can capture images one after the other and edit them later.
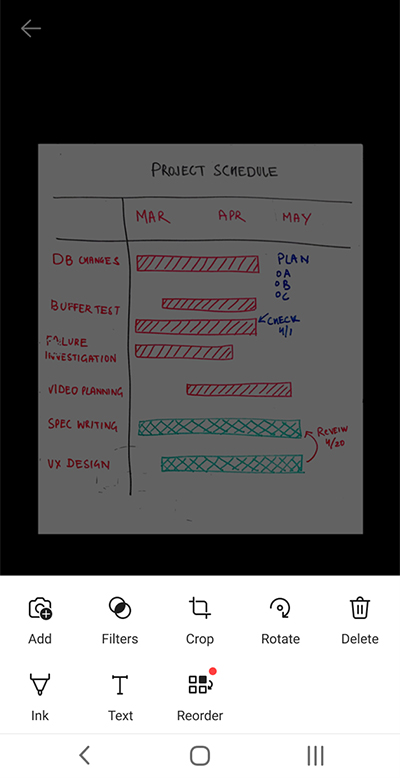
Tap any of the icons that appear in the lower tray to begin editing or adjusting a captured image.
You can Add a new image to your scan, apply a Filter to the image, Crop, Rotate, or Delete the image, annotate it with the Pen or with Text, or Reorder the images.
By using the optional Crop feature, you can trim away any unwanted parts of the image by excluding them from your selection.
To reorder multiple images in a scan, tap Reorder. You’ll be shown all captured images in one view and you can then drag them in the order you want.
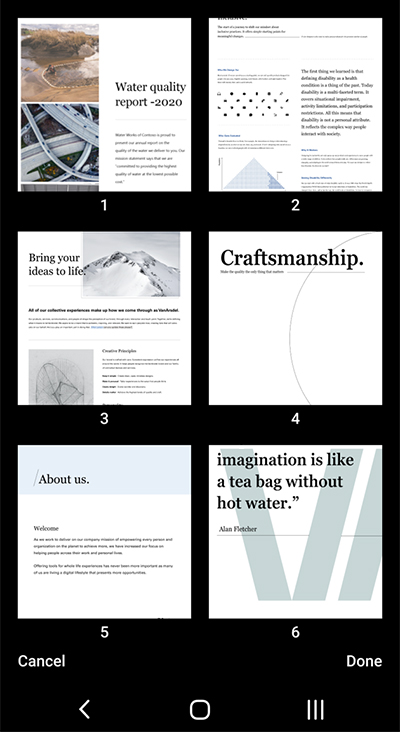
When you’re done reordering the images, tap Done in the lower right corner. You can then continue editing the current image with any of the other editing tools.
When you’re done editing your images, tap the orange Done button in the lower tray.
Step 4: Save and share
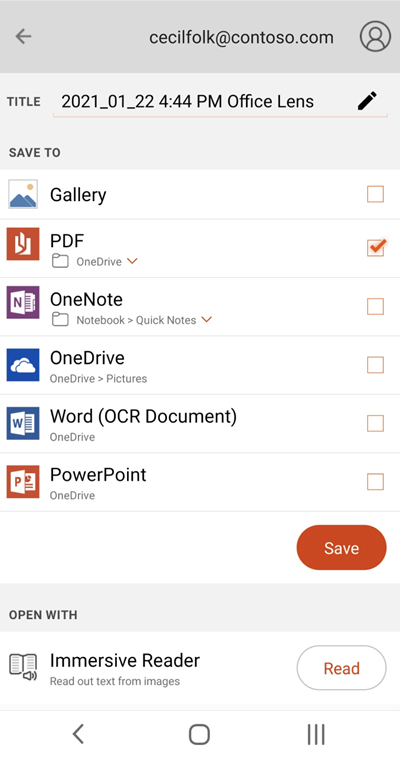
If your image was captured in Whiteboard, Document, or Photo mode, you can save it to the Gallery on your Android device.
You can also save the image as a PDF (Portable Document Format) file, or save it to Microsoft OneNote, OneDrive, Word, or PowerPoint.
Check the option (or options) you want, and then tap Save.
Note: If you choose to save the image to OneNote, OneDrive, Word, or PowerPoint, you may be prompted to sign in with your Microsoft Account or your Work or School account.
If you want Optical Character Recognition (OCR) to be applied to your captured image, select the Word option. Microsoft Lens will create a Word file in your OneDrive account, which will automatically extract all legible text that is found in your captured image.
If your image was captured in Business Card mode, select OneNote to save it as a vCard (.vcf file). If you also want to save the image to the Gallery on your Android device, select Gallery as well, and then tap Save.
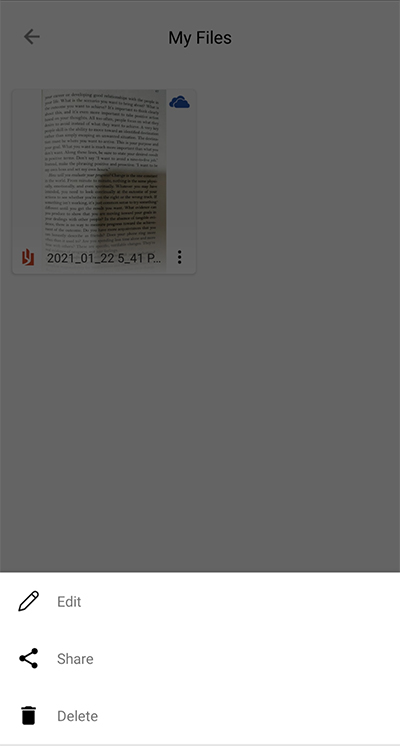
Edit a previously scanned PDF
You can easily edit a PDF file that was previously created with Microsoft Lens. On your Android device, navigate to My Files by tapping the three-dot menu at the top-right of your screen. Next, tap the three-dot menu next to the file name of the PDF file that you want to edit, and then tap Edit.
You can now add additional images to this PDF file, edit the existing images, or reorder any of the images.
Use intelligent Actions
Select the Actions mode from the main screen. This takes you to the first sub-mode, which you can use to extract text from an image.
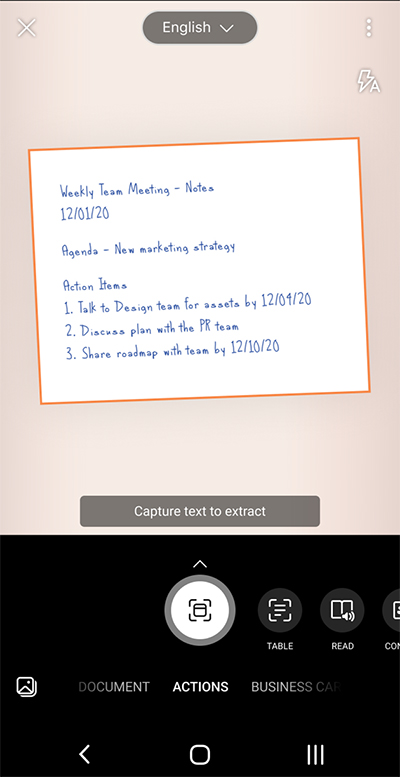
To extract text from an image, select the Text mode, select the preferred text language from the menu at the top of the screen, point the camera at the text you want to extract, and then tap the round Camera button.
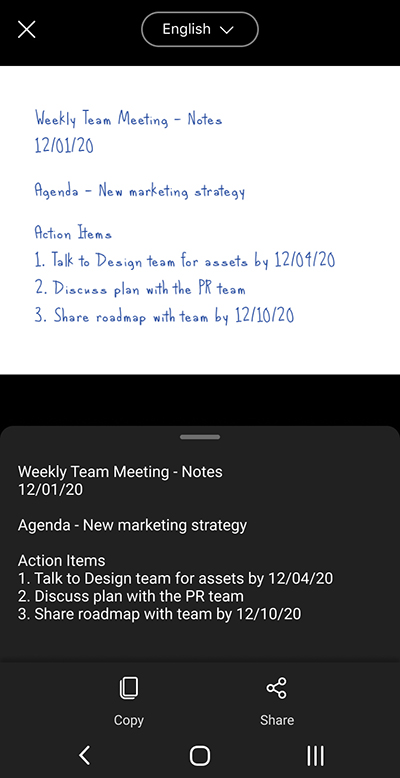
Next, position the text by adjusting the borders of the image and then tap Continue in the lower right corner of the screen. If you want to retake the image, tap Retake in the lower right corner of the screen.
When you tap Continue, Microsoft Lens extracts the text from the image and displays it on your screen. You can now Copy the text and Share it in any of the other apps on your Android device.
Note: Microsoft Lens currently supports 30 languages for extracting text from an image. However, text extraction from handwritten notes is currently limited to English only.
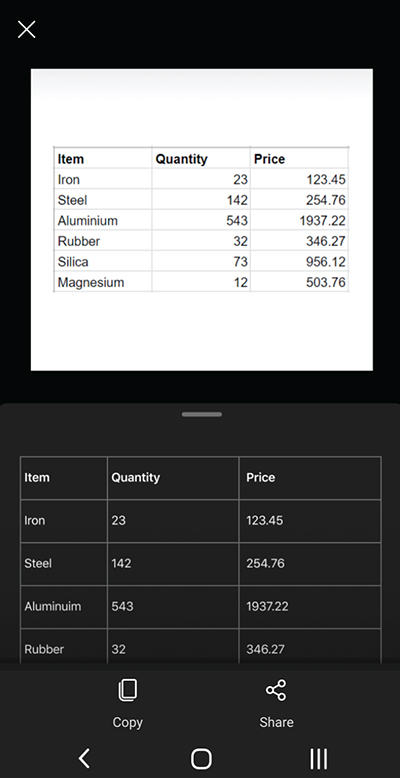
Extract a table from images
To extract table from an image, select the Table mode, point the camera at the table you want to capture, and then tap the round Camera button.
Next, position the table by adjusting the borders of the image, and then tap Continue on the lower right corner of the screen. If you want to retake the image, tap Retake in the lower right corner of the screen.
When you tap Continue, Microsoft Lens extracts the table from the image and displays it on the screen. You can now Copy the table and Share it in any of the other apps on your Android device.
Note: Microsoft Lens currently supports 21 languages for extracting a printed table from an image.
Read text in Immersive Reader
To read text from an image, select the Read mode, point the camera at the text you want to read, and then tap the round Camera button.
Next, position the text by adjusting the borders of the image and tap Continue on the lower right corner of the screen. If you want to retake the image, tap Retake in the lower right corner of the screen.
When you tap Continue, Microsoft Lens displays the text in the image in the Immersive Reader. You can tap the Play button to listen to the text spoken out loud. You can change the text size, spacing, font and some other settings by tapping the 3-line menu icon at the top right.
Note: Microsoft Lens currently supports 30 languages for reading out loud legible text in an image.
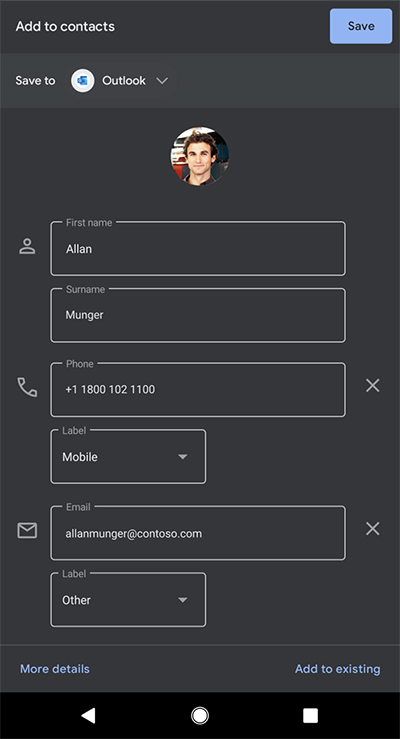
Save contact information from Business Card on your phone
To scan a business card and save it as a Contact on your phone, select the Contact mode, point the camera at the business card, and then tap the round Camera button.
Next, position the business card by adjusting the borders of the image, and then tap Continue in the lower right corner of the screen. If you want to retake the image, tap Retake in the lower right corner of the screen.
When you tap Continue, Microsoft Lens displays the contact information extracted from the business card and you can save it to your Contacts on your device.
Scan a QR code
Select the QR Code mode, and then point the camera at the code you want to scan. Microsoft Lens automatically scans the code and displays the information link, which you can Copy and Share in any of the other apps on your Android device.

Additional information
Captured images saved as Word, PowerPoint, or PDF files will be in your Documents folder on OneDrive, so you can access them from any of your devices. PDF files can also be saved locally on your Android device, and you can edit the save location for your PDF by tapping the Save button.
Microsoft Lens doesn’t just import an image into a Word or PowerPoint file. The final Word and PowerPoint documents are real Microsoft Office documents.
Microsoft Word can recognize handwritten or typed and printed text, as well as the general layout of what you capture. As a result, the text, formatting, and layout in the Word document that Microsoft Lens creates are fully editable — just as if you authored the document yourself.
Microsoft PowerPoint can recognize handwritten lines and strokes that are transformed into drawing objects that can be re-colored, resized, moved around, and edited. You can also remove the background of drawings, which makes it easier to reuse them in other presentations.
PDF (Portable Document Format) files extract the text information from a captured image. You can search the text contents of a PDF file and highlight or copy any part of the page with your preferred PDF Reader app.
Optical Character Recognition (OCR) is supported in the following languages:
|
Save Destination |
Target Text/Input |
Languages |
|
Word, PDF, OneDrive, OneNote, Immersive Reader |
Printed Text |
English, Simplified Chinese, Traditional Chinese, Czech, Danish, Dutch, Finnish, French, German, Greek, Hungarian, Italian, Japanese, Korean, Norwegian, Polish, Portuguese, Russian, Spanish, Swedish, Turkish |
|
OneNote |
Handwritten Text |
English |
|
Business Card mode (OneNote) |
Business Card |
English, Simplified Chinese, German, Spanish |
Accessibility
To make it easier to work with Microsoft Lens, you can connect a keyboard to your device with either Bluetooth or USB.
In addition, the Accessibility settings in Android that can help you use Microsoft Lens in a way that works best for you. On your Android device, go to Settings > Accessibility to turn on features like TalkBack.
For more information, visit the Android Accessibility Help Center.
Support
If you need assistance with Microsoft Lens for Android, you can send email to our product team at olensandsup@microsoft.com.


