
Page breaks are dividers that break a worksheet into separate pages for printing. Microsoft Excel inserts automatic page breaks based on the paper size, margin settings, scale options, and the positions of any manual page breaks that you insert. To print a worksheet with the exact number of pages that you want, you can adjust the page breaks in the worksheet before you print it.
Tips:
-
Although you can work with page breaks in Normal view, we recommend that you use Page Break Preview view to adjust page breaks so that you can see how other changes that you make (such as page orientation and formatting changes) affect the automatic page breaks. For example, you can see how a change that you make to the row height and column width affects the placement of the automatic page breaks.
-
To override the automatic page breaks that Excel inserts, you can insert your own manual page breaks, move existing manual page breaks, or delete any manually-inserted page breaks. You can also quickly remove all the manually-inserted page breaks. After you finish working with page breaks, you can return to Normal view.
In Page Break Preview, dashed lines are page breaks Excel automatically added. Solid lines are page breaks that were added manually.

Insert a page break
-
Click the worksheet that you want to print.
-
On the View tab, in the Workbook Views group, click Page Break Preview.
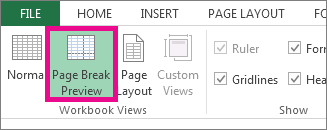
You can also click Page Break Preview

-
Do one of the following:
-
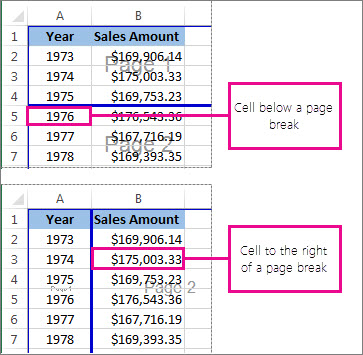
To insert a vertical page break, select the row below where you want to insert the page break.
-
To insert a horizontal page break, select the column to the right of where you want to insert the page break.
-
-
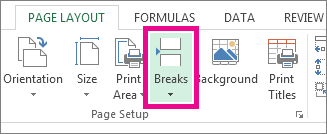
On the Page Layout tab, in the Page Setup group, click Breaks.
-
Click Insert Page Break.
You can also right-click the row or column below or to the right of where you want to insert the page break, and then click Insert Page Break.
If manual page breaks that you insert do not take effect, it may be that the Fit To scaling option has been selected on the Page tab of the Page Setup dialog box (Page Layout tab, Page Setup group, Dialog Box Launcher

Move a page break
Important: To enable dragging of page breaks to another location in a worksheet, make sure that the cell drag-and-drop feature is enabled. If this feature is not enabled, you may not be able to move any page breaks.
-
To verify that drag-and-drop is enabled, do the following:
-
Click the File tab > Options.
-
In the Advanced category, under Editing options, select the Enable fill handle and cell drag-and-drop check box, and then click OK.
-
-
Click the worksheet that you want to modify.
-
On the View tab, in the Workbook Views group, click Page Break Preview.
You can also click Page Break Preview
-
To move a page break, drag the page break to a new location.
Note: Moving an automatic page break changes it to a manual page break.
Delete a page break
-
Select the worksheet that you want to modify.
-
On the View tab, in the Workbook Views group, click Page Break Preview.
You can also click Page Break Preview
-
Do one of the following:
-
To delete a vertical page break, select the column to the right of the page break that you want to delete.
-
To delete a horizontal page break, select the row below the page break that you want to delete.
Note: You cannot delete an automatic page break.
-
-
On the Page Layout tab, in the Page Setup group, click Breaks.
-
Click Remove Page Break.
You can also remove a page break by dragging it outside of the page break preview area (to the left past the row headers, or up past the column headers). If you cannot drag page breaks, make sure that the drag-and-drop feature is enabled. For more information, see Move an existing page break.
Remove all manually-inserted page breaks
Note: This procedure resets the worksheet to display only the automatic page breaks.
-
Click the worksheet that you want to modify.
-
On the View tab, in the Workbook Views group, click Page Break Preview.
You can also click Page Break Preview
-
On the Page Layout tab, in the Page Setup group, click Breaks.
-
Click Reset All Page Breaks.
Tip: You can also right-click any cell on the worksheet, and then click Reset All Page Breaks.
Return to Normal view
-
To return to Normal view after you finish working with the page breaks, on the View tab, in the Workbook Views group, click Normal.
You can also click Normal
-
After working with page breaks in Page Break Preview view, you may still see the page breaks in Normal view because page breaks have been turned on automatically. To hide the page breaks, close and reopen the workbook without saving it.
-
Page breaks remain visible when you close and reopen the workbook after saving it. To turn them off, click the File tab, click Options, click the Advanced category, scroll down to the Display options for this worksheet section, and clear the Show page breaks check box. For more information, see Display or hide page breaks in Normal view.
-

Display or hide page breaks in Normal view
-
Click the File tab > Options.
-
In the Advanced category, under Display options for this worksheet, select or clear the Show page breaks check box to turn page breaks on or off in Normal view.
You cannot add page breaks to a workbook in Excel for the web.
However, you can open the spreadsheet on Excel desktop and add page breaks.
Need more help?
You can always ask an expert in the Excel Tech Community or get support in Communities.


