
"Presence” and "privacy relationships" have specific importance in Skype for Business. Read on to learn all about them, and how to change the privacy relationships that you have with your contacts and how to limit access to your presence information when you need to.
Note: Your admin - that is, the person who set up Skype for Business for your business or school - determined how IM and presence works in your organization when they set it up. They also determined how your Skype for Business works with people outside of your business.
What exactly is presence information in Skype for Business?
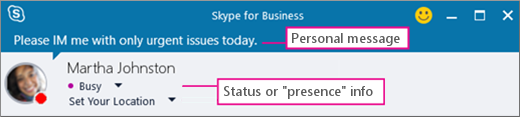
Your presence information includes your availability status (such as Available or Away), a color-coded presence indicator (such as green, yellow, or red), your schedule, your location, and any personal status messages or out-of-office notes you added.
What are privacy relationships in Skype for Business?
In Skype for Business, privacy relationships control how much of your online presence information others see.
Each of your contacts has one of five privacy relationships with you, and each relationship gives access to a different amount of information. For example, Colleagues, which is the relationship new contacts are given by default when you add them, can learn more about where you are, when you’ll be available, and how to reach you than External Contacts but less than Workgroup. Friends and Family, as you might expect, can see more of this information than all the others.
The one exception here is that contacts you have a Workgroup relationship with may need to find you at your work site, so only these contacts can see your meeting locations and get your attention via Skype for Business even if you’ve set your status to Do Not Disturb.
Which privacy levels give access to what information?
This table shows who can see what:
|
Type of information: |
Available to: |
|||
|
External Contacts? |
Colleagues? |
Workgroup? |
Friends & Family? |
|
|
Presence Information |
Yes |
Yes |
Yes |
Yes |
|
Presence Status |
Yes |
Yes |
Yes |
Yes |
|
Display Name |
Yes |
Yes |
Yes |
Yes |
|
Email Address |
Yes |
Yes |
Yes |
Yes |
|
Title * |
Yes |
Yes |
Yes |
Yes |
|
Work Phone * |
Yes |
Yes |
||
|
Mobile Phone * |
Yes |
Yes |
||
|
Home Phone * |
Yes |
|||
|
Other Phone |
Yes |
|||
|
Company * |
Yes |
Yes |
Yes |
Yes |
|
Office * |
Yes |
Yes |
Yes |
Yes |
|
SharePoint Site * |
Yes |
|||
|
Meeting Location # |
Yes |
|||
|
Meeting Subject # |
Yes |
Yes |
Yes |
|
|
Free Busy |
Yes |
Yes |
Yes |
|
|
Working Hours |
Yes |
Yes |
Yes |
|
|
Location # |
Yes |
Yes |
Yes |
|
|
Notes (Out-of-Office Note) |
Yes |
Yes |
Yes |
|
|
Notes (Personal) |
Yes |
Yes |
Yes |
|
|
Last Active |
Yes |
Yes |
Yes |
|
|
Personal Photo Web Address (if applicable) |
Yes |
Yes |
Yes |
Yes |
-
An asterisk (*) above indicates that if this information is defined in an organization’s directory service, it will be visible to all contacts in your organization, regardless of privacy relationship, and to external contacts (if configured and recognized by your organization’s network).
-
A pound sign (#) above indicates that this information is visible by default.
Change your privacy relationship with a contact
To view your contacts according to their privacy relationships:
-
Open Skype for Business, and in your Contacts list, click the Relationships tab in the area just above your contacts (other options are Groups, Status, and New).
To change the privacy relationship you have with a contact:
-
In your Contacts list, right-click the contact, point to Change Privacy Relationship, and then click a new privacy relationship for the contact.
By default, contacts are assigned the Colleagues privacy relationship when you add them to your Contacts list. If you have any contacts that you’ve later assigned to another relationship, you can change the privacy relationship back to Colleagues by clicking either Colleagues or Auto-assign Relationship.
Hide your location
By default, Skype for Business updates your location when you log on from different places. You can hide this information from others by doing the following:
-
In the Skype for Business main window, click the Set Your Location menu under your name.
-
Clear the check box next to Show Others My Location.
Enable Privacy Mode
By default, everyone except Blocked Contacts can see your presence status. To modify the privacy settings, you can do the following:
-
In the Skype for Business main window, click the gear icon, click Tools, then select Options.
-
In the Skype for Business - Options dialog box, click Status, and then do one of the following:
-
-
Choose I want everyone to be able to see my presence regardless of system settings (override default settings).
OR,
-
Choose I want the system administrator to decide - currently everyone can see my presence but this could change in the future.
-
Block a contact
To block everyone from reaching you, try setting your Status to Do not disturb or Appear Away.
To forcibly prevent contacts from reaching you via IM or phone in Skype for Business, do this for each one:
-
In your Contacts list, right-click the contact you want to block.
-
Click Change Privacy Relationship, and then click Blocked Contacts.
Note: Your name and email address will still be visible to a blocked contact.


