
You can create a signature line by underlining blank spaces. The best way to do this depends on whether you want to print the document or distribute it online.
You can add a signature line to a document, add a graphic of your handwritten signature, or save a signature block as an AutoText building block.
For information on adding a digital signature, see Add or remove a digital signature in Office files.
You can underline blank spaces for a printed document by pressing the TAB key and applying the underline formatting to the tab characters.
Apply underline formatting to tab characters
-
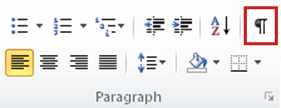
On the Home tab, in the Paragraph group, click Show/Hide.
The marks that indicate spaces and tab stops are displayed.
-
Press the TAB key.
-
Select the tab characters that you want to underline. A tab character looks like a small arrow.

-
Do one of the following:
-
To apply a simple underline format, press CTRL+U.
-
To apply a different style of underline, on the Home tab, in the Font group, click the Font Dialog Box Launcher, click the Font tab, and then select a style from the Underline style list.
-
To create an underline in an online document or form, insert a table cell with the bottom border turned on. This method ensures that when someone types on the line, the line stays in place.
You can create a line on its own, or you can create a line that has introductory text, such as Signature or Date.
Create a line
-
Click where you want to insert a blank underline.
-
On the Insert tab, in the Tables group, click Table.

-
Click the upper-left box to insert a 1x1 table.
To change the length of the line, move the pointer over the end of the table until it becomes a resize pointer

-
Right-click the table, click Borders and Shading, and then click the Borders tab.
-
Under Setting, click None.
-
Under Style, click the line type, color, and width that you want.
-
In the diagram under Preview, click between the lower margin markers to add the bottom border. Make sure that only the bottom line is displayed.
-
Under Apply to, click Table, and then click OK.
Note: If you prefer to view the table without the light gray gridlines that do not print, on the Layout tab, in the Table group, click Show Gridlines.
Create a line that has introductory text
-
Click where you want to insert a blank underline.
-
On the Insert tab, in the Tables group, click Table.
-
Click the upper-left box to insert a 2x1 table.
To change the length of the line, move the pointer over the end of the table until it becomes a resize pointer
-
Right-click the table, click Borders and Shading, and then click the Borders tab.
-
Under Setting, click None.
-
Under Apply to, click Table, and then click OK.
-
Right-click the cell where you want to add the underline, click Borders and Shading again, and then click the Borders tab.
-
Under Style, click the line type, color, and width that you want.
-
In the diagram under Preview, click between the lower margin markers to add the bottom border. Make sure that only the bottom line is displayed.
-
Under Apply to, click Cell.
-
Type the introductory text that you want in the cell that doesn't display the line.
Note: If you prefer to view the table without the light gray gridlines that do not print, on the Layout tab, in the Table group, click Show Gridlines.
First, you need to create an image of your signature. You can write it on a piece of paper, scan the page, and then crop the image file that your scanner creates Save the image in one of the common image file formats, such as .bmp, .gif, .jpg, or .png.
Important: Because of the numerous scanners, digital cameras, and other devices available to consumers, we cannot offer instructions on using these devices. For information, see the manufacturer’s manual or Web site.
After you have your image file, you can add it to a document, by clicking the Insert tab, clicking Picture, and then inserting the image of your signature. However, you might want to add other information, such as your typed name, below the image. To do that, you can create a reusable AutoText entry that contains both the image of your signature and the typed information. For more information, see Use Quick Parts and AutoText in Word.
You can save a signature block as an AutoText entry so that it’s readily available in the AutoText building block gallery.
-
In Word, type the signature block that you want to save. Or, insert the image of your signature and type the additional information that you want to include.
-
Select the signature block.
-
On the Insert tab, in the Text group, click Quick Parts, and then click Save Selection to Quick Part Gallery.
-
In the Create New Building Block dialog box, type a name for your signature block.
-
In the Gallery list, click AutoText.
-
Click OK.
To insert your signature block, click the Insert tab, click Quick Parts, click AutoText, and then click your signature block.


