
Use the Handout Master to create and edit presentation handouts. Changes appear on all pages of the printed handout.
You can change the number of slides per page, page orientation, slide size. You can add or remove page numbers, headers and footers, date and time, and you can insert a picture or add a background.
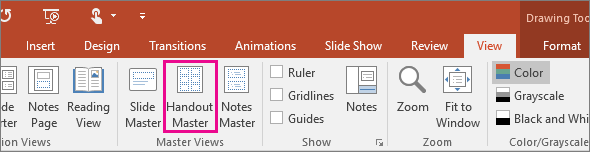
To see the handout options, select the View tab, and then select Handout Master in the Master Views group.
Select a heading below to open it and see detailed instructions.
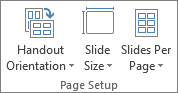
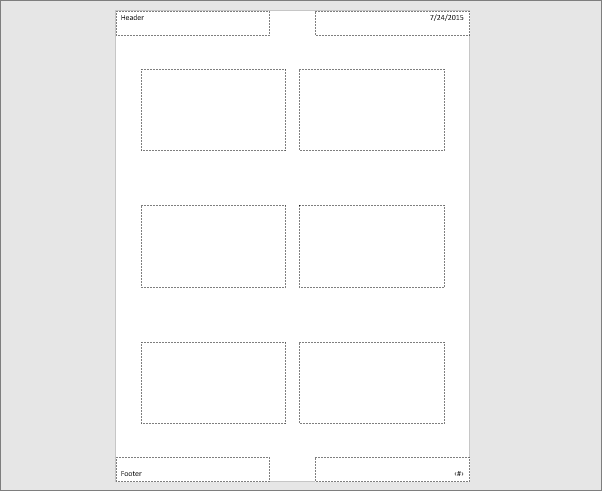
In the Page Setup group, you can specify the number and layout of slides to print on each page, change the orientation of handouts, and set the slide size. You can use settings on all three menus—Handout Orientation, Slide Size, and Slides Per Page—to customize your layout exactly how you want it.
Set the slides per page:
-
Click Slides Per Page.

-
Choose a layout option from the thumbnail images.
Tip: The 3 Slides option includes lines that your audience can use to take notes.
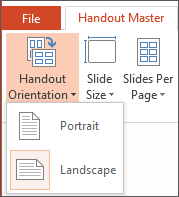
Set the orientation:
-
Click Handout Orientation, and then choose Portrait or Landscape.
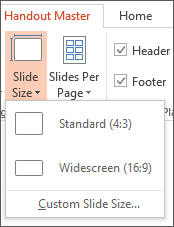
Set the slide size:
-
Click Slide Size (or, in PowerPoint 2010, Slide Orientation), and then choose one of the options.
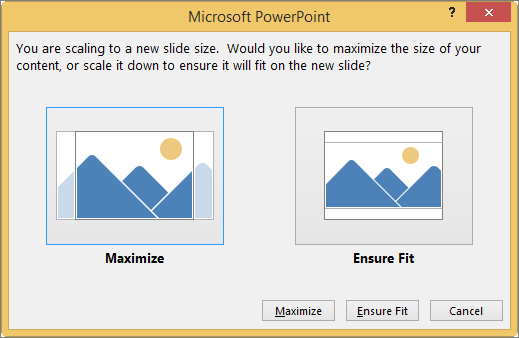
When PowerPoint is unable to automatically scale your content, it prompts you with a message. Select Maximize to increase the size of your slide content when you are scaling to a larger slide size. (Choosing this option could result in your content not fitting on the slide.) Select Ensure Fit to decrease the size of your content. (This could make your content appear smaller, but you’ll be able to see all content on your slide.)
Tips:
-
To set a custom size, including width, height, slide numbering, and orientation of slides and notes, click Custom Slide Size on the Slide Size menu.
-
To make sure your slides will print the way you want, preview your handouts before printing.
-
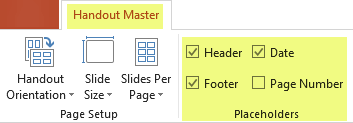
You can adjust headers and footers in the Placeholders group. By default, the placeholders appear in the top and bottom corners of the Handout Master page.
Click in a text placeholder (Header, Footer, Date, or Page Number) to make changes to it. You can do things like:
-
Turn headers/footers on or off: In the Placeholders group on the ribbon, clear the check box of the item (Header, Date, Footer, or Page Number) that you want to turn off.
-
Edit or add content in the text placeholders: In addition to text changes, you can use commands on the Insert tab to add graphics or other content types.
-
Format text shape and appearance: Select the text and use the options on the Format and Home tabs to make changes.
-
Change text placeholders: Drag a text placeholder to move it, and use the text box sizing handles to change its size.
-
On the toolbar ribbon, select the View tab and then select Handout Master.
-
On the Insert tab of the ribbon, select Insert, and then select Pictures (or another button, such as Online Pictures, depending on where you are getting your image from).
-
Browse to the image you want, select it, and then choose Insert.
The image is inserted in the middle of the page.
-
Drag the image to the location you want and resize it, if necessary. For additional formatting options, click the Picture Tools Format tab.
You can change the background of your handouts (but not the background of your slides) in the Background group. You can also quickly change the font for all for your handout text at once, and you can apply special borders and visual effects.

-
Colors: Choose a color theme for your handout background. You may have to click Background Styles and choose an option to see it applied.
-
Background Styles: Choose a style option from the list. The colors displayed depend on your choice in the Colors list.
Tip: Click Format Background at the bottom of the Background Styles list to open the Format pane and choose from more background options, such as advanced fill settings, artistic effects, and color and image settings.
-
Fonts: Choose a font from the list to quickly apply it to all headers and footers.
-
Effects: Choose an effect from the list to apply a theme effects, with features including shadows, reflections, lines, fills, and more.
To see how your handout will look when it's printed:
-
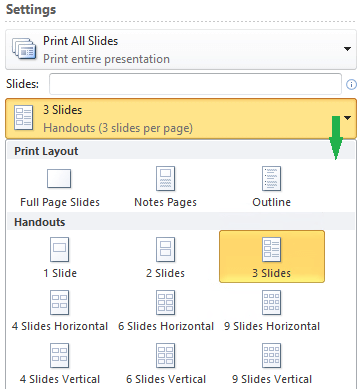
Click File > Print.
-
In the Print dialog box, under Settings, select the second box (which by default is set to Full Page Slides) to expand the list of options. Then, under Handouts, select the layout you want.
-
You can use the arrow buttons at the bottom of the Preview pane to page through the print dialog thumbnails.

For more information about working with PowerPoint handouts, see: Video: Work with handout masters
Additional information
-
The changes you make to a handout master do not apply to a slide master or notes master.
-
It isn't possible to resize the slide placeholders on a handout master page, but you can resize the placeholders for header, footer, page number, and date.


