
Note: This article has done its job, and will be retiring soon. To prevent "Page not found" woes, we're removing links we know about. If you've created links to this page, please remove them, and together we'll keep the web connected.
Once you've created a custom view of a SharePoint document library, you can edit it by adding or deleting columns or by changing the way the information in the view is sorted, filtered, or grouped. If you need to create a custom view, see Create a custom view of a document library.
Note: Some custom view settings require library owner or admin access to change. For more information about changing view settings in addition to column, sort, filter, or group by settings, see Change a view.
Modify a custom view of a document library
-
Navigate to the custom view that you want to modify.
-
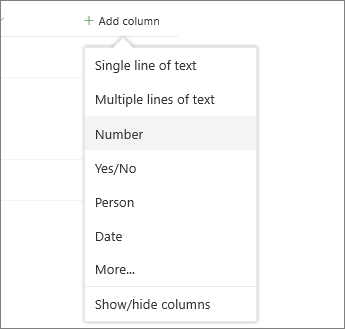
To add a new column type, click the add column button + Add column or +. From here you can add a common column type, or click More... to create custom types. If the column already exists, click Show/hide columns.
For more info, see Create a column in a SharePoint list or library.
Note: Does your screen look different than this? Your administrator may have classic experience set on the document library. If so, see Change a view (includes select another view).
-
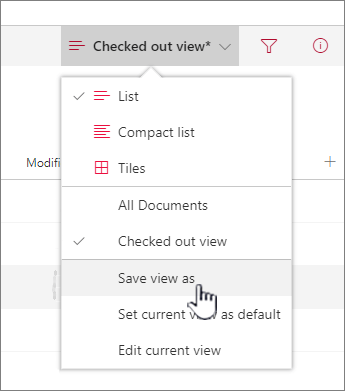
Make the edits to the custom view that you want and then click View options

Notes:
-
When you edit a custom view of a document library, an "*" will appear next to the view name at the top of the view menu. After you've saved your changes, the "*" goes away.
-

Note: If you have any files selected, you'll see a message 1 selected x (where 1 is any number you have selected) in the upper right of the screen. Click the X to clear the selections and get the View options button.
-
-
Click Save view as in the View options menu.
-
Update or change the name in the Save as dialog.

and click Save.
You can also use the Quick Edit button to add columns to a custom view.

From the Quick Edit view, you can add columns and data. When you're finished, click Exit quick edit.
For more information about how to change a specific view setting, see Create a custom view of a document library
Need to delete a custom view of a document library?
To delete a custom view of a document library, you must have library owner or admin permissions for the library where you want to delete the custom view. See Delete a custom view of a document library for the steps to delete a custom view of a document library.
Leave us a comment
Was this article helpful? If so, please let us know at the bottom of this page. If it wasn't helpful, let us know what was confusing or missing. Please include your SharePoint, OS, and browser versions. We'll use your feedback to double-check the facts, add info, and update this article.


