
Office add-ins can help you personalize your documents or speed up the way you access information on the web. For example, with an add-in you could look up items on Wikipedia or add an online map to your document without having to leave Excel.
Are you looking for information about COM add-ins for Excel? If you are, see Add or remove add-ins.
Get an Office add-in for Excel
-
Click File> Get Add-ins. You can directly install an add-in on the page or click More Add-ins to explore.
Or you can also select Home > Add-ins >More Add-ins. -
In the Office Add-ins box, select My Add-ins to view your add-ins. Or browse for the add-in you want by selecting Store tab and using the Search box.
-
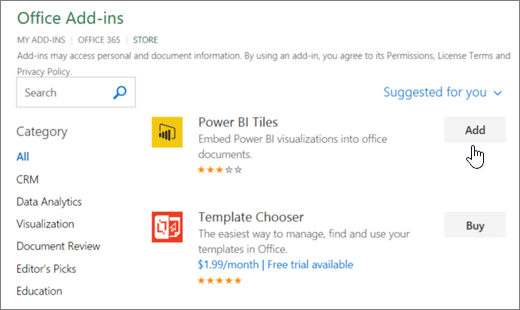
Click an add-in to read more about it, including a longer description and customer reviews, if available. Then, click Add, Try, or Buy for the add-in you want.
If you’re prompted to sign in, type the email address and password you use to sign-in to Office programs. Review the privacy information, and then click Continue (for free add-ins), or confirm billing information and complete your purchase.
Start using your Office add-in with Excel
To start using your add-in with Excel, double-click it in the add-ins list.
-
Click Home> Add-ins > More Add-ins.
-
In the Office dialog, select My Add-ins tab.
-
Select the add-in from My Add-ins tab in the Office Add-ins dialog and click Add to install the add-in.
Remove an Office add-in
-
Click Home > Add-ins > More Add-ins.
-
In the Office Add-ins dialog, select My Add-ins tab and click on the add-in you would like to remove and select Remove.
-
Click Remove in the confirmation window.
Important: New name for apps for Office - Office Add-ins. We are currently updating our products, documentation, samples, and other resources to reflect the platform name change from "apps for Office and SharePoint" to "Office and SharePoint Add-ins". We made this change to better distinguish the extension platform from Office apps (applications). While these changes are taking place, the dialogs and messages you see in your application might be different than what you see in this article.
Using Office Add-ins in Excel 2016
You can use the web Office Add-ins in Excel 2016.
Get an Office add-in for Excel 2016
-
Click Home > Add-ins > More Add-ins.

-
In the Office Add-ins dialog box, select the Store tab and browse for the add-in you want, or search for an add-in by using the Search box.
-
Click an add-in to read more about it, including a longer description and customer reviews, if available. Then, click Add or Buy for the add-in you want.
If you’re prompted to sign in, type the email address and password you use to sign in to Office programs. Review the privacy information, and then click Continue (for free add-ins), or confirm billing information and complete your purchase.
Start using your Office add-in with Excel 2016
To start using your add-in with Excel 2016, follow these steps:
-
Click Home> My Add-ins.
-
In the Office add-in dialog, click any add-in from the My Add-ins to start using it.

Note: After you get a new add-in, it should show up in your My Add-ins list. If it doesn’t, click Refresh

Remove an Office add-in
-
Click Home > Add-ins >More Add-ins.
-
In the Office add-ins dialog, in the My Add-ins tab, right-click on the add-in you would like to remove and select Remove.
-
Click Remove in the confirmation window.


