
Create a SharePoint team site to provide a location where you and your team can work on projects and share information from anywhere on any device. A team site includes a group of related web pages, a default document library for files, lists for data management, and web parts that you can customize to meet your needs.
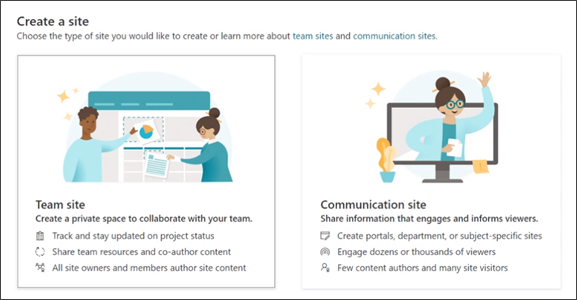
Should I create a team site or a communication site?
Use a team site when you want to collaborate with other members of your team or with others on a specific project. With a team site, typically all or most members can contribute content to the site and the information is limited to only the members of the team or project and specific stakeholders. If your intention is to simply broadcast information out to a broad audience, a communication site is the better choice. With a communication site, typically only a small set of members contribute content that is consumed by a much larger audience.
Steps to create a team site
-
Do one or the following:
-
If you're using Microsoft 365, sign in. For help, see Where to sign in to Microsoft 365.
In the top left corner of the page, select the app launcher icon

Note: If you don't see the SharePoint tile or the Sites tile, your Microsoft 365 subscription may not include SharePoint in Microsoft 365. Contact the person administering Microsoft 365 in your organization. If you're the administrator for your Microsoft 365 tenant, see Switch to a different Microsoft 365 for business plan to add SharePoint in Microsoft 365 to your subscription.
-
If you're using SharePoint Server 2019, log into SharePoint.
-
-
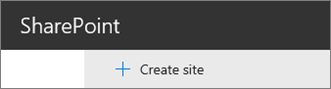
At the top of the SharePoint page, click + Create site and choose the Team site option. A site creation wizard will appear on the right-hand side of the screen where you input the information to create a team site.
Notes:
-
If your plan is to associate the new team site with a SharePoint hub site, you can streamline the process by first navigating to the hub site and clicking the Create site link in the top right corner there. The new team site will automatically be associated with that hub site.
-
If you don't see the + Create site link, self-service site creation may be disabled in SharePoint. Contact the person administering SharePoint in your organization to create a team site. If you're a tenant administrator, see Manage site creation in SharePoint Online to enable self-service site creation for your organization or Manage sites in the new SharePoint admin center to create a site from the SharePoint in Microsoft 365 admin center. Site creation is not currently available in the SharePoint mobile app.
-
-
Select a team site template that comes pre-populated with content to serve a specific scenario. Or, to create a team site from scratch select the Team collaboration template.
-
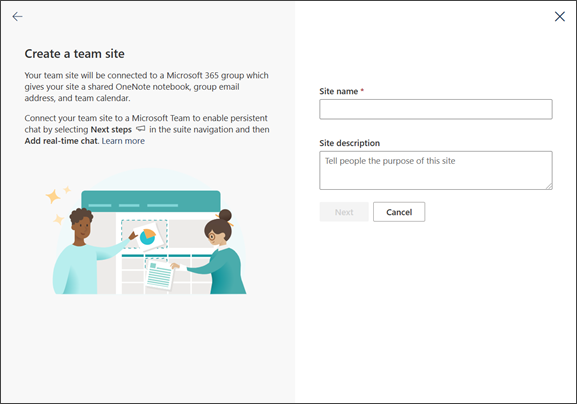
Give your new team site a name. Unless you're using SharePoint Server 2019, Microsoft 365 group e-mail will be automatically generated with the same name as your team site. As you type, you will see whether or not the name you've chosen is available.
Note: If Microsoft 365 Groups are disabled in SharePoint in Microsoft 365, the Email address field won't appear.
-
In the Site description box, add some text that let's people know the purpose of your site.
-
If offered, in the Privacy settings section, choose either Public - anyone in the organization can access this site or Private - only members can access this site to control who has access to your site.
-
If enabled by your admin, choose a site classification in the Site classification section. The options listed can pertain to sensitivity of information or to the life-cycle of information on your site.
-
If you're using SharePoint Server 2019, click Finish, you're done! If not, continue.
-
Select a language for your site.
Caution: Once you select a default language for your site and create the site, you can't change the language to something else later. You can, however, add alternate supported languages.
-
In SharePoint in Microsoft 365, add the names or email addresses of anyone else you want to manage the site in the Add additional owners box.
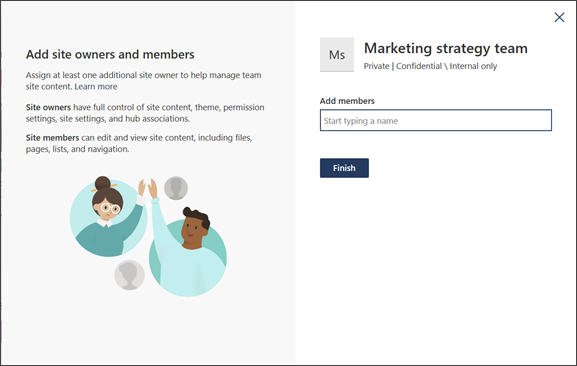
Note: The site creator is automatically a member of the site owners group.
-
In SharePoint in Microsoft 365, in the Add members box, add the name or email address for everyone you want to be a member of your site and then click Finish. Members added to the Microsoft 365 group associated with the site are automatically added to the site members group.
To wait and add additional owners, members, or visitors later, click Finish.
If you've chosen a custom site template, a banner will display at the top of your site showing the set-up status for your new site. To see which settings were applied by the site template, click Settings

Once your site is created, it will appear among the sites you're following. Your site will not inherit the permission settings or navigation of other sites. See the Manage site permissions section in Manage your SharePoint team site settings for more details.
Classic site creation
If your screen doesn't match the images above, it means that your administrator has site creation set to the classic site creation experience. In this case, a corresponding Microsoft 365 Group won't be created.
-
Click + Create site.
-
Give your site a name, and then click Create.

Your site will be created in the location your administrator has predefined and the site will appear among the sites you’re following. Your site will not inherit the permission settings or navigation of other sites.
Next steps
Now that you've created a site, learn how you can customize and get the most out of it:
-
Customize your team site (classic experience only)
-
Change the logo, title, and description of your SharePoint site


