
When you add a modern page to a site, you add and customize web parts, which are the building blocks of your page. You can connect some web parts to each other to create an interactive and dynamic experience for your page viewers. For example, you can connect a Document library web part to a File and Media web part. When a user clicks a file name in the Document library list, the File viewer shows the contents of that specific file. Or, connect a List web part to an Embed web part, and add custom code for a variety of dynamic experiences.
Notes:
-
Some functionality is introduced gradually to organizations that have opted in to the Targeted Release program. This means that you may not yet see this feature or it may look different than what is described in the help articles.
-
The web parts in this article are not available for use on classic pages.
Web parts you can connect include: the List properties web part, File and Media web part, and Embed web part. Here are some examples of how you can use these connected web parts.
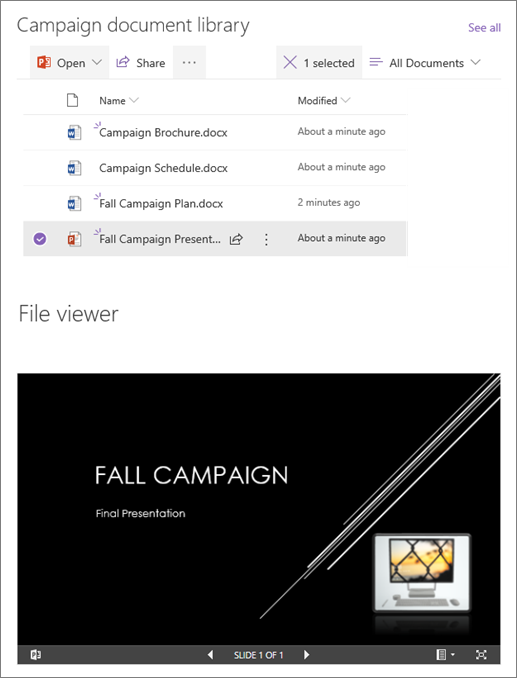
Show a file based on what a user selects in a document library (connect a File and Media web part to a Document library web part)
In this example, users can browse through a library of campaign documents and see the content in a selected file without leaving the page, and without having to open each file.
To do this:
-
On your page, add a Document Library web part with the library you want to use, and add a File and Media web part.
-
If you're adding the File and Media web part for the first time, the Recent documents pane will open. Select Cancel on the bottom right of this pane.
-
Select Edit web part

-
Select the ellipses (...) at the top right of the property pane, and then selectConnect to source.
-
Under Connect to source, select the document library you want to use from the drop down list.

-
Select the X at the top of the pane to close it.
-
Select Save as draft at the top of the page.
-
Test your connection by selecting a document from the Document library you chose. You should see the document displayed in the File and Media web part.
-
When you're ready for your audience to see the page, select Publish at the top right of the page.
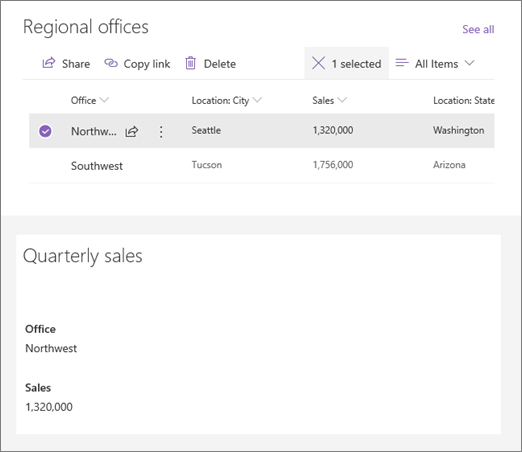
Show an item in a list based on what a user selects in a List web part (connect a List properties web part to a List web part)
When you have a large list with many columns, it can be hard for users to find the specific information they are looking for. With the List properties web part, a user can select an item from a List web part, and see only the value(s) you specify. In the following example, a List web part contains a list of Regional offices. When the user selects an item from the list, the List properties web part displays only the Office name and Sales data.
To do this:
-
On your page, add a List web part with the list you want to use, and then add a List properties web part.
-
Select Edit web part
-
Select the ellipses (...) at the top right of the property pane, and then select Connect to source.
-
Under Connect to source, select the list you want to use from the drop-down list.
-
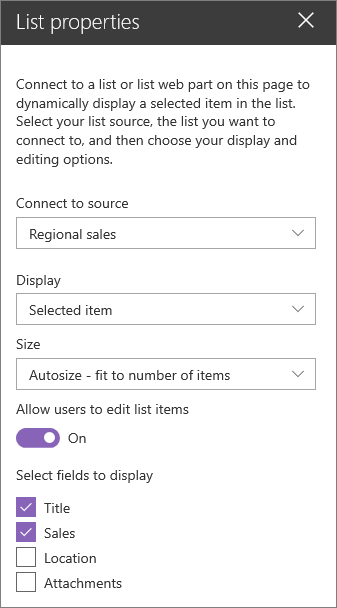
Under Display, select what you want the user to see on your page.
-
Under Fields to display, select the check boxes next to the columns that you want to show values from.
-
Select Save as draft at the top of the page.
-
Test your connection by selecting an item from the list you chose. You should see the value you specified in the List properties web part.
-
When you're ready for your audience to see the page, select Publish at the top right of the page.
Show a video, image, or location based on what a user selects in a List web part (connect an Embed web part to a List web part)
With the Embed web part, you can enter links or embed code that use variables, allowing you to show a wide variety of items depending on what your page viewer selects. Here are three examples of how you could show selected images, videos, and locations.
Show a selected YouTube video
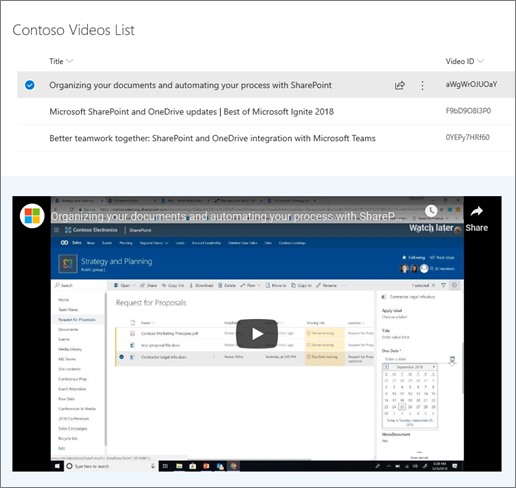
In this example, the List web part contains a list with video titles and IDs for several YouTube videos. When a user chooses a video from the list, the Embed web part shows that video. The link in the Embed web part uses a variable to represent the video ID of the video chosen by a user from the list.
To do this:
-
Create a list that has a Title column and a column for your Video IDs (as in the example above). The ID is the portion of the YouTube link that identifies the video, and is found after the "v=" part of the link. For example, in the following link, the italicized portion is the Video ID:
https://www.youtube.com/watch?v=0YEPy7HRf60
-
On your page, add a List web part and choose the list with the video IDs.
-
Add an Embed web part.
-
Select Edit web part
-
Select the ellipses (...) at the top right of the property pane, and then select Connect to source.
-
Under Connect to source, select the list from the drop down.
-
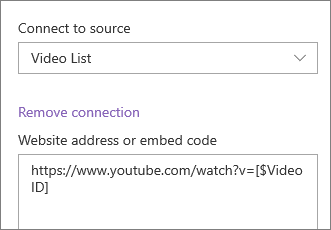
Under Web site address or embed code, add the YouTube link. Instead of using an individual video ID, though, use the name of the list column that contains the IDs as a variable. A variable is denoted by an opening bracket, a $, and a closing bracket after the name. Here's an example, where Video ID is the column name:
-
Select Save as draft at the top of the page.
-
Test your connection by selecting an item from the list you chose. You should see the video displayed in the Embed web part.
-
When you're ready for your audience to see the page, select Publish at the top right of the page.
Show a selected image
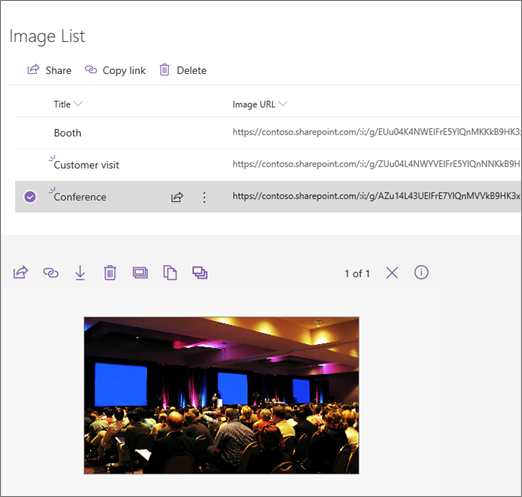
In this example, the List web part contains image titles and URLs for images stored on a SharePoint site. When a user chooses an image from the list, the Embed web part shows that image. In this example, IFrame code is used in the Embed web part, and the variable represents the image link.
To do this:
-
Create a list that has a Title column and a column for your Image URLs.
Tip: To get an URL for your image, go to the library where the image is stored, right click on the image, and click Copy link. Then click Copy. Now you can paste the link into your list.
-
On your page, add a List web part and choose the list with your Image URLs.
-
Add an Embed web part.
-
Select Edit web part
-
Select the ellipses (...) at the top right of the property pane, and then selectConnect to source.
-
Under Connect to source, select the list from the drop down.
-
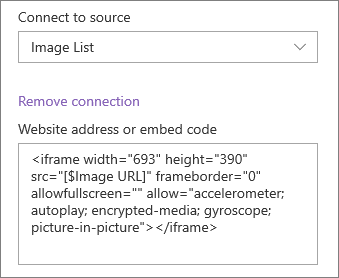
Under Web site address or embed code, add your embed code. In this example, the embed code is:
<iframe width="693" height="390" src="[$Image URL]" frameborder="0" allowfullscreen="" allow="accelerometer; autoplay; encrypted-media; gyroscope; picture-in-picture"></iframe>
where [$Image URL] is the variable that represents the column name for the Image URLs.
-
Select Save as draft at the top of the page.
-
Test your connection by selecting an item from the list you chose. You should see the image displayed in the Embed web part.
-
When you're ready for your audience to see the page, select Publish at the top right of the page.
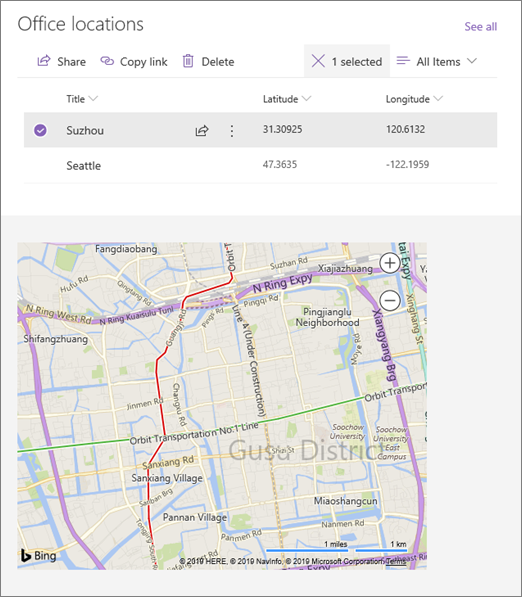
Show a selected location
In this example, the List web part contains locations and their coordinates. When a user chooses a location from the list, the Embed web part shows that location on a Bing map. In this example, IFrame code is used in the Embed web part, and the variables represent the coordinates.
To do this:
-
Create a list that has a Title column and columns for longitude and latitude.
-
On your page, add a List web part and choose the list with the location information.
-
Add an Embed web part.
-
Select Edit web part
-
Select the ellipses (...) at the top right of the property pane, and then select Connect to source.
-
Under Connect to source, select the list from the drop down.
-
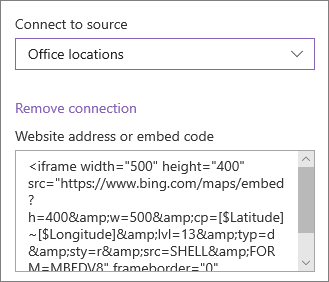
Under Web site address or embed code, add your embed code. In this example, the embed code is:
<iframe width="500" height="400" src="https://www.bing.com/maps/embed?h=400&w=500&cp=[$Latitude]~[$Longitude]&lvl=13&typ=d&sty=r&src=SHELL&FORM=MBEDV8" frameborder="0" scrolling="no"> </iframe>
where [$Latitude] and [$Longitude] are the variables that represents the column names for each of those points.
-
Select Save as draft at the top of the page.
-
Test your connection by selecting an item from the list you chose. You should see a Bing map that shows the location displayed in the Embed web part.
-
When you're ready for your audience to see the page, select Publish at the top right of the page.
Notes:
-
Embed code must be iframe-based (that is, start and end with <iframe> tags). Embed code that uses <script> tags is not supported.
-
Only secure web sites can be embedded. Make sure the URL of the web site begins with HTTPS.
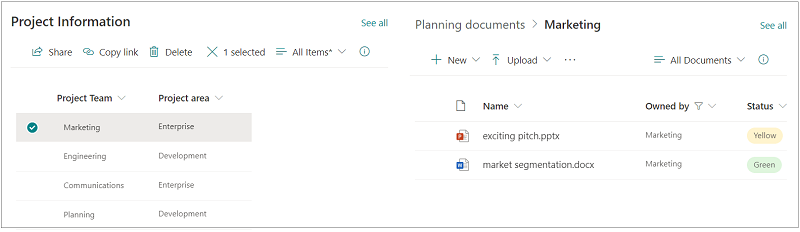
Filter a list based on a selection in another list or library
With dynamic filtering, you can filter one list based on a selection made in another list. In the following example, the Planning Documents library is filtered by a selection in the Project Information list. The "Marketing" value in the Project Team column is selected, so only documents owned by the Marketing team are displayed in the Planning Documents library.
To do this:
-
On your page, add a List web part or a Library web part and select the list or library with the values you want to filter by.
-
Add another List web part or a Library web part and select the list or library that contains the information you want to filter.
-
Select the list or library web part you want to filter, and select Edit web part
-
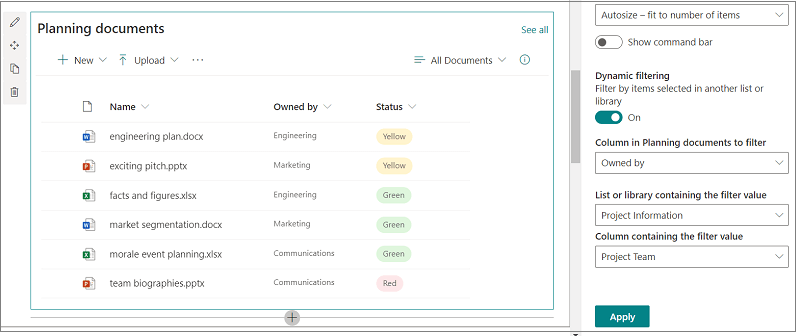
Under Dynamic filtering, slide the toggle to the On position.
-
Select the column you want to filter in the field Column in [your list name] to filter.
-
Under List or Library containing filter value, select the list or library you added to your page in Step 1.
-
Under Column containing the filter value, select the column that has the values you want to filter by.
-
Select Apply.
Using the example image at the beginning of section, the Dynamic filtering options for the Planning Documents library would look like the following:
-
When you’re done, select Save as draft at the top of the page, or if you're ready for your audience to see the page, select Publish at the top right of the page.


