
Note: This article has done its job, and will be retiring soon. To prevent "Page not found" woes, we're removing links we know about. If you've created links to this page, please remove them, and together we'll keep the web connected.
You can use an Office Data Connection (.odc) file to connect to an Online Analytical Processing (OLAP) database.
-
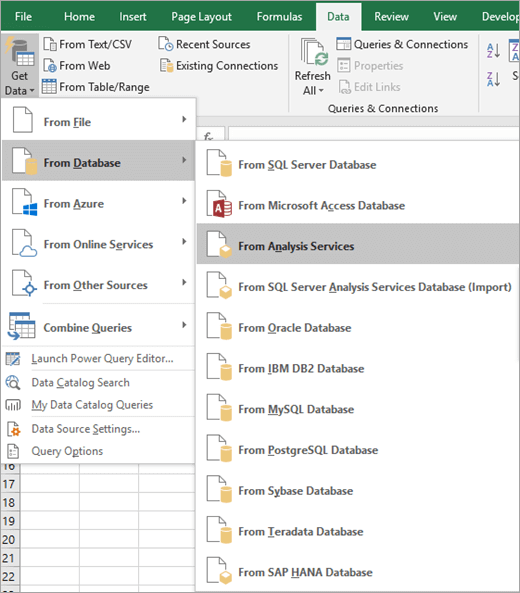
On the Data tab, select Get Data > From Database > From Analysis Services.
Note: If you are using Excel 2013, 2010, or 2007, on the Data tab, in the Get External Data group, select From Other Sources > From Analysis Services.
The Data Connection Wizard starts. This wizard has three screens.
-
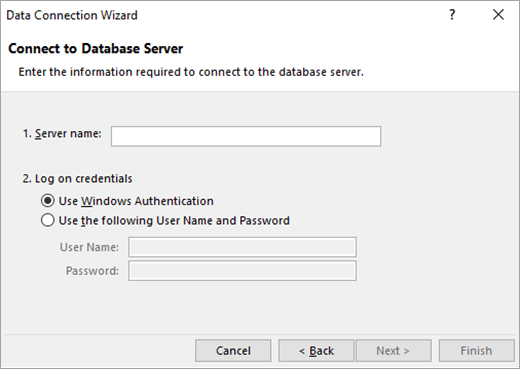
Type the name of the OLAP server in the Server name text box.
Note: To specify an offline cube file, type the complete file path, file name, and extension. For more information about creating offline cube files, see Create an offline cube file from an OLAP server database.
-
Under Log on credentials, do one of the following:
-
To use your current Windows user name and password, click Use Windows Authentication.
-
To enter a database user name and password, click Use the following User Name and Password, and then type your user name and password in the corresponding User Name and Password text boxes.
Security Note:
-
Use strong passwords that combine uppercase and lowercase letters, numbers, and symbols. Weak passwords don't mix these elements. For example, Y6dh!et5 is a strong password and House27 is a weak password. Passwords should contain 8 or more characters. A pass phrase that uses 14 or more characters is better.
-
It is critical that you remember your password. If you forget your password, Microsoft cannot retrieve it. Store the passwords that you write down in a secure place away from the information that they help protect.
-
-
-
Click Next to go to the next wizard screen
-
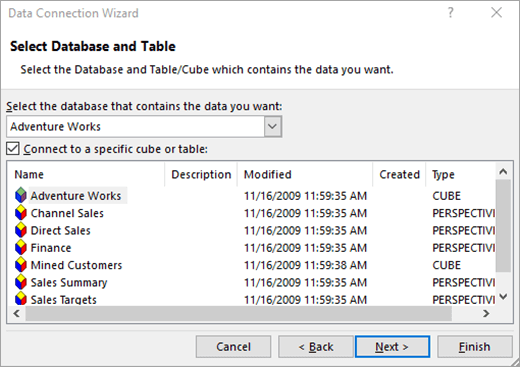
Under Select the database that contains the data you want, select a database.
-
To connect to a specific cube in the database, make sure that Connect to a specific cube or table is selected, and then select a cube from the list.
-
Click Next to go to the next wizard screen,
-
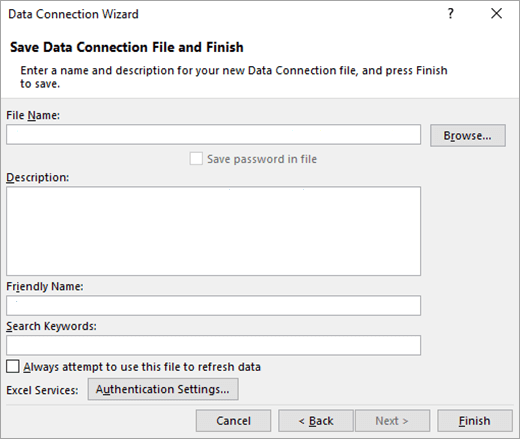
Optionally, in the File Name text box, revise the default file name. Click Browse to change the default file location or check for existing file names.
-
Optionally, type a description of the file, a friendly name, and common search words in the Description, Friendly Name, and Search Keywords text boxes.
-
To ensure that the connection file is always used when the PivotTable is refreshed, click Always attempt to use this file to refresh this data. This check box ensures that updates to the connection file will always be used by all workbooks that use that connection file.
-
To specify how a PivotTable is accessed if the workbook is saved to Excel Services and is opened by using Excel Services, click Authentication Settings, and select one of the following options to log on to the data source:
-
Windows Authentication Select this option to use the Windows user name and password of the current user. This is the most secure method, but it can affect performance when there are many users.
-
SSO Select this option to use Single Sign On, and then enter the appropriate identification string in the SSO ID text box. A site administrator can configure a SharePoint site to use a Single Sign On database where a user user name and password can be stored. This method can be the most efficient when there are many users.
-
None Select this option to save the username and password in the connection file.
Security Note: Avoid saving logon information when connecting to data sources. This information may be stored as plain text, and a malicious user could access the information to compromise the security of the data source.
Note: The authentication setting is only used by Excel Services, and not by Microsoft Office Excel. If you want to ensure that the same data is accessed whether you open the workbook in Excel or Excel Services, make sure that the authentication setting in Excel is the same.
-
-
Click OK.
-
Click Finish to close the Data Connection Wizard.
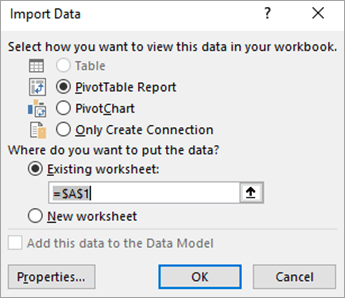
The Import Data dialog box appears.
-
Under Select how you want to view this data in your workbook do one of the following:
-
To create just a PivotTable report, click PivotTable Report.
-
To create a PivotTable report and PivotChart report, click PivotChart and PivotTable Report.
-
To store the selected connection in the workbook for later use, click Only Create Connection. This check box ensures that the connection is used by formulas that contain Cube functions that you create and that you don't want to create a PivotTable report.
-
-
Under Where do you want to put the data?, do one of the following:
-
To place the PivotTable or PivotChart report in an existing worksheet, select Existing worksheet, and then type the first cell in the range of cells where you want to locate the PivotTable report.
Alternatively, click Collapse Dialog


-
-
To place the PivotTable report in a new worksheet starting at cell A1, click New worksheet.
-
Optionally, you can change connection properties by clicking Properties, by making your changes in the Connection Properties dialog box, and then by clicking OK. For more information, see Connection properties.
Tip: When you use a workbook connected to a SQL Server Analysis Services database, you may need additional information to answer specific product questions, such as reference information about multidimensional expressions (MDX), or configuration procedures for an online analytical processing (OLAP) server.


