Our poetry book template makes it easy for several poets to work together in a single document that can be printed out as a booklet. To start:
-
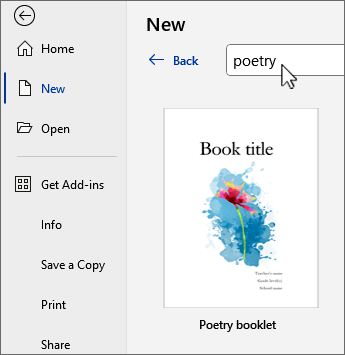
On the File tab and select New.
-
Type poetry into the Search for online templates field.
-
Select the Poetry booklet template.
-
Select Create.
Tip: For more choices, search online at create.microsoft.com.

Each page of the booklet starts with a new poem. To set up the booklet with a blank page waiting for each poet, do this:
-
Put your cursor before "Authors" in the heading on the last page, and then go to the Insert tab and choose

-
Click near the top of the new blank page and type a placeholder title.
-
Press Enter, and type the poet's name.
-
Repeat these steps for each poet.
Select the title or poets name and go to the Home tab to select Font size, typeface, and effects.
Tip: To use text layouts from the example poems, select the poem, including title and author name. Then copy and paste it onto the new, blank page. Replace the example text with placeholder text.
If a poem fills up more than one page, Word will add a page to take care of that, without messing up other pages in the booklet.
If you need to delete a page, just delete everything on the page until Word removes the page.
To give everyone access to the booklet, you'll be saving it in OneDrive and inviting the other poets in.
-
In the upper-right corner of Word, select

-
Choose a OneDrive location, and give the booklet a name.
-
Enter the names (email addresses) of your fellow poets.
-
Select the pencil

-
Add a message if you want and select

The other poets will receive email that includes a link to the booklet. When they follow the link, they'll all be working collaboratively on the document.
To write their poem, they press Enter after their name, and start typing.
Authors can select fonts, formatting, and images to include on the page.
Tip: To share the booklet through Teams, chat, or email, select 
-
Stumped for just the right word in your poem?
Try right-clicking a word and going to Synonyms for a short list of alternatives, or choose

-
Sticking to a meter, writing a limerick or haiku?
Show the breaks between syllables by going to the View tab, select


-
Want to hear what your poem sounds like?
Select your poem. then on the Review tab, select

Images in the booklet are laid out behind the text on each page. Here's how to add your own:
-
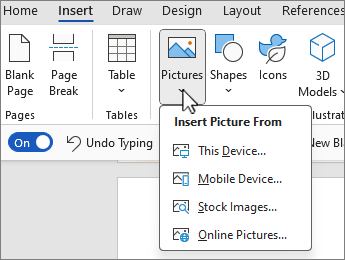
On the Insert tab, select

-
Find a picture you like, and select Insert.
-
Delete the caption text box if present.
-
Select the picture, select


-
Change the size and placement of the picture by dragging it on the page.

Images in the booklet are laid out behind the text on each page. Here's how to add your own:
-
On the Insert tab, select

-
Find the picture you want to use, and select Insert.
-
Select the picture, and on the Format Picture tab in the ribbon select Wrap Text, and then choose Behind Text.
-
Change the size and placement of the picture by dragging it on the page.
The list of authors at the end of the booklet is laid out in a table, and the easiest way to move from the text column to the picture column is by pressing the Tab key.
-
Replace the placeholder text with real author info. Use the up and down arrow keys to move between name, title, and organization.
-
Press the Tab key.
-
With the picture selected, right-click, select Change Picture and choose a picture source.
-
Browse to your picture of the real author, and select Insert.
-
Press the Tab key again to go to the next author's info.
-
When you get to the end of the list, pressing the Tab key adds a new row to the table. Continue to add text and pictures for each poet.
The table of contents keeps track of which poems are on which pages, and you can update it at any time.
-
Select anywhere in the table of contents.
-
Select Update Table.`

-
Choose Update entire table, and then click OK.
The document is designed so that each page of the booklet takes up half of a landscape-oriented page, printed double-sided.
-
On the File tab, select Print.
-
Choose Print on Both Sides, Flip pages on short edge.
-
Select Print.
If you want to print the booklet in color, be sure to choose a color printer. You might have to select Printer Properties and specify Color in your printer's dialog box.
-
On the File tab, select Print.
-
Switch Double-sided printing on, and select On (Short edge).
-
Select Print.
For a staple-bound booklet, fold the stack of paper in half, and use a long-reach stapler to staple along the fold.


