
Note: This article has done its job, and will be retiring soon. To prevent "Page not found" woes, we're removing links we know about. If you've created links to this page, please remove them, and together we'll keep the web connected.
In Word, PowerPoint, and Excel for Mac, you can easily align objects—such as pictures, shapes, SmartArt, and charts—in relation to other objects, the edges of the page, or the margins.
Word
-
Hold down Shift , click the objects that you want to align, and then click the Shape Format tab.
-
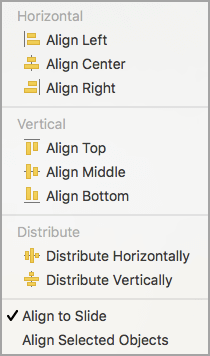
Click Arrange > Align > Align Selected Objects.
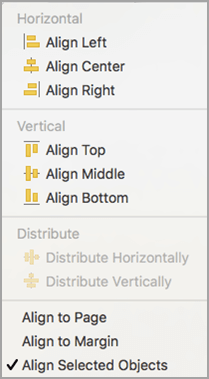
This is selected by default.
If Align Selected Objects is not available
In the document, select at least two objects. The Align Selected Objects option becomes enabled.
-
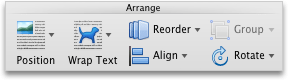
Click Arrange > Align, and then click the alignment that you want.
-
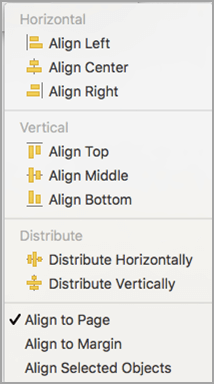
Hold down Shift , click the objects that you want to align, and then click the Shape Format tab.
-
Click Arrange > Align > Align to Page.
-
Click Arrange > Align, and then click the alignment that you want.
To more easily align objects, you can use a grid. Or, you can snap your objects to a grid line that runs through the vertical edges, horizontal edges, and center of other objects. The line becomes visible only when you drag an object near another object.
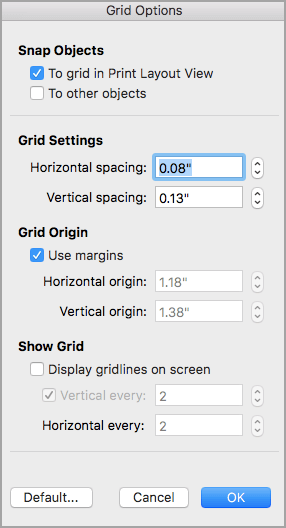
To use a grid, you have to first turn on the grid option.
-
On the Word menu, click Preferences.
-
In the Word Preferences box, under Authoring and Proofing Tools, click Edit.
-
In the Edit box, click Grid Options.
-
In the Grid Options box, select the type of snap-to behavior that you want:
-
To snap objects to a grid, under Snap Objects, select To grid in Print Layout View.
-
To snap objects to other objects, under Snap Objects, select To other objects.
-
-
(Optional) You can set other grid settings such as spacing.
-
To show the gridlines, under Show Grid, select Display gridlines on screen.
Note: You can also toggle the gridlines on and off by selecting or clearing the Gridlines check box on the View tab or View menu.
-
Click OK.
After you choose a grid option, align your objects as follows.
-
Hold down Shift , click the objects that you want to align, and then click the Shape Format tab.
-
Click Arrange > Align, and select an alignment option. If you displayed the gridlines, you will see that the objects are aligned on the grid.
Tip: If you set the preference to align to grid but want to suspend this setting while you move an object, hold down

PowerPoint
-
Hold down Shift , click the objects that you want to align, and then click the Shape Format tab.
-
Click Align > Align Selected Objects.
This is selected by default.
If Align Selected Objects is not available
In the document, select at least two objects. The Align Selected Objects option becomes enabled.
-
Click Align, and then click the alignment that you want.
-
Hold down Shift , click the objects that you want to align, and then click the Shape Format tab.
-
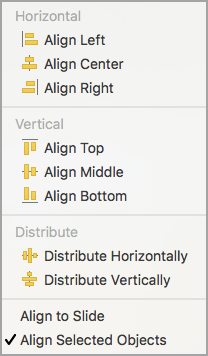
Click Align > Align to Slide.
-
Click Align, and then click the alignment that you want.
To more easily align objects, you can snap your objects to a grid line that runs through the vertical edges, horizontal edges, and centers of other objects. The line becomes visible only when you drag an object near another object.
-
Click View > Guides >Snap to Grid.
Dynamic Guides — lines that run through the center of other objects and the center of the slide — appear when you drag an object. You can use dynamic guides to align an object relative to another object. Or, you can align an object relative to the center of a slide.
-
Click View > Guides > Dynamic Guides.
-
Click the object that you want to align.
Tip: To select multiple objects, hold down Shift , and then click the objects that you want.
-
Drag the object near another object that you want to align it with, or drag the object near the center of the page.
Note: To temporarily hide Dynamic Guides, hold down Command while you drag the object.
-
Use the grid lines that appear to obtain the alignment that you want.
Excel
-
Hold down Shift , click the objects that you want to align, and then click the Shape Format tab.
-
Click Align, and then click the alignment that you want.
See also
Word
-
Hold down Shift, click the objects that you want to align, and then click the Format tab.
-
Click Arrange > Align > Align Selected Objects.
This is selected by default.
If Align Selected Objects is not available
In the document, select at least two objects. The Align Selected Objects option becomes enabled.
-
Click Arrange > Align, and then click the alignment that you want.
-
Hold down Shift, click the objects that you want to align, and then click the Format tab.
-
Click Arrange > Align > Align to Page.
-
Click Arrange > Align, and then click the alignment that you want.
To more easily align objects, you can use a grid. Or, you can snap your objects to a grid line that runs through the vertical edges, horizontal edges, and center of other objects. The line becomes visible only when you drag an object near another object.
-
Hold down Shift, click the objects that you want to align, and then click the Format tab.
-
Click Arrange > Align > Grid Options.
-
Do one of the following:
To automatically align objects
Do this
On a grid in Publishing Layout view
Under Snap objects, select the To grid in Publishing Layout View check box.
On a grid in Print Layout view
Under Snap objects, select the To grid in Print Layout View check box.
With grid lines that go through other shapes
Under Snap objects, select the To other objects check box.
Tip: If you set the preference to align to grid but want to suspend this setting while you move an object, hold down
Static Guides make it easy to manually align text boxes, graphics, and other objects precisely to a specified area of a document.
-
On the View menu, click Publishing Layout.
-
On the View menu, make sure that Ruler has a check mark next to it.
-
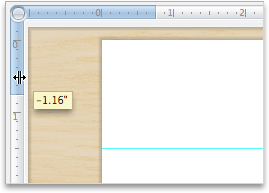
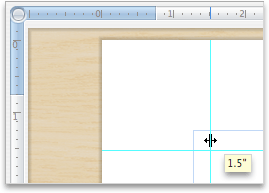
Rest the pointer over a blue portion of the horizontal or vertical ruler until the pointer turns into a double-headed arrow.
-
Drag a guide onto the page and position it anywhere you want.
PowerPoint
-
Hold down Shift , click the objects that you want to align, and then click the Format tab.
-
Click Arrange > Align > Align Selected Objects.
This is selected by default.
If Align Selected Objects is not available
In the document, select at least two objects. The Align Selected Objects option becomes enabled.
-
Click Arrange > Align, and then click the alignment that you want.
-
Hold down Shift , click the objects that you want to align, and then click the Format tab.
-
Click Arrange > Align > Align to Slide.
-
Click Arrange > Align, and then click the alignment that you want.
To more easily align objects, you can snap your objects to a grid line that runs through the vertical edges, horizontal edges, and centers of other objects. The line becomes visible only when you drag an object near another object.
-
On the View menu, point to Guides, and then select Snap to Grid.
To more easily align objects, you can snap your objects to other objects on the slide. The line becomes visible only when you drag an object near another object.
-
On the View menu, point to Guides and then select Snap to Shape.
Static Guides make it easy to manually align text boxes, graphics, and other objects precisely to a specified area of a document.
-
On the View menu, point to Guides, and then click Static Guides.
-
To add additional guides, hold down Option and drag a guide anywhere you want.
Dynamic Guides — lines that run through the center of other objects and the center of the slide — appear when you drag an object. You can use Dynamic Guides to align an object relative to another object. Or, you can align an object relative to the center of a slide.
-
On the View menu, point to Guides, and then click Dynamic Guides.
-
Click the object that you want to align.
Tip: To select multiple objects, hold down Shift, and then click the objects that you want.
-
Drag the object near another object that you want to align it with, or drag the object near the center of the page.
Note: To temporarily hide Dynamic Guides, hold down Command while you drag the object.
-
Use the grid lines that appear to obtain the alignment that you want.
Excel
-
Hold down Shift , click the objects that you want to align, and then click the Format tab.
-
Click Arrange > Align, and then click the alignment that you want.


