
If you want to organize your messages in Outlook on the web, you can create new folders or rename, move, or delete existing folders. You can also set up rules so that Outlook on the web automatically moves messages into folders depending on conditions that you specify.
Note: If the instructions don't match what you see, you might be using an older version of Outlook on the web. Try the Instructions for classic Outlook on the web.
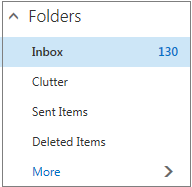
By default, your account starts with these folders:
-
Inbox Incoming messages arrive in your inbox unless you’ve created an Inbox rule to redirect them to another folder, or they’re identified as junk email.
-
Junk Email Messages that have junk email characteristics but that aren’t blocked by a spam filter before they reach your mailbox will automatically be moved to this folder. Learn more about how to Filter junk email and spam in Outlook on the web.
-
Drafts If you start writing a message but don't finish, it will automatically be saved to your Drafts folder. You can come back to the message later to continue editing it, and then send it.
-
Sent Items By default, a copy of every message you send is put in your Sent Items folder.
-
Deleted Items When you delete a message, it’s moved to the Deleted Items folder.
Most of what you can do with a folder can be found in the context menu that appears when you right-click a folder.
-
Create new subfolder Use to create a new subfolder in the folder you right-clicked.
-
Delete folder Moves the folder and all its contents to Deleted Items.
-
Delete all Moves all the items in the selected folder to Deleted Items.
-
Mark all as read Marks as read all items in the selected folder.
-
Rename Give the folder a different name. Default folders, such as the Inbox folder, can't be renamed.
Create new folders to organize your messages as you like. For example, you can create a folder for a specific project, for all messages from a particular person, or for all messages sent to a distribution group that you’re a member of.
Create a new folder
-
At the bottom of the folder list, select New folder.
-
In the new folder box, enter a name for the folder and then press Enter.
Create a new subfolder
-
In the folder pane, right-click the folder to which you want to add a subfolder.
-
Select Create new subfolder.
-
In the new folder box, enter a name for the folder and press Enter.
Note: You can't rename default folders such as Inbox, Drafts, or Deleted Items.
-
In the folder pane, right-click the folder you want to rename.
-
Select Rename.
-
Enter a name for the folder and press Enter.
Note: You can't delete default folders such as Inbox and Sent Items.
-
In the folder pane, right-click the folder or subfolder you want to delete.
-
Select Delete folder.
-
Select OK to confirm.
In Outlook on the web, the Favorites folder automatically includes these folders: Inbox, Sent Items, and Deleted Items. You can add folders to Favorites to make it easier to keep track of the folders that are most important to you. Adding a folder to Favorites doesn’t move the folder, but instead creates a link to it. Folders added to Favorites are still in your personal folder.
-
To add a folder to Favorites, right-click the folder under your personal folder, and select Add to Favorites.
-
To reorganize folders in Favorites, choose a folder and drag it to a new position in the folder hierarchy. Or right-click a folder and then select Move up in list or Move down in list.
-
To remove a folder, right-click the folder you want to remove from Favorites and select Remove from Favorites. This action only removes the link to the folder; the folder is still in your personal folder.
Depending on your organization's policies, you may be able to add a public folder to Favorites. For information about how to create a public folder in Outlook on the web and add it to your Favorites, see Create and share a public folder.
Note: Policies are controlled by your organization’s administrator. Policies may not be available for your account.
Archive and retention policies let you automatically move or delete messages after they’ve been in your mailbox for a certain amount of time. To learn more about these policies and how to assign them, see Assign retention labels and archive policies in Outlook on the web.
When you delete a message or folder, it’s moved to the Deleted Items folder. You can either manually remove messages from the folder or you can set Outlook on the web to automatically empty your Deleted Items folder when you sign out.
Note: Contents of deleted folders are only visible once you expand the Deleted Items folder: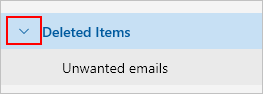
Empty your Deleted Items folder when you sign out
-
At the top of the screen, click Settings .
-
Select Mail > Message handling.
-
Under Message options, select the check box next to Empty my deleted items folder.
-
Click Save.
To learn how to restore deleted messages, see Recover deleted email messages in Outlook on the web.
Use commands on the Outlook on the web command bar or set up rules to have Outlook on the web automatically move messages into folders as you receive them.
Use commands to automatically handle messages
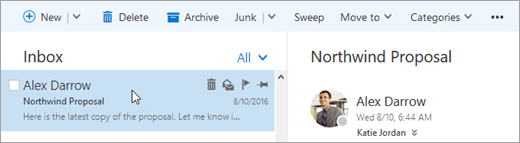
Commands like Sweep and Move to let you automatically delete or move messages from a particular sender. Commands appear on the Outlook on the web command bar when you select a message in your inbox.
-
Sweep lets you quickly delete unwanted emails in your Inbox. When you select a message, you can automatically delete all incoming email from that sender, keep only the latest email and delete the rest, or delete emails older than 10 days.
-
Move to lets you move a message a specific message to another folder.
Set up rules to automatically handle messages
Use rules to automatically move messages into folders as you receive them.
-
In your inbox, select a message to which you want to assign a rule and select

-
Select Create rule. The Create a rule dialog box opens.
-
Choose a folder to which you want to move messages from that sender.
-
To choose other conditions and actions, select More options.
By default, the Stop processing more rules check box is selected. When this is selected, subsequent rules will be ignored, even if they apply to the message.
-
Select OK to save the rule.
Instructions for classic Outlook on the web
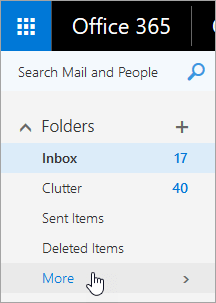
By default, your account starts with these folders:
-
Inbox Incoming messages arrive in your Inbox unless you’ve created an Inbox rule to redirect them to another folder, or they’re identified as junk email.
-
Clutter Helps you filter mail based on how you handled incoming messages in the past. When turned on, the email server keeps track of messages you read or don't read. Messages you don't read are moved to the Clutter folder.
-
Sent Items By default, a copy of every message you send is put in your Sent Items folder.
-
Deleted Items When you delete a message, it’s moved to the Deleted Items folder.
In Outlook on the web, if you choose More under Folders, you'll find those default folders are organized under Favorites. The same default folders also are listed under your personal folder, and become part of a longer list of folders, many of which your administrator might have created. Folders your administrator might have added include:
-
Drafts If you create or respond to a message, but can’t finish it right away, it will automatically be saved to your Drafts folder. You can come back to the message later to continue editing it, and then send it.
-
Junk Email Messages that have junk email characteristics but that aren’t blocked by a spam filter before they reach your mailbox will automatically be moved to this folder. The Learn about junk email and phishing article has more information about your Junk Email folder.
-
Notes This is a read-only folder. You must use Outlook to create or edit items in this folder.
-
Conversation History By default, a copy of every conversation you have in Skype for Business is put in your Conversation History folder.
Most of what you can do with a folder can be found in the shortcut (context) menu that appears when you choose a folder and right-click. Which shortcut appears depends on if you've selected a folder under Favorites or under your personal folder.
Favorites folder
The Favorites folder shows the top mail folders. The shortcut menu features options that are used or needed most often when working with these folders.
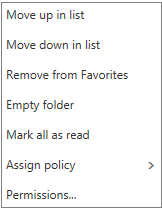
-
Move up in list or Move down in list Use one of these options to reposition the folder higher or lower in the folder hierarchy.
-
Remove from Favorites Removes the folder from Favorites. Removing the folder from Favorites doesn't remove it from your personal folder.
-
Empty folder Deletes everything in the folder, including any subfolders.
-
Mark all as read Marks every item in the folder as read.
-
Assign policy Assign an archive or retention policy to messages in the folder. This option may not be available if your administrator has not enabled it.
-
Permissions Give other users access to folders in your mailbox.
Personal folder
Your personal folder is a collection of all the mail folders available to you. The shortcut (context) menu attached to your personal folders offers more options than the shortcut menu with the Favorites folder. Not all options, however, are available for all folders, and some options might not be available because of administrative permissions.
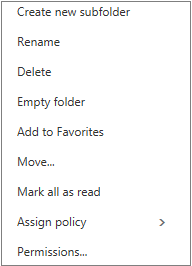
The shortcut menu for the personal folder has four options that the shortcut menu for the Favorites folder doesn't:
-
Create new folder Use to create a new subfolder in the folder you right-clicked.
-
Rename Give the folder a different name. Default folders, such as the Inbox folder, can't be renamed.
-
Add to Favorites Adds (links) the current folder to your Favorites.
-
Move Opens a window so you can move the selected folder to a new location in the folder hierarchy. You also can select and drag a folder to a new location.
Note: The next time you sign in, folders you created will be arranged in alphabetical order.
Create new folders to organize your messages as you like. For example, you can create a folder for a specific project, for all messages from a particular person, or for all messages sent to a distribution group that you’re a member of.
Create a new folder
-
Below Folders, select More.
-
Do one of the following:
-
Next to Favorites or the name of your personal folder, click the Create New Folder button.

-
Right-click your personal folder and then select Create new folder.
-
-
In the new folder box, enter a name for the folder and then press Enter.
Tips:
-
Any new folder created will automatically appear below the default folders.
-
Any new folder created in the Favorites folder will automatically be added to your personal folder, but it can only be deleted from the personal folder.
-
Any new folder created in your personal folder, however, will only appear in the Favorites folder if you right-click it and choose Add to favorites.
Create a new subfolder
-
Below Folders, select More.
-
In your personal folder, right-click the folder that you want to add a subfolder to, and select Create new subfolder.
-
In the new folder box, enter a name for the subfolder and press Enter.
Note: You can't rename default folders such as Inbox, Drafts, or Deleted Items.
-
Below Folders, select More.
-
In your personal folder, right-click the folder you want to rename and select Rename.
-
Enter a name for the folder and press Enter.
You can drag a folder to a new spot in your folder hierarchy, or you can use the Move option in the shortcut menu.
Note: The next time you sign in, folders you created will be arranged in alphabetical order.
-
Below Folders, select More.
-
In your personal folder, right-click the folder you want to move, and select Move.
-
In the Move Folder window that opens, choose a new folder to move the folder into, and select Move.
You also can create a new folder to move the folder into by right-clicking the parent folder you want and choosing Create new folder. Use Inbox rules to automatically move incoming messages to specific folders based on criteria you choose.
Note: You can't delete default folders such as Inbox and Sent Items.
-
Below Folders, select More.
-
Right-click the folder or subfolder you want to delete, and select Delete.
-
Select OK to confirm.
In Outlook on the web, the Favorites folder automatically includes these folders: Inbox, Clutter, Sent Items, Deleted Items. You can add folders to Favorites to make it easier to keep track of the folders that are most important to you. Adding a folder to Favorites doesn’t move the folder, but instead creates a link to it. Folders added to Favorites are still in your personal folder.
-
To add a folder to Favorites, right-click the folder under your personal folder, and select Add to Favorites.
-
To reorganize folders, choose a folder and drag it to a new position in the folder hierarchy. Or right-click a folder and then select Move up in list or Move down in list.
-
To remove a folder, right-click the folder you want to remove from Favorites and select Remove from Favorites. This action only removes the link to the folder; the folder is still in your personal folder.
Depending on your organization's policies, you may be able to add a public folder to Favorites. For information about how to create a public folder in Outlook on the web and add it to your Favorites, see Create and share a public folder.
Note: Policies are controlled by your organization’s administrator. Policies may not be available for your account.
Archive and retention policies let you automatically move or delete messages after they’ve been in your mailbox for a certain amount of time. To learn more about these policies and how to assign them, see Assign retention labels and archive policies in Outlook on the web.
When you delete a message, it’s moved to the Deleted Items folder. You can either manually remove messages from the folder or you can set Outlook on the web to automatically empty your Deleted Items folder when you sign out. Your administrator may also have set up a policy to empty items from your Deleted Items folder after they’ve been there for a preset number of days.
Empty your Deleted Items folder when you sign out
-
At the top of the screen, click Settings

-
Under Your app settings, select Mail.
-
Select Automatic processing > Message options > Empty the Deleted Items folder when I sign out.
-
Click Save

To learn how to restore deleted messages, see Restore deleted email messages in Outlook on the web.
Use commands on the Outlook on the web menu bar or set up rules to have Outlook on the web automatically move messages into folders as you receive them.
Use commands to automatically handle messages
Commands like Sweep and Move to let you automatically delete or move messages from a particular sender. Commands appear on the Outlook on the web menu bar when you select a message in your inbox.
-
Sweep lets you quickly delete unwanted emails in your Inbox. When you select a message, you can automatically delete all incoming email from that sender, keep only the latest email, or delete emails older than 10 days.
-
Move to lets you move a message a specific message or automatically move all messages from that sender to another folder.
Set up rules to automatically handle messages
Use rules to automatically move messages into folders as you receive them.
-
In your inbox, select a message to which you want to assign a rule and click

-
Click Create rule. The New inbox rule dialog box (form) opens.
-
Name Shows the name of the sender.
-
When the message arrives, and it matches all of these conditions By default, three conditions are set for the received message. Select the arrows to choose other conditions. If you want to use more conditions, choose Add condition.
-
Do all of the following By default, one of three predefined actions is set. Select the arrow to choose other actions. If you want to add another action, choose Add action.
-
Except if it matches any of these conditions By default, no exceptions are set. Select the arrow to set an exception to the conditions above. Choose Add exception if more than one is needed.
-
Stop processing more rules By default, the check box is selected. When this is selected, subsequent rules will be ignored, even if they apply to the message.
-
-
Click OK to save the rule. Depending on the structure of your account, you might receive a warning about modifying your rules. If necessary, consult your administrator.
Note: If you need to move messages out of your mailbox but want to save them, you can use Outlook to save your messages to a .pst file. The messages will be available only when you’re using Outlook and can access the .pst file. For more information, see Introduction to Outlook Data Files (.pst and .ost), and Create an Outlook Data File (.pst) to save your information.


