
Map a network drive to a SharePoint library
It makes sense to want to map a network drive to a document library from SharePoint in Microsoft 365 so that you can see the library's files in File Explorer.
However, there is a simpler way to achieve your aim: SharePoint can put files in File Explorer without you having to map a drive, and the files don't take up storage space on your device.
We recommend using Add shortcut to My files or Syncinstead of mapping a network drive to SharePoint

When someone shares a folder in Microsoft OneDrive, SharePoint, or Teams, you can add a shortcut to the shared folder in your OneDrive to easily find and work with the files. These shortcuts appear in OneDrive on the web, Windows File Explorer, Mac Finder, Teams, and in the OneDrive mobile apps.
We recommend using OneDrive shortcuts as the more versatile option when available.
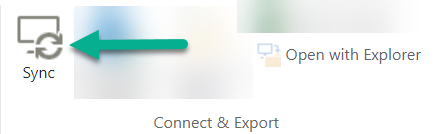
Sync is a fast and reliable method for putting SharePoint files into folders on your device that you can then manage with File Explorer. Whenever you open a SharePoint-based file from File Explorer and then save it, your changes are automatically synchronized to the online SharePoint document library.
When you're looking at a document library, Sync is available near the top of the page:
Modern experience:

Classic experience:
How to Sync SharePoint files and folders
Setting up Sync is a one-time process that permanently puts files in File Explorer, without taking up storage space on your device.
Watch a 90-second video demonstration about using Sync on your SharePoint files and folders.
For more detailed instructions, see Add shortcuts to shared folders or Sync SharePoint and Teams files with your computer.
If you want to map a network drive to SharePoint instead
Before you start, it's important to note that this is legacy technology and it may be affected by the deprecation of Internet Explorer in August 2021 (see Microsoft 365 apps and services to end support for IE 11).
When you're mapping a network drive to a SharePoint document library:
-
The steps that require a web browser must be performed in Internet Explorer (version 10 or 11).
-
A mapped drive is only available when you're online.
-
Performance depends on connectivity speed.
-
To maintain the mapped network drive after it's established, you should periodically (say, every two weeks) navigate to the SharePoint library in Internet Explorer. This action refreshes an underlying "security token" that gives you permission to have the network drive mapped to the online library.
Three-step process for mapping a drive
The main steps are described in the following sections:
Get the address details of the SharePoint site or library
-
Open Internet Explorer and go to the Microsoft 365 sign-in page at https://portal.office.com.
-
Sign in with the username and password for your work or school account.
-
On the home page, select

-
Select the document library that you want to map to.
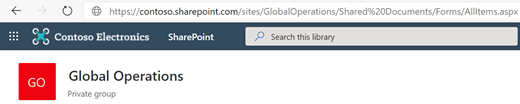
In the example picture above, we've navigated to a Contoso.com team site and selected the library named Documents.
-
If you're using modern SharePoint, switch to classic SharePoint: At the bottom of the navigation pane on the left, select Return to classic SharePoint. If you're using classic SharePoint, go to step 6.
-
On the Ribbon at the top, select Library.
-
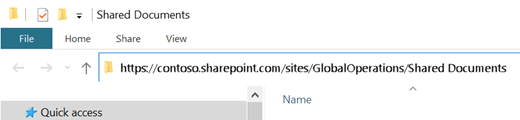
Select Open with Explorer.
Windows File Explorer opens.
-
Select the address box and copy the "https://..." address shown there.
In Internet Explorer, add the SharePoint document library to Trusted Sites
-
In Internet Explorer, select the Settings

-
Select the Security tab, then select Trusted sites.
-
Select Sites.
-
Under Add this web site to the zone, enter the root of the site you want to map to, as illustrated in the previous procedure. The root is https:// plus the first part of the address (before the first instance of a single "/" character.) For example, using the document library illustrated in the previous procedure, the root of the site is:
https://contoso.sharepoint.com
-
Select Add.
Map a drive to your document library
-
Switch back to File Explorer.
-
In the pane on the left, right-click the Network folder and select Map network drive.
-
Click the link named Connect to a web site that you can use to store your documents and pictures.
-
Click Next twice to walk through the informational steps of the Add Network Location wizard.
-
Under the Specify the location of your site heading, in Internet or network address box, paste the address you copied from File Explorer earlier, then select Next.
-
Enter a descriptive name for your network location. (This name will appear as an entry in the left pane of File Explorer, under This PC or My Computer, next to a folder icon.)
-
Select Next, then select Finish.
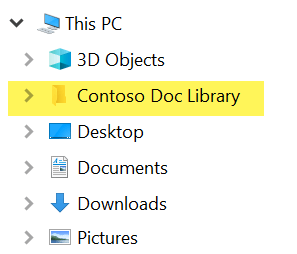
In File Explorer, the mapped library appears as a folder item under This PC:
See Also


Need more help?
Want more options?
Explore subscription benefits, browse training courses, learn how to secure your device, and more.


Communities help you ask and answer questions, give feedback, and hear from experts with rich knowledge.


