
Audiences are groupings of users that you can use to target content to people in your organization. Groupings are determined by memberships in Exchange Online distribution groups, memberships in SharePoint groups, or rules that are configured by the SharePoint admin using the SharePoint admin center. SharePoint administrators can add, edit, and delete audiences using the SharePoint admin center.
Note: You must have Microsoft 365 global admin permissions to access the SharePoint admin center and perform the tasks outlined in this article.
Audiences enable organizations to target content to specific users. You can apply audiences to content at the list or list-item levels.
In , audience rules SharePointcan be based on information in the following repositories:
-
The Microsoft 365 directory service user account, which is a Microsoft Azure Active Directory instance
-
Membership in an identity management system, for example, Active Directory Domain Services (AD DS)
-
An organization’s reporting structure (if this information is stored in AD DS).
Audiences are defined and contained in user profile service applications.
Each audience must be compiled before content can be targeted to that audience. Compilation identifies membership in an audience by crawling the data most recently reported from the identity management system. In SharePoint, audience compilation is configured for you and occurs at regular pre-determined intervals by the Microsoft 365 directory.
Security Note: Audiences are only a convenient way to deliver content to specific groups of people. The content is still available and visible to anyone with appropriate permissions. For more information, read Plan your permissions strategy.
Add, edit, or delete an audience
Audiences group users in an organization so that you can personalize information to ensure that it is as relevant to them. When you add a new audience, you also add an audience rule that determines the membership of the audience. Audiences always have at least one audience rule. For more information about audience rules, see Add, edit, or delete an audience rule.
When you add a new audience, you also select an owner for the audience. The owner should be someone who understands why the audience was created and who can be contacted if there is a problem with the audience. The person who created the audience is often specified as the owner, but this is not a requirement. Having audience owners is helpful in enterprises that have a large number of audiences created by several different administrators.
Important: When you add a new audience, you cannot view its members until the new audience is compiled.
Add an audience
You can add an audience when you want to filter the delivery of content so that it is visible only to selected users.
-
Sign in to Microsoft 365 as a global admin or SharePoint admin.
-
Select the app launcher icon

-
In the left pane, choose Admin centers > SharePoint.
-
Choose User Profiles.
-
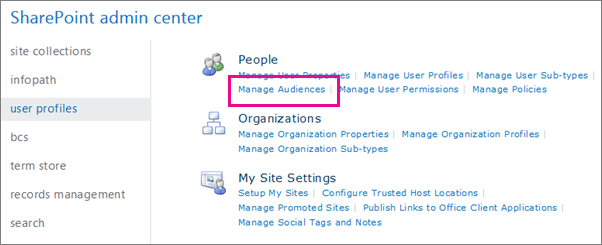
Under People, choose Manage Audiences.
-
On the View Audiences page, select New Audience.
-
On the Create Audience page, in the Properties section, in the Name box, type a name for the new audience.
-
In the Description box, type a detailed description of the new audience.
-
In the Owner box, type the account name of the user who will own and manage this audience. You can select Check Names to verify that you have typed the name correctly, or you can select Browse to search for an account name.
-
Select Satisfy all of the rules or Satisfy any of the rules to determine the members of this audience.
-
Select OK.
-
On the Add Audience Rule page, take one of the following actions:
-
To add a rule based on the properties of a user:
-
In the Operand section, select User.
-
In the Operator section, select Reports Under to create a rule based on organizational hierarchy or select Member Of to target by group or distribution list.
-
In the Value box, type or select the user that you want to use to test this rule.
-
For a Reports Under rule, select the person who is the manager of the users you want to include in the audience.
-
For a Member Of audience, select the group or distribution list to include for the audience rule.
-
-
-
To add a rule based on a user profile property:
-
In the Operand section, select Property, and then select a property from the list.
-
From the Operator list, select an operator for the property. Although each property has a slightly different set of operators, common operators include = and Contains.
-
In the Value section, type a value to use when evaluating the property against this rule.
-
-
-
Select OK.
Edit an audience
You can change the name, description, or owner of an audience. You can also change whether audience members must satisfy all audience rules or can satisfy any of the audience rules.
-
Sign in to Microsoft 365 as a global admin or SharePoint admin.
-
Select the app launcher icon
-
In the left pane, choose Admin centers > SharePoint.
-
Choose User Profiles.
-
Under People, choose Manage Audiences.
-
On the View Audiences page, in the list of audiences, point to the name of the audience that you want to edit, select the arrow that appears, and then select Edit.
-
On the Edit Audience page, you can make the following changes:
-
In the Properties section, you can change the name or description of the audience.
-
In the Owner box, you can type the account name of the user that will own and manage this audience. You can select Check Names to verify that you have typed the name correctly, or you can select Browse to search for an account name.
-
You can select Satisfy all of the rules or Satisfy any of the rules to determine the membership of this audience.
-
-
Select OK to apply your changes.
Delete an audience
You might want to delete an audience when there is no longer a business need to target content to the users and groups in that audience.
-
Sign in to Microsoft 365 as a global admin or SharePoint admin.
-
Select the app launcher icon
-
In the left pane, choose Admin centers > SharePoint.
-
Choose User Profiles.
-
Under People, choose Manage Audiences.
-
On the View Audiences page, in the list of audiences, select the audience that you want to delete and then select Delete.
-
Select OK to confirm the deletion.
Add, edit, or delete an audience rule
When you add an audience, you also create an audience rule that determines the membership of the audience. Audiences always have at least one audience rule, but you can change audience rules at any time. New or edited audience rules are not applied until the audience is recompiled during the next Microsoft 365 directory sync.
Each audience rule includes the following elements:
-
Operand identifies the user or property that you want to include in the query for the rule.
-
Operator determines whether users who are compared to the value are included in or excluded from the rule.
-
Value is the point of comparison that is used by the query.
Audiences with multiple rules use one of the following sets of logic:
-
Satisfy all of the rules: Users must match all rules to become members of the audience. Added rules tend to reduce the size of the audience.
-
Satisfy any of the rules: Users that match any rules become members of the audience. Added rules tend to increase the size of the audience.
Add an audience rule
Adding audience rules is a good practice in the following situations:
-
New value for the User operand You are targeting an audience by membership or reporting structure, and you want to add users in a different distribution list or reporting to a different manager.
-
New operator the User operand You are currently targeting by reporting structure and want to target by membership in a distribution list.
-
New operand You are currently targeting an audience by membership or reporting structure, and you want to expand or reduce the membership based on a user profile property.
-
New Property operand You are targeting an audience based on one property and you want to expand or reduce the membership based on an additional property.
To add an audience rule, follow these instructions.
-
Sign in to Microsoft 365 as a global admin or SharePoint admin.
-
Select the app launcher icon
-
In the left pane, choose Admin centers > SharePoint.
-
Choose User Profiles.
-
Under People, choose Manage Audiences.
-
On the View Audiences page, point to the name of the audience that you want to configure, select the arrow that appears, and then select View Properties.
-
On the View Audience Properties page, in the Audience Rules section, select Add rule.
-
On the Add Audience Rule page, take one of the following actions:
-
To add a rule based on a user:
-
In the Operand section, select User.
-
In the Operator section, select Reports Under to create a rule based on organizational hierarchy or select Member Of to target by group or distribution list.
-
In the Value box, type or select the user that you want to use to test this rule.
-
For a Reports Under rule, select the person who is the manager of the users you want to include in the audience.
-
For a Member Of audience, select the group or distribution list to include for the audience rule.
-
-
-
To add a rule based on a user profile property:
-
In the Operand section, select Property, and then select a property from the list.
-
From the Operator list, select an operator for the property. Although each property has a slightly different set of operators, common operators include = and Contains.
-
In the Value section, type a value to use when evaluating the property against this rule.
-
-
-
Select OK.
Edit an audience rule
Editing an audience rule is a good practice in the following situations:
-
Operand This is the least likely change, because it is almost always a better practice to add a new rule. However, you might change a User operand based on reporting structure or membership in a distribution list to a Property operand based on a manager, title, or other property that is intended to create an audience with a similar but better-targeted membership.
-
Operator You might change the operator if the actual membership of the list is too narrow or broad. For example, you might change the = (Equals) operator to the Contains operator to increase the membership of the audience.
-
Value You might change the target value for an audience rule if you are evaluating the right user operand or property, but the membership is larger or smaller than intended, or there are users or groups that you want to include or exclude based on changing business needs. If the property is multivalued, you can also add one or more additional values.
Note: Changes to audience rules will not be reflected until after the audience is recompiled according its regular predetermined time interval in SharePoint.
-
Sign in to Microsoft 365 as a global admin or SharePoint admin.
-
Select the app launcher icon
-
In the left pane, choose Admin centers > SharePoint.
-
Choose User Profiles.
-
Under People, choose Manage Audiences.
-
On the View Audiences page, point to the audience that you want to configure, select the arrow that appears, and then select View Properties.
-
On the View Audience Properties page, in the Audience Rules section, select the rule that you want to edit.
-
On the Edit Audience Rule page, take one of the following actions:
-
To base the audience membership on a user:
-
In the Operand section, select User.
-
In the Operator section, select Reports Under to create a rule based on organizational hierarchy or select Member Of to target by group or distribution list.
-
In the Value box, type or select the user that you want to use to test this rule.
-
For a Reports Under rule, select the person who is the manager of the users you want to include in the audience.
-
For a Member Of audience, select the group or distribution list to include for the audience rule.
-
-
-
To base the audience membership on a user profile property:
-
In the Operand section, select Property, and then select a property from the list.
-
From the Operator list, select an operator for the property. Although each property has a slightly different set of operators, common operators include = and Contains.
-
In the Value section, type a value to use when evaluating the property against this rule.
-
-
-
Select OK.
Delete an audience rule
The membership of a list can be expanded or reduced if the business need for targeting content has changed. If an audience must satisfy all rules, deleting an audience rule expands the membership. If an audience can satisfy any of the rules, deleting an audience rule reduces the membership. If the audience itself is no longer needed, you should delete the entire audience instead of just specific rules.
Note: Audiences will continue to include audiences that match deleted rules until compilation is complete.
-
Sign in to Microsoft 365 as a global admin or SharePoint admin.
-
Select the app launcher icon
-
In the left pane, choose Admin centers > SharePoint.
-
Choose User Profiles.
-
Under People, choose Manage Audiences.
-
On the View Audiences page, point to the audience that you want to configure, select the arrow that appears, and then select View Properties.
-
On the View Audience Properties page, in the Audience Rules section, select the rule that you want to delete.
-
At the bottom of the Edit Audience Rule page, select Delete.
-
Select OK to confirm the deletion.
View audiences
You can view a list of audiences in order to select an audience or audience rule to edit or delete. Use this procedure to view all audiences.
-
Sign in to Microsoft 365 as a global admin or SharePoint admin.
-
Select the app launcher icon
-
In the left pane, choose Admin centers > SharePoint.
-
Choose User Profiles.
-
Under People, choose Manage Audiences.
-
To find a specific audience in a list of audiences, type the first few letters of the audience name in the Find audiences that start with box, and then select Find.


