
Note: We are currently updating this feature and rolling out changes, so you may have a different experience than what is described below. Learn more about upcoming functionality improvements in Create a form with Microsoft Forms.
Surveys let other people fill out your list—like a sign-up sheet or questionnaire—where you can see it all in one place online. Here’s how to create your survey in OneDrive and OneDrive for work or school:
In OneDrive for work or school
To get started with building a survey, follow these steps:
-
Sign in to Microsoft 365 with your school or work credentials.
-
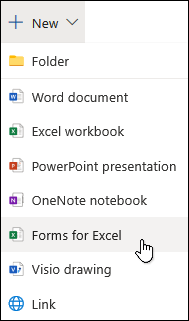
Click New, and then select Forms for Excel to begin creating your survey.
Note: Forms for Excel is available for OneDrive for work or school and new team sites connected with Microsoft 365 groups. Learn more about Microsoft 365 groups.
-
Enter a name for your survey, and then click Create.
-
Click Add Question to add a new question to the survey. You can choose to add Choice, Text, Rating, or Date questions.
Note: Your survey is saved automatically while you create it.

-
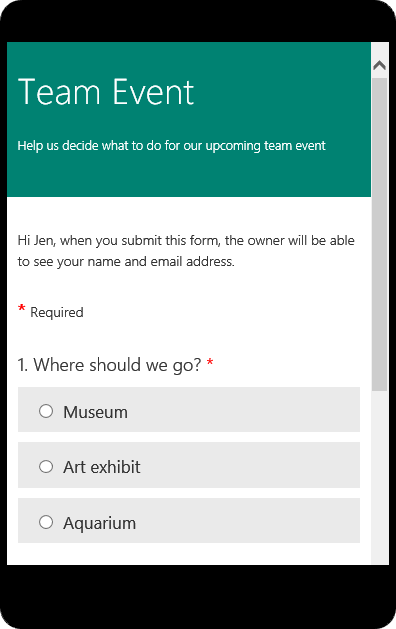
For choice questions, enter the text you want to display for the question and each of the choices.
Want to add more choices? Click Add Option to add more choices than the default two choices. Click Add “Other” Option to add a choice option that displays the text Other. To remove a choice, click the trash can button next to it. You can also choose to make a question required or allow multiple choices for a question by changing the settings at the bottom of the question. To have Microsoft Forms randomly shuffle the order of the options displayed to users of the survey, click the ellipses button (...) and then click Shuffle options.
Tip: Click the ellipses button (…) and then click Subtitle to add a subtitle for a question.
Some choice questions will trigger auto suggestions.
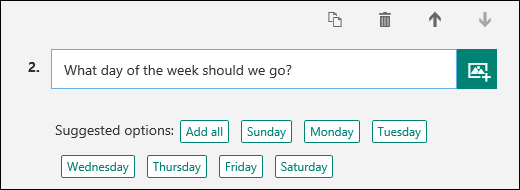
Click on the suggested options to add as choices. In the following example, Monday, Wednesday, and Friday are selected.
-
Click Add Question to add more questions to your survey. To change the order of the questions, click the Up or Down arrows on the right side of each question. For text questions, select the Long Answer option if you want a larger text box displayed on the survey.
Tip: To copy a question, select it and then click the Copy Question button

-
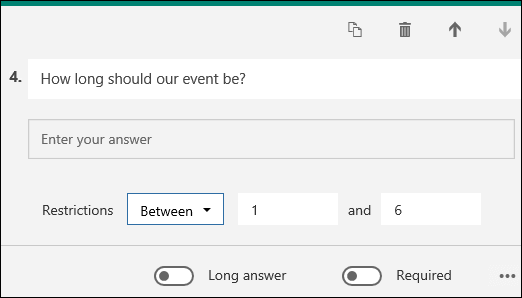
Text questions also allow you to set restrictions when you need to have numbers as the answer. Click the ellipses button (…) and then click Restrictions. You can choose to restrict the numbers by selecting from the various options such as Greater than, Less than, Between, and many others.
-
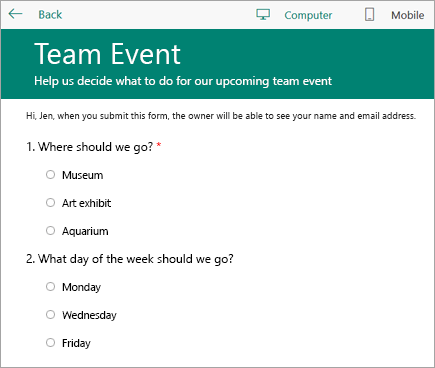
Click Preview at the top of the design window to see how your survey will look on a computer. If you want to test your survey, enter answers for the questions in preview mode and then click Submit.
-
Click Mobile to see how your survey will look on a mobile device.
Click Back when you are finished previewing your survey.


In OneDrive
Important: Excel survey is retiring soon. While any existing surveys you've created in OneDrive via Create > Excel survey will still work as expected, use Microsoft Forms for any new survey creation.
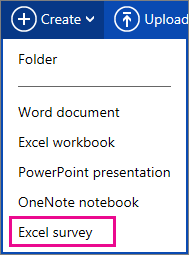
Near the top of the screen, click Create, and then click Excel survey.
You’ll get a form that walks you through creating your survey.
Tips for creating your Excel survey
-
You can add a survey to an existing workbook. With your workbook open in Excel for the web, go to Home and in the Tables group, click Survey > New Survey. A survey worksheet will be added to your workbook
-
Fill out the Enter a title and Enter a description fields. If you don’t want a title or description, delete the placeholder text.
-
Drag questions up or down to change their order on the form.
-
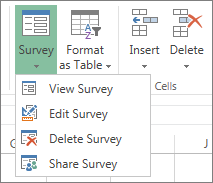
When you want to see exactly what your recipients will see, click Save and View. Go back to editing by clicking Edit Survey. When you’re done, click Share Survey.
-
If you click Close, you can get back to editing and viewing the form by going to Home > Survey in Excel for the web.
-
Clicking Share Survey starts the process of creating a link to your form. Click Create to generate the link. Copy and paste the link in mail, a message, or post. Anyone who opens the link can fill out your form, but they can’t see the resulting workbook unless you give them permission.
Make form questions work for you
As you add questions to your form, remember that each question corresponds to a column in the Excel worksheet.

Think of how you’ll use the information in the resulting worksheet. For example, giving people a list of choices instead of letting them type their response lets you sort and filter the responses.
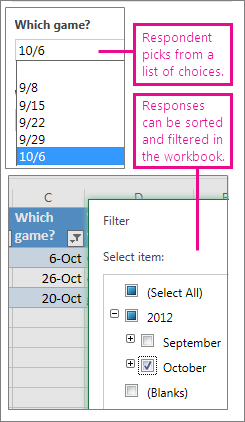
To set this up, go to Home > Survey > Edit Survey, and click on a question to edit it. Pick Choice as the Response Type, and then put each choice on a separate line in the Choices box.

Try other response types, too.
-
Date or Time lets you sort results in chronological order.
-
Number responses can be calculated with math functions to find things like totals and averages.
-
You can quickly filter Yes/No responses to see who’s in and who’s out.
Note: Columns in the spreadsheet are built as you add questions to the survey form. Changes you make to the survey form are updated in the spreadsheet, unless you delete a question or change the order of questions on the form. You'll have to update the spreadsheet manually in those cases: delete the columns that go with the questions you deleted, or cut and paste columns to change their order.


