
You can use the new Asset Library template to set up a library that makes it easy to store, organize, and find rich media assets, such as image, audio, or video files.
In this article
Features of the Asset Library
An Asset Library is a type of document library that has been extended with additional functionality to support the storage and organization of rich media, such as images, videos, or audio files.
The Asset Library template supports the following features:
New digital asset content types The Asset Library is pre-configured to support the new content types for image, video, and audio files. These content types include new columns that enable you to track metadata that is specific to rich media assets.
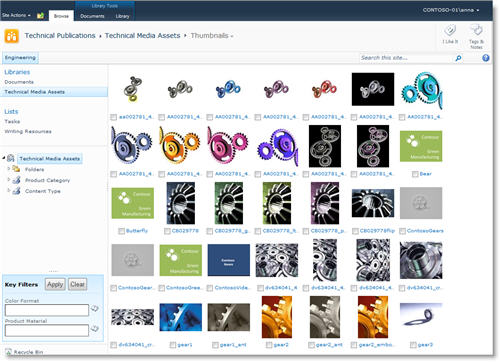
Thumbnail–centric views The default view for the Asset Library is the Thumbnails view, which displays small thumbnails of the assets in the library. This view makes it easy to quickly browse for image and video files.
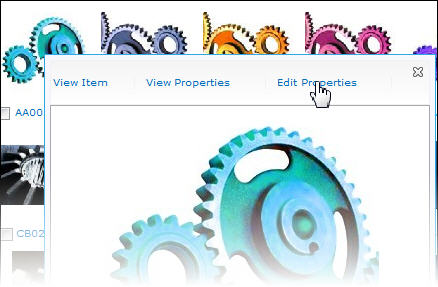
Image previews When you move your pointer over an asset in the Thumbnails view, a preview window displays a larger version of the image, as well as image properties. You can take actions on the asset from the preview window.
Automatic metadata extraction for image files When you upload image files to an Asset Library, any existing metadata for the file is extracted and promoted to corresponding columns (if available) in the library. Automatic metadata extraction is supported for the following image file types: BMP, GIF, ICO, JPEG, PNG, and TIFF.
Podcasting support through RSS You can use the RSS feature of the asset library to set up podcasting for audio or video files stored in Asset Library. Site users can subscribe to the RSS feed for the library to receive new content as it is added via podcast.
Create an Asset Library
To create an Asset Library, you must have permission to create lists. Site owners have this permission by default.
-
Navigate to the site where you want to create the library.
-
On the Site Actions menu, click View All Site Content, and then click Create.
-
Under Filter By, select Library, and then click Asset Library.
-
In the name box, type a name for the library, and then click Create.
Because an Asset Library is a specialized kind of document library, you can configure the same settings for it that you can configure for a document library. After you create an Asset Library, you can modify settings for features such as versioning, metadata navigation, or workflow by using the Library Settings command on the Library tab of the ribbon. For more information about configuring these options, browse the Library topics in Help.
If you want to change what properties are displayed in the preview window when you rest the cursor on a thumbnail, you can do so by customizing the Thumbnails view for the library.
Upload a file to an Asset Library
To upload a single file to an asset library, you use the New Document command on the ribbon.
If the file you want to upload is very large, you might want to check with your administrator to see what the file size limit is for uploaded files on this site. The default file size threshold for most libraries is 50 MB, and this might not be sufficient for many video files. You may need to work with the administrator for your site to adjust this setting. The maximum file size limit for uploaded files on a SharePoint site is 2 GB. You cannot upload files that exceed this 2 GB limit.
-
Navigate to the Asset Library where you want to upload files.
-
Click the Documents tab on the Library Tools ribbon.
-
Point to New Document, and then select the content type for file you want to upload (Image, Audio, or Video).
-
In the Upload Document dialog box, click Browse to locate the file you want, and then click OK.
-
Do one of the following, depending on which media type you are uploading.
-
If you are uploading an image file: Type a name for the file you are uploading. You can also specify a Title, Keywords, and Comments to help make it easier for users to find this. If your image already has some metadata associated with it, you may notice that some fields are pre-populated for you.
-
If you are uploading a video file: Type a name for the file you are uploading. You can also specify Title, Keywords, Author, and Comments to help make it easier for users to find this file. If you want a specific preview image to display for this video, type the Web address for the image file you would like to use next to Preview Image URL. You can also specify Copyright information, as well as the Frame Width and Frame Height for the video.
-
If you are uploading an audio file: Type a name for the file you are uploading. You can also specify Title, Keywords, Author, and Comments. If you want a specific preview image to display for this audio file, type the type the Web address for the image file you would like to use next to Preview Image URL. You can also specify Copyright information.
-
-
Click Save.


