
When your boss asks how your project is doing compared to your original plan, the last thing you want to say is “I don’t know.” You can avoid that fate by setting and saving a baseline as a snapshot of your original schedule before your project gets rolling.
These instructions are specific to Microsoft Project Online and Microsoft Project Server.
Set a baseline for your project
-
Go to Schedule in the Quick Launch, then on the Task tab, in the Editing group, click Set Baseline, and then click the numbered baseline you want to use for the current project data. You can save up to 11 different baseline data sets, including the unnumbered Baseline.
Tip: After a baseline is saved, the date when it was saved is included next to it in the list of baselines that you can choose from when you set a baseline. This can help you choose which numbered baseline to use, and is a good reference for remembering when you last captured a baseline of your project data.
Clear a baseline for your project
You can also clear baselines that you have previously set.
-
Go to Schedule in the Quick Launch, then on the Task tab, in the Editing group, click Clear Baseline, and then click the numbered baseline you want to clear.
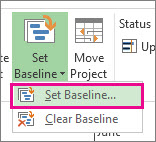
Set a baseline
-
Click Project > Set Baseline > Set Baseline.
-
Pick the baseline you want to set.
Tip: You can set as many as 11 baselines in a single project. Do this to get frequent snapshots of where things stand.
-
Click Entire Project.
You don’t need to take any special steps to save the baseline. When you save your project, the baseline is saved with it.
Project management tip If your current data never seems to sync with your baselines, you may need to take a hard look at your original plan. The project scope may have changed, for example, or you may need more resources than you first thought. Check with your project stakeholders, and consider setting a new baseline using the above procedure.
Read more about how to track the progress of your schedule, whether you’re a beginner or expert.
Update a baseline
If you add a task to your project after a baseline has been set, you can add the new task to this baseline.
-
Select the new task you want to add to the baseline.
If the task has subtasks, be sure to select them, too. -
Click Project > Set baseline > Set Baseline, and then pick the baseline you want to update.
-
In the Set Baseline dialog box, pick the baseline you want to update.
-
Under For, click Selected tasks.
-
If you’re adding subtasks, under Roll up baselines, click one of the following to specify how you want subtasks to be added up their summary tasks.
-
To all summary tasks Updated baseline data for the new tasks is rolled up to all associated summary tasks, not just the nearest summary task.
-
From subtasks into selected summary task(s) Baseline data is updated only for the selected summary task. Typically, you’ll do this so that only the nearest summary task reflects the new roll-up data.
-


