
A healthy community is one that is lively, growing, and useful to its members. It fosters open and engaging discussion on topics of interest to like-minded individuals. Community moderators ensure that members enjoy the rewards of community membership, such as finding and keeping in touch with key individuals and staying current on trends and hot topics, while removing content that is inappropriate or detracts from the overall purpose of the community. Moderators also ensure that questions get answered, key content is promoted, and key contributors are recognized with special badges. The moderator’s role is to keep a community vibrant and inviting. This article explains the moderator features available for SharePoint communities.
In this article
Moderator permissions
The Moderators group is created automatically when a community site or site collection is provisioned. Moderators have higher level privileges than community members, which enable them to view all discussions and replies; promote content; assign badges to top contributors; and review, edit, and delete reported content. Moderators can also assign themselves “Moderator” badges as a way of identifying themselves to the larger community.
Grant moderator permissions
Note: Only the community owner or administrator can grant moderator permissions.
-
From the root of your site collection, click Settings

-
Under Users and Permissions, click Site permissions.
-
Select the check box next to the Moderators group.
-
On the Permissions tab, click Grant Permissions.
-
Type the email address of the person to whom you want to grant moderator permissions.
-
Click Show Options.
-
In the drop-down list, click Moderators [Moderate].
-
Click Share.
Manage categories
Content categories are organizational tools for managing discussions on a community. Moderators create and delete categories based on the purpose of the community and the types of discussions that develop over time. Moderators can also change the category of a discussion at any time.
Members select a category when creating a discussion and use the categories as a filtering mechanism for finding discussions of relevance to them.
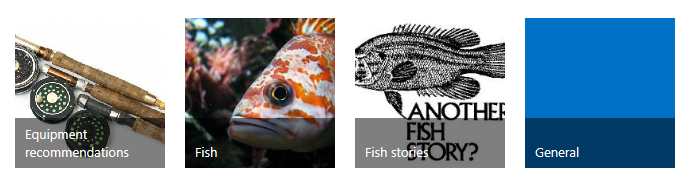
By default, categories are organized alphabetically on the Categories page. Members can change the organization according to hot topics or recent activity. Each category is represented by a tile. Tiles contain title, description, and activity information and can include a picture that represents the content of the category, as shown below.
Create a category
-
From the Community tools web part on your community home page, click Create categories.
-
Click new item.
-
In Category Name, type a name for the category. This name will appear on the tile of the Categories page and in the category dropdown that authors use to classify their discussions. The name should be relatively short but descriptive enough that members understand what type of discussions the category contains.
-
In Description, type a brief description of the category contents. The description is optional.
-
In Category Picture, type or paste the URL of the picture that should be used for this category. The picture will appear on the Category page tile for this category. A category picture is optional.
-
Under Type the description, type a description for the picture. The picture description is optional.
-
Click Save.
Edit a category
-
From the Community tools web part on your community home page, click Create categories.
-
Click the name of the category you want to edit.
-
On the View tab, click Edit Item.
-
Make your changes, and then click Save.
Delete a category
-
From the Community tools web part on your community home page, click Create categories.
-
Click the name of the category you want to delete.
-
On the View tab, click Delete Item.
-
In the confirmation window, click OK.
Discussions contained within the deleted category are not deleted.
Restore a category
-
From any page in the community, in the Quick Launch, click Site Contents.
-
In the upper-right corner of the screen, click Recycle Bin.
-
Select the check box next to the category you want to restore.
Note: All discussions or replies deleted by members are listed in the Recycled Bin. Only owners and moderators can restore content.
-
Click Restore Selection.
-
In the confirmation window, click OK.
The category is restored, and discussions that were part of the category prior are again contained within the category.
Monitor unanswered questions
One of the most important features of any community is the dialogue that takes place among its members. The credibility of the community and its vibrancy decline when discussions fizzle or questions go unanswered, so part of the community moderator’s job is to ensure that discussions are lively and members receive answers to their questions quickly. Thus, an Unanswered Questions view is available on the home page of the community so that moderators can monitor questions easily. This view queries for discussions that are marked as questions but have not yet received a “Best reply.”
-
On the home page of the community, click the Open Menu (…), and then click Unanswered questions.
-
Click the discussion title to open and review the item.
Promote content
In a busy community, many different discussions across multiple categories might be going on at once. The moderator can select those discussions that are particularly useful, relevant, or important to community members and promote them to “featured” status. Once marked as featured, a discussion is included in the Featured Discussions view, which filters out all other discussions except those that are featured. Featured discussions in a given category are also displayed at the top of the page in that category.
Promote a discussion to featured status
-
From the Community tools web part on your community home page, click Manage Discussions.
-
Select the discussion you want to feature.
-
On the Moderation tab, click Mark as Featured.
The status of the discussion topic in the Is Featured Discussion column changes to Yes.Tip: To promote several discussions to featured status, select all that apply, and then click Moderation > Mark as Featured.
Remove featured status
-
From the Community tools web part on your community home page, click Manage Discussions.
-
Select the discussion you want to remove from featured status.
-
On the Moderation tab, click Unmark as Featured.
The status of the discussion topic in the Is Featured Discussion column changes to No.Tip: To remove several discussions from featured status, select all that apply and then click Moderation > Unmark as Featured.
Find featured discussions
-
On the home page of the community, click the Open Menu(…).
-
Click Featured.
Manage reported content
When community members come across content they think might be incorrect or inappropriate, they can report that content to the moderator for evaluation. The marked content and any related comments are visible in the Manage Discussions view until the moderator takes action on them. Although moderators can see all comments pertaining to a particular post or reply, members see only their own comments and never know if other members have marked the content as needing moderator review.
The Reporting of Offensive Content feature is disabled by default but can be enabled at any time. Enabling it causes several things to happen:
-
A Report to Moderator menu item is added to all discussions and replies.
-
A Review Reported Posts option is added to the Community Tools web part.
-
A Manage Reported Posts option is added to the Community Administration section of the Site Settings page.
-
A Moderation tab is added to the ribbon and includes review, edit, delete, and dismiss options.
-
A permanent Abuse Reports list is created on the back end to store all comments pertaining to community posts marked for moderator review. This report is hidden from view and unavailable to all members.
Enable the Reporting of Offensive Content feature
Note: You must be a member of the Owners group to enable this feature.
-
On the Community tools web part on your community home page, click Community settings.
-
Select the Enable reporting of offensive content check box.
-
Click OK.
Disable the Reporting of Offensive Content feature
Note: You must be a member of the Owners group to disable this feature.
Disabling the Reporting of Offensive Content feature removes review options from menus, the Community Tools web part, and the Site Settings page. Any comments previously submitted will remain in the Abuse Reports list but is not visible from the user interface.
-
From the Community Tools web part on your community home page, click Community settings.
-
Clear the Enable reporting of offensive content check box.
-
Click OK.
Review reported content
Note: You must be a member of the Moderators or Owners group to review reported content.
-
On the Community tools web part on your community home page, click Review reported posts.
-
Click a post.
-
On the Moderation tab, click:
-
Edit Post if you want to edit the content of the post. The member’s report can’t be edited.
-
Delete Post if you decide the post content is inappropriate for the community. Any associated report content will also be deleted.
-
Dismiss Report if you decide the post content is appropriate for the community. Any associated report content will be deleted.


