
There are several actions you need to do to keep your Contacts list current. This article helps you organize your contacts so that you can easily find the people who you have to get in touch with.
What do you want to do?
Search for people
The search bar is located in the Contacts list, under the Contacts icon, and in the Phone view, under the Phone icon. You can search for the names of people or for a skill (job title).
-
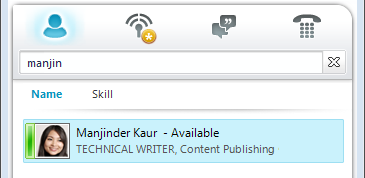
In the search box, type a name, email alias, or phone number. You can even type the name of a distribution group or alias. Microsoft Lync Online communications software displays the results as you type. If more than one contact or group comes up, the one who is in your Contacts list appears at the top of the list. All contacts and non-contacts will have a vertical status bar to the left of the person’s picture, and will indicate presence, such as Available, Offline, and Busy.
-
If your company is using Microsoft SharePoint services, Name and Skill buttons appear below the search bar. You can search by using a keyword, such as job title or area of expertise. Click Skill to see others with similar areas of expertise or job titles. Click the X in the search bar to return to the Contacts list.
Select multiple contacts
Sometimes it is more efficient to select several contacts at a time. An example would be when you’re putting together a meeting invitation.
-
To select several non-adjacent contacts, press and hold the CTRL key while you click them.
-
For adjacent contacts, press and hold the SHIFT key while you click, or use the arrow keys to select.
Add people outside your company to your Contacts list
Lync Online can display presence information for contacts who use email services such as the Windows Live network of Internet services (including MSN and Hotmail) and who are joined to Lync. Federated users (users who are outside your company) can do activities such as share presence information, make Lync calls, and conduct video conferences.
-
Open Lync, and, in the search box, type the email address for the person that you want to add to your Contacts list.
-
In the contact card that appears, click the plus sign (+).
-
Select a contact group in which to place the contact. Also, you can create a new group at this time by typing the name beside the Add to New Group field.
Some users have an email account with a service that is not federated with Lync. Although you can add these users to your Contacts list in the same way you add federated users, you’ll not see presence information.
Other users sign in to a federated site by using their non-federated user ID (email address). If this is the case, use the format user(unfederated.com)@federatedcompany.com when you add the contact. This displays his or her presence in Lync. For example, MrContoso(gmail.com)@msn.com.
Organize contacts
When you’ve found the contacts that you want, you can add them to a contact group so you can easily find them next time. Lync automatically populates Frequent Contacts based on the 10 contacts with whom you most often have conversations. You can also “pin” your most important contacts to the top of the group for quick access. Lync pre-populates the pinned list with your team members.
Pin or unpin a frequent contact to the top of a group
To pin or unpin a frequent contact, do one of the following.
-
Open Lync, and, in your Contacts list, right-click the person, and then click Pin to Frequent Contacts.
-
To unpin a contact, right-click, and then click Unpin from Frequent Contacts.
Create a group
-
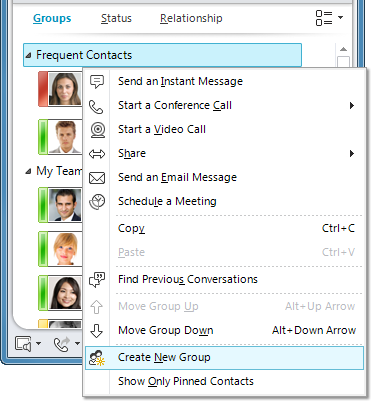
Open Lync, and, in your Contacts list, right-click any group name (for example, Frequent Contacts), click Create New Group, and then name the group.
-
To add people to the new group, search for a contact, point to the contacts name in the search results, and then click the plus sign (+). Or, right-click the contact in the search results, click Add to Contacts List, and then click the group name.
Note: If you see a Delegates group in your Contacts list, it’s showing the delegates you’ve set up in Outlook to manage your mail and calendar on your behalf. You manage these delegates in Outlook, not in Lync: in Outlook, go to File > Account Settings > Delegate Access.
Sort and display your contacts
You can sort your contacts by using the:
-
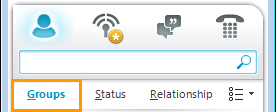
Groups, Status, and Relationship buttons.
-
Display name or Availability options.
Sort contacts in the Contacts list
-
To see the contacts in the default groups (including Frequent Contacts and Other Contacts) in addition to any groups you’ve created, click Groups.
-
In your Contacts list, do any of the following:
-
To sort the contacts by presence status (Online, Away, Unknown, and Unavailable), click Status.
-
To sort contacts by their privacy relationship, click Relationship.
-
To see explanations of what the relationships are, right-click a contact, and then point to Change Privacy Relationship.
-
Change the look of your Contacts list
-
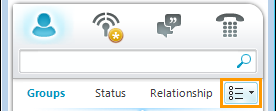
Click the arrow next to the Display Options button below the search bar to display the Layout Options menu.
Depending on how you’ve sorted your contacts, different options appear in the menu. For example, you can choose to show “friendly names” as opposed to email names or status details as opposed to only names. If your company has enabled displaying contact pictures in the Contacts list, you can choose whether to show pictures, which determines how many contacts fit in the window. (If you don’t show pictures, the choice is between name only, on one line, or name and details, on a second line.)
Note: You can also turn off pictures everywhere in Lync by clicking My Picture in the Lync - Options dialog box. For more information, see Set My Picture options.
Change the way that Lync displays contacts
-
In your Contacts list, click the Display Options button below the search bar to switch between one and two lines of information per contact. If your company uses contact photographs, a two-line view displays the photos.
-
For more choices, click the down arrow beside Display Options to open the Layout Options menu.
View contacts by privacy relationship (formerly called access level)
-
In your Contacts list, click the Relationship button below the search bar.
To understand what presence information is exposed for each privacy relationship, see Control access to your presence information.
Move, copy, and remove contacts
In your Contacts list, do the following to move, copy, and remove contacts.
-
To move a contact to another group, right-click the contact, point to Move Contact To, and then click the group you want.
-
To copy the contact to another group, right-click the contact, click Copy, right-click the group you want, and then click Paste.
-
To remove the contact from the group, right-click the contact, and then click Remove from Group.
-
To remove the contact entirely, right-click the contact, and then click Remove from Contacts List.
Note: Depending on how you’re viewing contacts (by group, status, or relationship), moving and copying functions differ. Be aware that dragging contacts between privacy relationship groups changes the privacy relationship for the contact.
View a contact card
Depending on the privacy relationship that a contact has granted you, you can see his or her schedule, as well as a personal note. The contact card also provides a point for connecting with the contact, including starting an instant messaging conversation, calling, scheduling a meeting, or sending an email.
-
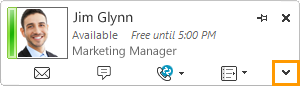
In your Contacts list, point to a contact’s picture (or status icon, if pictures are not displayed) to see a basic contact card.
-
To get more information, click the Expand contact card button (down arrow) in the lower-right corner of the card.
-
To keep the card visible, click the Pin button in the upper-right corner of the card. You can drag the card to a convenient place on the desktop.
Tag a contact
You can mark, or “tag,” a contact in your Contacts list so that you’ll be notified when he or she becomes available. Lync displays a notification as soon as a contact’s status changes to Available.
-
In your Contacts list, right-click the person you want to tag.
-
Click Tag for Status Change Alerts.


