
Microsoft Word, PowerPoint, Outlook, and Excel for Microsoft 365 on Windows, Mac, Android, and Windows Mobile support inserting and editing scalable vector graphics (.SVG) files in your documents, presentations, email messages, and workbooks.
On iOS you can edit SVG images that you've already inserted on another platform.
|
|

Tip: SVG is an open standard that was established in 1999.
Insert an SVG image
You insert an SVG file the same way you insert other types of image files:
-
Select Insert > Pictures > This Device.
-
Navigate to the .svg file you want to insert, then select it and choose Insert.
Insert an icon
The library of icons in Office apps consists of SVG images that you can insert in an Office document and then customize:
-
Select Insert > Icons.
-
Browse or search with keywords for an image. Then select it and choose Insert.
For more information on how to add an SVG image to your file see Insert icons in Microsoft Office.
Customize an SVG image
After an SVG image is placed in your document, you can customize its appearance:
-
Resize the image without any loss of image quality
-
Change the fill color
-
Add or change the outline
-
Apply a preset style that includes both a fill color and an outline
-
Apply special effects, such as a shadow, reflection, or glow
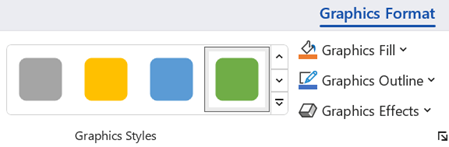
All the above options are available on the Graphics Format tab of the ribbon when an image is selected on the canvas:
Additional image customizations
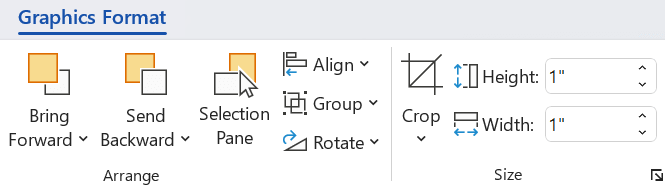
As with any shape in an Office document, you can rotate it and use alignment options for more precise placement. The Size options on the Graphics Format tab of the ribbon let you crop the image or specify precise dimensions for it:
Convert an SVG image to an Office shape
Many SVG files (including Office icons) are single-color images. But you can disassemble an SVG file and customize individual parts of it by using the Convert to Shape option:
-
On the document canvas, right-click the image.
-
Select an individual piece of the image, then use the options on the Shape Format tab of the ribbon to modify it as you want.
-
Repeat step 2 for each piece of the image you want to modify.
-
(PowerPoint and Excel only) When you're done customizing the pieces, use Ctrl+click to select all of them. Then on the Shape Format tab on the ribbon, select Group > Group. This action joins the pieces together again as one object in case you subsequently need to move or resize the image as a whole.
Here's a short video where Doug shows you how it's done.

To insert an SVG file in Office for Mac just use Insert > Pictures like any other image file.
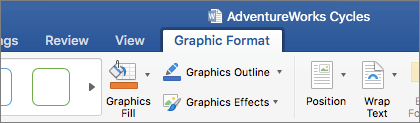
There are several things you can do to customize how your SVG image looks in your document. To access those tools click on your SVG image and a contextual Graphic Format tab should appear on the Ribbon. Let's take a look at some of the more useful options the Graphic Format tab offers you.
-
Change Graphic - This lets you select a different image to replace the current image with.
-
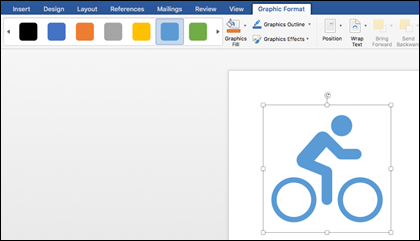
Graphics Styles - The gallery contains a collection of pre-defined styles for converting your image to a line drawing or changing the fill color of it. In the example below I've inserted a logo of a bicycle and the original is all black. In the Styles Gallery I've selected a preset that has a light blue fill to match my company theme.
-
If you want to change the color of your image and none of the styles in the gallery are quite what you want, Graphics Fill lets you choose from hundreds of colors. Whatever color you choose is going to apply to the entire image.
-
Looking to give your SVG images a little extra style? Graphics Effects helps you add drop shadows, glows, 3D effects and more to your images. In the example below I've selected a perspective shadow to make my image appear a bit more three-dimensional.
-
To change (or remove) the line around your SVG image choose Graphics Outline. This lets you set the color of the border surrounding your image. The eyedropper tool described above works here too.
-
To control how text flows around your SVG image use the Wrap Text tool.
-
You can use the Bring Forward or Send Backward tools to layer your image on the page. This is handy if you want to place other objects in front of (or behind) your image.
-
The Selection Pane tool makes it a little easier to select specific items on a complex page.
-
Align makes it easier to place your selected image along the left edge, in the middle or at other known places on the page.
-
If you have multiple images that you'd like to treat as a single object, select the first object, hold down the Ctrl key and select each of the other objects, then click Group. To ungroup them choose any object in the group, then click Group > Ungroup.
-
The Rotate command makes it easy to rotate your image, or flip it vertically or horizontally.
-
Size - These are tools for cropping or resizing your image. For details on how to use the Crop tool see Crop a picture. To use the size tools simply specify the height and/or width you desire, in inches.
-
The Format Pane opens a pane that gives you easy access to the tools to modify this image.
You can't insert an SVG image in iOS, but you do have some editing tools available in Office for SVG images that you've already got in your files. To get started tap the SVG image you want to edit and you should see the Graphics tab appear on the ribbon.
-
Graphics Styles - These are a set of predefined styles you can add to quickly change the look of your SVG file.
-
If you want to change the color of your image and none of the styles in the gallery are quite what you want, Graphics Fill lets you choose from hundreds of colors. Whatever color you choose is going to apply to the entire image.
Note: If you want to fill individual parts of the SVG image with different colors you'll need to convert it to a shape first. Currently you'll need to open your document in Office for Microsoft 365 on Windows to do that.
-
To change (or remove) the line around your SVG image choose Graphics Outline. This lets you set the color of the border surrounding your image.
-
Wrap Text helps you to control how text will flow around your image in the document.
-
If you want to stack multiple objects on top of each other Arrange lets you move the selected image up or down (forward or backwards) in the stack.
-
Use the Crop tool if you only want a portion of your SVG image. With the image selected, tap Crop then drag the box to frame the image the way you want it. When you're done, tap Crop
Tip: If you want to undo your cropping, tap the image, select Crop again and then tap Reset from the context menu that appears.
-
Use the Alt Text tool to give your image a text description for people who are using screen readers to read your document.
To edit an SVG image in Office for Android, tap to select the SVG you want to edit and the Graphics tab should appear on the ribbon.

Note: If you don't see the ribbon, tap the Edit icon 
-
Styles - These are a set of predefined styles you can add to quickly change the look of your SVG file.
-
If you want to change the color of your image and none of the styles in the gallery are quite what you want, Fill lets you choose from hundreds of colors. Whatever color you choose is going to apply to the entire image.
Note: If you want to fill individual parts of the SVG image with different colors you'll need to convert it to a shape first. Currently you'll need to open your document in Office for Microsoft 365 on Windows to do that.
-
To change (or remove) the line around your SVG image choose Outline. This lets you set the color of the border surrounding your image.
-
Wrap Text helps you to control how text will flow around your image in the document.
-
If you want to stack multiple objects on top of each other Arrange lets you move the selected image up or down (forward or backwards) in the stack.
-
Use the Crop Graphic tool if you only want a portion of your SVG image. With the image selected, tap Crop then drag the box to frame the image the way you want it. When you're done, tap Crop
-
Size and Position lets you specify how large your SVG image should be on the page.
-
Use the Alt Text tool to give your image a text description for people who are using screen readers to read your document.
Have a question, suggestion or comment on Microsoft Office?
We're listening
This article was last updated on October 30, 2022 as a result of your comments. If you found it helpful, and especially if you didn't, please use the feedback controls below to let us know how we can make it better.


