
Join the program
Insiders are passionate people who love Microsoft 365 apps, want to try out new features first, and make a difference in the products they use every day by providing early feedback. Ready to onboard? Go to the Join section of our site and choose your favorite platform (or platforms!) to get started.
Insider levels
The Microsoft 365 Insider program has two channels: Beta Channel and Current Channel (Preview). These channels determine how often, and how early, you get updates. Pick the one that’s right for you. Either way, we’re here to help and listen.
Beta Channel
We recommend this channel for people who want to try out new features while they’re still in active development, identify issues, and provide feedback. You will receive frequent updates that include new features as well as bug fixes and other updates.
Beta Channel is best suited for people who don’t mind the bit of risk involved in using unsupported builds.
Current Channel (Preview)
We recommend this channel for customers who want to receive supported builds with less frequent, more stable updates and minimal risk.
New features are released about once per month and may include bug fixes and other updates.
Note: For iOS, there is only one Insider level: Beta Channel.
Supported operating systems
Microsoft 365 Insider builds are available for the following operating systems:
- Windows
- Mac
- iOS
- Android
You’ll need to be running a version of the operating system that is supported by Microsoft 365. For information, see the System requirements for Microsoft 365 and System requirements for Microsoft 365 mobile apps. We recommend that you run the most current version of your operating system.
Apps included
- Word
- Excel
- PowerPoint
- OneNote
- Outlook
- Access
- Project
- Visio
- Word
- Excel
- PowerPoint
- OneNote
- Outlook
- Word
- Excel
- PowerPoint
- OneNote
- Outlook
- Word
- Excel
- PowerPoint
- OneNote
Note: We are expanding the Microsoft 365 Insider program to include information about preview features and experiences from additional apps such as Teams, Forms and more. This information is in the Microsoft 365 Insider blog.
Get the latest build
Once you’ve joined the program and installed an Insider build, you can check for updates using the instructions below.
Note: if you are using a business or education subscription to Microsoft 365 in your device, your IT administrator may manage updates for you, and you may not be able to change your update channel.
| Platform | How to check for updates manually | How to enable automatic updates |
|---|---|---|
| Windows |
|
|
| Mac |
|
|
| iOS |
|
|
| Android |
|
|
Try new features
When builds are released, they usually include new features for you to try out. For a list of the features and updates that were included in a build, check the Release Notes on learn.microsoft.com. To learn more about features as they start rolling out to Insiders, visit the Microsoft 365 Insider blog on this site.
Why don’t I have a feature that’s mentioned in the Release Notes or Blog?
There are a few reasons why you may not see a new feature that you’ve read about.
- Do you have an active Microsoft 365 subscription on your device? Most new features are only available to Microsoft 365 subscribers. If you are using a perpetual version of Office (i.e. 2016, 2019, LTSC), you won’t receive preview features.
- Check for updates. You may not have the latest build on your device. Compare the build number from a Microsoft 365 app on your device to the latest build listed in the Release Notes.
- Build numbers always go up with each new build. If the build number in your Microsoft 365 app doesn’t match the build number in the Release Notes or Insider blog, as long as your build number is higher than the one listed, your device will receive the feature when it is enabled. See “Features are rolled out in stages,” below.
- For details on how to find Microsoft 365 build information on your device, refer to the What information should I have available when asking for help? section in the Get Support topic on this page.
- Turn on the Coming Soon toggle. If you have the latest Microsoft 365 build installed, check for a “Coming Soon” toggle in the upper right corner of the app. If you see one, make sure that it is toggled on, as some new features will only appear when it is in the On position. Please note that this toggle does not always appear, and this is normal.
- Features are rolled out in stages. Features in a specific build are exposed in stages to progressively larger groups of Insiders over time. If you are unsure whether this is the case, or if you have any other questions about accessing or using a new feature, please reach out to us on X (formerly Twitter) @MSFT365Insider or in the Micrososft Support Community forum.
Copilot for Microsoft 365
Copilot for Microsoft 365 is available to enterprise customers with E3/E5 licenses that have purchased an additional Microsoft Copilot for Microsoft 365 commercial SKU. See commercial pricing and plans.
If your organization has purchased and deployed Microsoft Copilot for Microsoft 365, and you don’t see Copilot in your Microsoft 365 apps, please contact your organization’s IT administrator to make sure you have been assigned a Copilot for Microsoft 365 license.
Note: Microsoft Copilot for Microsoft 365 documentation for IT Administrators is here: https://learn.microsoft.com/microsoft-365-copilot.
Update channels for Copilot for Microsoft 365
(Requires licenses as noted above)
Copilot for Microsoft 365 features and updates are released through the Microsoft 365 app update channels. New features are first released to devices in the Insider Beta Channel and then Current Channel (Preview), followed by production devices in the Current Channel and Monthly Enterprise Channel. The Semi-annual channel is excluded. Please note that the Microsoft 365 update channel for your device is managed by your organization.
Provide feedback
We’d love to hear your thoughts about what works, what doesn’t, and how we can improve.
Within a Microsoft 365 App
The quickest way to get your comments to our engineers’ ears is right from within Microsoft 365 apps. They read customer feedback daily.
Windows
- From your Microsoft 365 app, go to Help > Feedback (or File > Feedback).
Mac
-
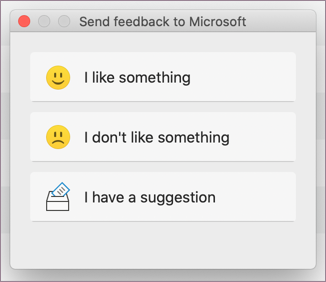
Select Help > Feedback.

-
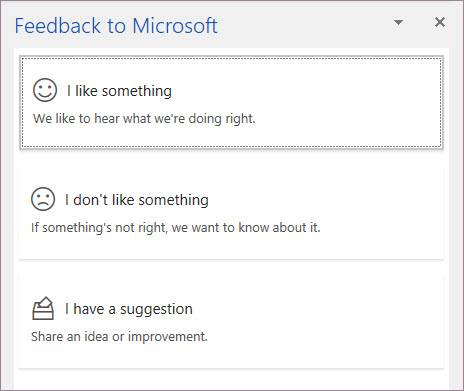
In the Send feedback to Microsoft dialog box, choose the type of feedback you want to provide.
iOS
- From your Microsoft 365 app, select “…” in the top right corner and then select Help & Give Feedback.
Android
- Open a Microsoft 365 app, tap your username in the top right corner of the app window, and select Settings > Send Feedback.
On the Feedback portal
On the Microsoft Feedback portal, you can browse for and submit feedback, upvote feedback from the community, and see status information from Microsoft.
In an Insider community
Be a part of our community and interact with fellow Insiders by posting to the Microsoft 365 Insider Answers forum or the Microsoft 365 Insider Tech Community. You can also tweet us @MSFT365Insider.
What kind of feedback is best?
Detailed and actionable feedback is vital for making changes and improvements to our apps. If you find a bug, have an issue, or have a great suggestion for how we can improve, we’d like to hear it. Here are a few tips that will help us categorize and share your feedback with the right people.
- Use a concise and descriptive title
Descriptive and specific titles help engineers understand the issue being reported. An example of a good title: “Excel’s ‘recent files’ list does not include recently added OneDrive files.” - Focus on one issue at a time
Providing feedback one item at a time ensures the correct logs and data are received with each submission and can be assigned to someone for follow up. Also, it helps us identify the volume of feedback we’re receiving on a particular issue. - Write details in the Description box
Information about your device, operating system, and apps are automatically reported when you submit feedback from an app. But detailed steps to reproduce the issue and screenshots (if applicable) are very helpful when you provide them.
Get support
Beta Channel
These builds are unsupported, but we encourage you to report issues and provide feedback from within the app.
Note: If you encounter an issue that is impacting your productivity, try changing to a supported channel, such as Current Channel (Preview) or Production.
Current Channel (Preview)
The most recent build is fully supported, so you can contact one of our experts at Microsoft Support if you need help.
Other ways to get help
- Search our online support site at https://support.microsoft.com/microsoft-365/
- Connect with us on X (formerly Twitter) at @MSFT365Insider.
- Reach out to the Microsoft Community Support forum.
- For help with Insider builds in Outlook and OneNote, select Help > Contact Support from within those apps.
- For Android, you can also visit the Microsoft 365 Insider for Android Tech Community.
What information should I have when asking for help?
When contacting us on X (formerly Twitter) or when posting in the Microsoft 365 Insider Community Support forum, please provide as much of this information up front as possible. The more details you can provide, the easier it will be to help troubleshoot the issue and determine the right solution. Here are some details to keep handy:
Step 1: Find the version/build for your platform:
| Platform | How to find your version/build |
|---|---|
| Windows |
|
| Mac |
|
| iOS |
|
| Android |
|
Step 2: Provide as much detail about the issue as possible:
- Is there an error code or message? Make sure to provide the whole error code or message, or a screenshot of them.
- Does this happen with all files in the app, or only with specific files?
- Where is the file saved? On your local device, in the cloud (on OneDrive, or another cloud service)?
- Is there something unique or different about the impacted file(s)? Are you using a specific font, a VBA script, a macro, or a different language than usual?
- Are you running any add-ins? Is the issue still present if you disable your add-ins?
- What steps are needed to reproduce this issue?
- If you need to change any settings, be sure to specify.
- Here’s an example: “Launch Word. Open a new document. Type anything into the document. Highlight the text, right click on it, then select Font. The Font menu doesn’t pop up.”
- Is this behavior new to the build you have now, or did it happen in previous builds as well?
Opt out or change channels
Note: If you have a subscription to Microsoft 365 through work or school, you’ll need to contact your Microsoft 365 administrator to change channels or opt-out of Microsoft 365 Insider builds.
| Platform | How to opt out or change channels |
|---|---|
| Windows |
Steps to change levels or opt-out of Microsoft 365 Insider builds on Windows
|
| Mac |
Steps to change levels on Mac
Note: You’ll be on the current build until we release a new update. Steps to opt-out completely on Mac
Note: You’ll be on the current Insider build until we release the next update. If you can’t wait for the next update, you can uninstall Microsoft 365 for Mac and then reinstall a fresh copy. Steps to uninstall/reinstall Microsoft 365 for Mac:
|
| iOS |
You can opt out of the Microsoft 365 Insider program for iPhone and iPad by following the instructions from the Apple TestFlight program |
| Android |
Steps to opt out on Android: You can either opt-out of receiving Beta Channel builds or leave the program completely.
|
Other Insider programs
At Microsoft, we have a number of Insider programs to get customers involved in our product planning. Here are a few other Insider Programs that you might be interested in looking into:
- Windows Insider program
- Skype Insider program
- Microsoft Teams Public Preview
- Microsoft Security Update Validation Program (provides organizations with early access to security updates to test application compatibility).
Terms and Conditions
The terms and conditions, as well as the data collection policies of the Microsoft 365 Insider program can be found below.
- Microsoft Services Agreement
- Microsoft Privacy Statement
- Diagnostic Data in Microsoft 365
- Troubleshooting Diagnostic Logs
- Required Service Data
- Account Privacy Settings
Age Availability
You might have noticed that the Microsoft 365 Insider program sign-up option is not available for you. Microsoft 365 doesn’t collect any kind of optional data from people below certain ages. If you’re under the age of 13, or some other age depending on laws where you live, you may see that you can’t send optional data or change this setting in Microsoft 365. This is to help protect your privacy and help make sure we don’t collect any info from you beyond what’s necessary to keep Microsoft 365 secure, updated and working the way it’s supposed to.