
Note: This article has done its job, and will be retiring soon. To prevent "Page not found" woes, we're removing links we know about. If you've created links to this page, please remove them, and together we'll keep the web connected.
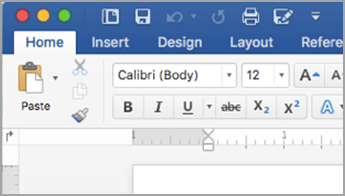
The ribbon can help you quickly find the commands that you have to have to complete a task. Commands are organized in logical groups that are collected together under tabs. In earlier versions of Office for Mac, many of these commands were located on the Formatting Palette.
Word
|
Expanded ribbon |
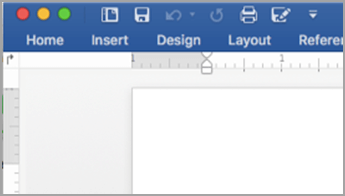
Collapsed ribbon |
Do either of the following:
-
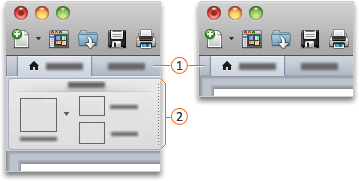
To see more of the document, you can minimize the ribbon so that only the tabs appear. On the right side of the ribbon, click

-
To expand the ribbon, on the right side of the ribbon, click

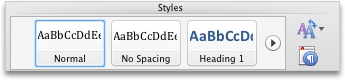
On the ribbon, you can view several thumbnails of styles, themes, or other formats, or you can expand the list to see them all. Some expanded lists have additional menu items at the bottom. To see an example, follow these steps.
-
On the Home tab, click the right arrow

-
To expand the list to see all the styles, point to a style, and then click
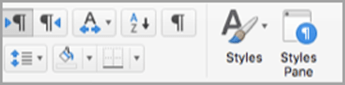
Alternatively, you can click the Styles Pane icon to see the available styles.


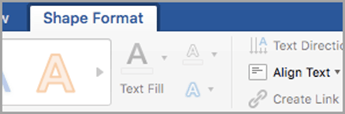
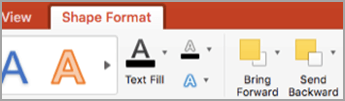
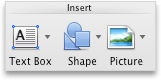
When you insert shapes, charts, pictures, movies, or other objects, additional tabs appear that you can use to format these objects. For example, if you insert a shape, the Shape Format tab appears. To see an example of how this works, follow these steps.
-
On the Insert tab, click Shapes
-
Select the shape that you want.
-
In your document, point where you want to insert the shape, hold down the mouse button, and then drag the pointer until the shape is the size that you want.
-
Click the shape, and then click the Shape Format tab.
-
Use the buttons, pop-up menus, and galleries to apply formatting to the shape.

As the document window becomes smaller, the number of items that can be shown on the ribbon also changes. For example, the number of thumbnails that appear decreases or a scrolling gallery changes into a button. To see how this works, follow these steps.
-
On the Home tab, count how many style thumbnails show.

-
Resize the window to make it smaller.
-
On the Home tab, a single expandable button appears instead of individual styles.
-
On the View menu, clear the Ribbon check mark.
PowerPoint
|
Expanded ribbon |
Collapsed ribbon |
Do either of the following:
-
To see more of the presentation, you can minimize the ribbon so that only the tabs appear, on the right side of the ribbon, click
-
To expand the ribbon, on the right side of the ribbon, click
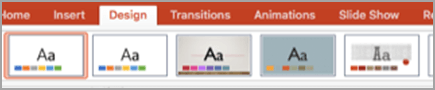
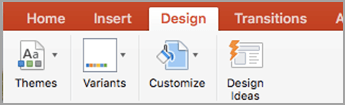
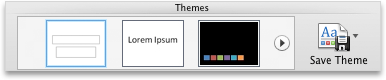
On the ribbon, you can view several thumbnails of styles, themes, or other formats, or you can expand the list to see them all. Some expanded lists have additional menu items at the bottom. To see an example, follow these steps.
-
On the Design tab, click the right arrow
-
To expand the list to see all the themes, point to a theme, and then click
-
To browse for more themes, at the bottom of the expanded list, click Browse for Themes.
-
Click Save Current Theme to save a theme in your Themes folder or a location you choose.
When you insert shapes, charts, pictures, movies, or other objects, additional tabs appear that you can use to format these objects. For example, if you insert a shape, the Shape Format. To see an example of how this works, follow these steps.
-
On the Insert tab, click Shapes
-
Select the shape that you want.
-
On your slide, point where you want to insert the shape, hold down the mouse button, and then drag the pointer until the shape is the size that you want.
-
Click the shape, and then click the Shape Format tab.
-
Use the buttons, pop-up menus, and galleries to apply formatting to the shape.
As the presentation window becomes smaller, the number of items that can be shown on the ribbon also changes. For example, the number of thumbnails that appear decreases or a scrolling gallery changes into a button. To see how this works, follow these steps.
-
On the Design tab, count how many theme thumbnails show.
-
Resize the window to make it smaller.
-
On the Design tab, a single expandable button appears instead of individual styles.
-
On the View menu, clear the Ribbon check mark.
Excel
|
Expanded ribbon |
Collapsed ribbon |
Do either of the following:
-
To see more of the workbook, you can minimize the ribbon so that only the tabs appear. On the right side of the ribbon, click
-
To expand the ribbon, on the right side of the ribbon, click
On the ribbon, you can view several thumbnails of styles, themes, or other formats, or you can expand the list to see them all. Some expanded lists have additional menu items at the bottom. To see an example, follow these steps.
-
On the Page Layout tab, click the down arrow next to Themes to see available themes.
-
Click Browse for Themes to see other themes that you may have saved.
-
Click Save Current Theme to save a theme in your Themes folder or a location you choose.
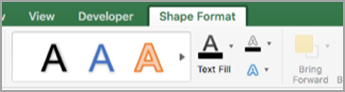
When you insert shapes, charts, pictures, or other objects, additional tabs appear that you can use to format these objects. For example, if you insert a shape, the Shape Format tab appears. To see an example of how this works, follow these steps.
-
On the Insert tab, click Shapes
-
Select the shape that you want.
-
In your document, point where you want to insert the shape, hold down the mouse button, and then drag the pointer until the shape is the size that you want.
-
Click the shape, and then click the Shape Format tab.
-
Use the buttons, pop-up menus, and galleries to apply formatting to the shape.
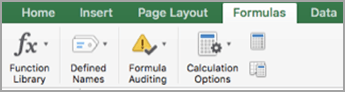
As the workbook window becomes smaller, the number of items that can be shown on the ribbon also changes. For example, the number of thumbnails that appear decreases or a scrolling gallery changes into a button. To see how this works, follow these steps.
-
On the Formulas tab, count how many formula thumbnails show.

-
Resize the window to make it smaller.
-
On the Formulas tab, the expandable Function Library button replaces the thumbnails. Click this button to see the formulas.
-
On the View menu, clear the Ribbon check mark.
See also
Word


Do either of the following:
-
To see more of the document, you can minimize the ribbon so that only the tabs appear. On the right side of the ribbon, click
-
To expand the ribbon, on the right side of the ribbon, click
On the ribbon, you can view several thumbnails of styles, themes, or other formats, or you can expand the list to see them all. Some expanded lists have additional menu items at the bottom. To see an example, follow these steps.
-
On the Home tab, under Styles, click the right arrow
-
To expand the list to see all the styles, point to a style, and then click
When you insert shapes, charts, pictures, movies, or other objects, additional tabs appear that you can use to format these objects. For example, if you insert a shape, the Format tab appears next to the Home tab. To see an example of how this works, follow these steps.
-
On the Home tab, under Insert, click Shape.
-
On the pop-up menu, rest the pointer on Rectangles, and then click the rectangle style that you want.
-
In your document, point where you want to insert the shape, hold down the mouse button, and then drag the pointer until the shape is the size that you want.
-
Click the shape, and then click the Format tab.
-
Use the buttons, pop-up menus, and galleries to apply formatting to the shape.
As the document window becomes smaller, the number of items that can be shown on the ribbon also changes. For example, the number of thumbnails that appear decreases or a scrolling gallery changes into a button. To see how this works, follow these steps.
-
On the Home tab, under Styles, count how many style thumbnails show.
-
Resize the window to make it smaller.
-
On the Home tab, under Styles, the number of style thumbnails decreases.
-
On the right side of the ribbon, click

-
Under General, clear the Turn on the ribbon check box.
PowerPoint
Do either of the following:
-
To see more of the document, you can minimize the ribbon so that only the tabs appear, on the right side of the ribbon, click
-
To expand the ribbon, on the right side of the ribbon, click
On the ribbon, you can view several thumbnails of styles, themes, or other formats, or you can expand the list to see them all. Some expanded lists have additional menu items at the bottom. To see an example, follow these steps.
-
On the Themes tab, under Themes, click the right arrow
-
To expand the list to see all the themes, point to a theme, and then click
-
To browse for more themes, at the bottom of the expanded list, click Browse Themes.
When you insert shapes, charts, pictures, movies, or other objects, additional tabs appear that you can use to format these objects. For example, if you insert a shape, the Format tab appears next to the Home tab. To see an example of how this works, follow these steps.
-
On the Home tab, under Insert, click Shape.
-
On the pop-up menu, rest the pointer on Rectangles, and then click the rectangle style that you want.
-
In your document, point where you want to insert the shape, hold down the mouse button, and then drag the pointer until the shape is the size that you want.
-
Click the shape, and then click the Format tab.
-
Use the buttons, pop-up menus, and galleries to apply formatting to the shape.

As the document window becomes smaller, the number of items that can be shown on the ribbon also changes. For example, the number of thumbnails that appear decreases or a scrolling gallery changes into a button. To see how this works, follow these steps.
-
On the Themes tab, under Themes, count how many theme thumbnails show.
-
Resize the window to make it smaller.
-
On the Themes tab, under Themes, the number of theme thumbnails decreases.
-
On the right side of the ribbon, click
-
Under General, clear the Turn on the ribbon check box.
Excel
Do either of the following:
-
To see more of the document, you can minimize the ribbon so that only the tabs appear. On the right side of the ribbon, click
-
To expand the ribbon, on the right side of the ribbon, click
On the ribbon, you can view several thumbnails of styles, themes, or other formats, or you can expand the list to see them all. Some expanded lists have additional menu items at the bottom. To see an example, follow these steps.
-
On the Home tab, under Format, click the right arrow
-
To expand the list to see all the formats, point to a format, and then click
-
To create a new cell style, at the bottom of the expanded list, click New Cell Style.
When you insert shapes, charts, pictures, movies, or other objects, additional tabs appear that you can use to format these objects. For example, if you insert a shape, the Format tab appears next to the Home tab. To see an example of how this works, follow these steps.
-
On the Standard toolbar, click Show or hide the Media Browser
-
Click Shapes
-
Click the shape that you want.
-
In your document, point where you want to insert the shape, hold down the mouse button, and then drag the pointer until the shape is the size that you want.
-
Click the shape, and then click the Format tab.
-
Use the buttons, pop-up menus, and galleries to apply formatting to the shape.

As the document window becomes smaller, the number of items that can be shown on the ribbon also changes. For example, the number of thumbnails that appear decreases or a scrolling gallery changes into a button. To see how this works, follow these steps.
-
On the Home tab, under Format, count how many format thumbnails show.

-
Resize the window to make it smaller.
-
On the Home tab, under Format, the thumbnails become Styles.
-
On the right side of the ribbon, click
-
Under General, clear the Turn on the ribbon check box.


