
Note: This article has done its job, and will be retiring soon. To prevent "Page not found" woes, we're removing links we know about. If you've created links to this page, please remove them, and together we'll keep the web connected.
Displaying content based on ratings can help content readers find quality content easily. If you are a content manager or author, ratings can help you easily see which topics are considered to be more popular by the readers.
In this article
Overview
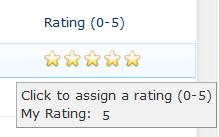
When ratings are enabled, a series of stars is available for users to select to apply their rating.
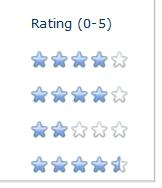
After a user selects a rating, it is submitted and averaged with other ratings. After the ratings are processed, which typically takes several minutes, the updated rating will be displayed.
If the ratings feature is enabled for your organization, a Rating Settings option will appear in the site settings for a list or library. You can set up ratings for lists, libraries, and content types, if you have permission to modify lists.
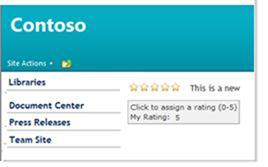
You can also make the ratings control available in a layout that page designers can apply to SharePoint publishing pages, if you have permission to edit content types and page layouts. A page layout ensures consistency of some page elements in similar Web pages. You can also enable people to rate posts and view ratings on a SharePoint blog by using a Web Part.
The Document Center site template is already set up to use ratings, if ratings are available. The Documents library already contains the ratings column, and content is sorted based on its ratings value in the Highest Rated Documents Web Part. The Enterprise Wiki template is also already set up with a ratings control on each page.
Add the rating column to a list or library
When you enable ratings for a list or library, a Rating (0-5) column is added. In some types of lists, such as calendars, the column is not displayed by default, but users can also access ratings via the properties for a list item or document.
-
If the list or library page is not already open, click the name of the library on the Quick Launch. Or, click Site Actions, click View All Site Content, and then under the appropriate section, click the name of the list or library.
-
In the ribbon, do one of the following:
-
For a list, under List Tools, click List, and then click List Settings in the Settings group.
-
For a library, under Library Tools, click Library, and then click Library Settings in the Settings group.
-
-
Under General, click Rating settings.
-
Under Allow items in this list to be rated, click Yes.
Notes:
-
In addition to the Rating (0-5) column, a Number of Ratings column is also added to the list, although it isn’t displayed by default. You can add the Number of Ratings column to the default or other views, or use it for sorting or filtering.
-
If you are using managed content types, the Rating (0-5) and Number of Ratings columns are added to all content types currently in the list or library, and the Ratings column is added to the default view. If you add other content types later, you will need to manually add the Ratings and Number of Ratings columns to those content types, or revisit the Ratings settings page with Yes selected and click OK again.
-
Add the rating column to a content type
If your list or library supports managed content types, and ratings are available on your server, you can add the Rating (0-5) and Number of Ratings columns to specific content types used by your list or library.
Adding ratings to specific content types in your library enables you to control which types of items that users can rate, based on their content type. For example, you might want to allow users to rate articles, but not budget documents. To add ratings to all content types that have been added to your list or library, use the procedure for adding the ratings column to a list or library instead so that you don’t have to edit each content type.
To add ratings to a content type in a specific list or library, the content type must first be added to the list or library. This procedure changes only the content types in the current list or library. The parent site content type for the list content type is not updated with the changes.
-
Go to the list or library in which you want to add ratings to the list content type. If the list or library page is not already open, click the name of the library on the Quick Launch. Or, click Site Actions, click View All Site Content, and then under the appropriate section, click the name of the list or library.
-
Do one of the following:
-
If you are working in a list, click the List tab, and then click List Settings.
-
If you are working in a library, click the Library tab, and then click Library Settings.
-
Under Content Types, click the name of the content type that you want to change.
Note: If the list or library has not been set up to allow multiple content types in advanced library settings, the Content Types section does not appear on the Customize page for the list or library.
-
Under Columns, click Add from existing site or list columns. If you have already enabled ratings for the list or library, the ratings columns will not be listed as an option for adding to the content type.
-
In the Select Columns section, under Select columns from, click the arrow to select the group from which you want to add a column.
-
Under Available columns, click the Rating (0-5) column, and then click Add. You can also add the Number of Ratings column, if you want people to see the number of ratings that have been applied to the item.
-
Click OK.
Note: You can also add ratings to site content types, so that the ratings are available to content types used in other lists or libraries, if you have permissions to edit site content types. Find more information about managing site content types in the See Also section.
Add ratings to a page layout of a publishing page
To add the ratings control to a page layout, you need to first add a ratings column to the page content type, and then edit the page layout in Microsoft SharePoint Designer 2010 to add the ratings page field.
This procedure applies to publishing pages only, and a SharePoint-compatible design program, such as Microsoft SharePoint Designer. You must have permission to edit content types, to use SharePoint Designer 2010 to customize pages.
The ratings control is then available on pages based on the layout. Using a page layout ensures that similar pages share some consistent elements and design.
If you want the ratings control to be available to all types of pages, you add the rating column to the parent Page content type. To make the ratings control available to only a specific type of layout, such as articles, add the column to the content type for the specific page layout.
-
At the top level of your site collection, click Site Actions, and then click Site Settings.
-
Under Galleries, click Site Content Types.
-
Do one of the following:
-
To make ratings available for all page content types, under Publishing Content Types, click Page.
-
To make ratings available for a specific type of page layout, under Page Layout Content Types, click the page layout you want to change. For example, to make ratings available for articles, click Article.
-
-
Click the name of the content type, such as Page, to open it.
-
Under the Columns section, click Add from existing site columns.
-
In the Select Columns From list, click Ratings. You can also scroll directly to the columns you want.
-
Select Rating 0-5, and click Add. You can also add the Number of Ratings column if you want users to see the number of people who have rated a page.
-
Under Update all content types inheriting from this type, specify whether or not you want to update all child content types, and then click OK.
-
On the Site Actions menu, click Site Settings.
-
Under Galleries, click Master pages and page layouts.
-
Select the check box next to page layout that you want to add ratings to, such as Article Left.
-
Click the arrow next to the layout name, and click Edit in Microsoft SharePoint Designer.
-
Click in the page where you want to insert the ratings control. In the Ribbon, click Insert, click SharePoint in the Controls group, and then click Show Toolbox.
-
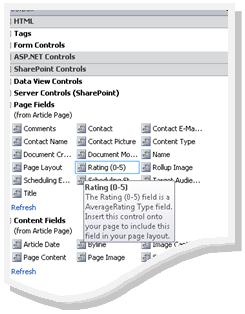
Open the Page Fields section, select the Rating (0-5) field, and then drag it to the place you want on the page.
-
Make any other changes you want to the page, save it, and check it in. When people create a new page based on the layout, or add this layout to an existing page, the Ratings control will be on the page.
Enable people to rate and view ratings on blog posts
You can add a Web Part to your blog that displays a view in which people can rate your posts and view other people’s ratings.
To use this procedure, you must have permissions to modify your blog site and the list of blog posts, as well as create public views. Ratings also have to be available on your server. For more information, see the person in charge of your site.
-
On a blog site, under Blog Tools, click Manage Posts.
-
Under List Tools, click List, and then click List Settings in the Settings group.
-
Under General, click Rating settings.
-
Under Allow items in this list to be rated, click Yes, and then click OK.
-
In the top breadcrumb or left navigation, click Posts to return to your list of posts.
-
In the Ribbon, click the List or Library tab, and then click Create View.
-
Click Standard View. If Create View is disabled, you may not have the necessary permissions to create a personal or public view.
-
Click Standard View.
-
In the View Name box, type the name for your view, such as Ratings. Leave the Make this the default view check box cleared.
-
In the Audience section, under View Audience, select Create a Personal view or Create a Public view. If Create a Public View is disabled, you may not have the necessary permissions to create a public view for this list or library.
-
In the Columns section, select only the columns that you want in the view and clear the columns that you do not want. To display just the post name and the rating, for example, select the Title and Rating (0-5) columns. You can add other columns you want, such as # of Comments.
-
Next to the selected columns, from the drop-down lists, select the order of the columns in the view.
-
In the Sorting section, select Created, and then click Show items in descending order. This setting will display the most recent posts first in the list, but you customize this setting, such as sorting by the highest rated posts.
-
Under Tabular View, clear the Allow individual item checkboxes checkbox.
-
Under Item Limit, type how many posts you want to display. For example, you might only want to display 5-10 posts if you have several other items to display on your blog page.
-
If you don’t want people to browse through pages of older posts from within this Web Part, click Limit the total number of items returned. This setting prevents the browsing arrows from displaying underneath the rated posts.
-
Click OK to create the view, and then click your blog name in the navigation to return to the blog home page.
-
Click Site Actions, and then click Edit Page.
-
Do one of the following:
-
Click Add a Web Part in the zone you want to place it.
-
Click on the page where you want to insert the ratings Web Part. For example, you might want to put it to the right of your posts. In the ribbon, click the Insert tab, and then click Web Part.
-
-
Under Categories, click Lists and Libraries, under Web Parts, click Posts, and then click Add. The new Web Part appears on the page.
-
To switch to the Ratings view you created, click the down arrow, and then click Edit Web Part. The configuration tool pane appears.
-
Under Selected View, click the ratings view you just created.
-
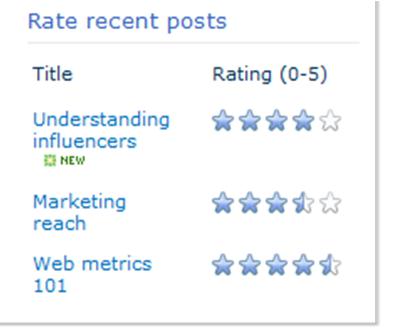
Under Appearance, type a name for the Web Part, such as Rate recent posts.
-
Make any other changes you want, and click OK.


