
Important: The Group Work Lists feature is not available in SharePoint 2013 and later versions. For more information, see Discontinued features and modified functionality in Microsoft SharePoint 2013.
The group calendar feature enables you to reserve resources, such as conference rooms and audio-visual equipment. For example, you can know the availability and reserve a conference room when you are schedule a meeting. You can also reserve just a resource, such as teleconferencing equipment.
The following steps must be completed before resources can be reserved.
In this article
To learn more about calendars and related features, see Use a Group Calendar.
Step 1: Activate the Group Work Lists feature for the site
Note: To activate a site feature, you must have at least the permissions obtained by being added to the default <Site Name> Owners SharePoint group for the site.
-
Click the Site Action menu and then click Site Settings.
-
Under Site Actions, click Manage site features.
-
Activate Group Work Lists.
Step 2: Enable resource reservation for a calendar
Note: To change list settings you must have at least the default Designer permission level, or the equivalent.
-
In the calendar, in the ribbon, click the Calendar tab, and then click List Settings.
-
On the List Settings page, click Title, description, and navigation.
-
On the General Settings page, in the Group Calendar Options section, set Use this calendar for Resource Reservation to Yes, and then click Save.
Step 3: Add resources to the Resources list
Note: To add items to a list, you must have at least the permissions obtained by being added to the default <Site Name> Members SharePoint group for the site.
-
Click the Site Actions menu and then click View All Site Content.
-
On the All Site Content page, in the Lists section, click Resources.
Important: Resources is a default list for most sites. If the Resources list does not exist on your site it must be created.
-
On the Resources page, click Add new item.
-
In the Resources dialog, type the Name for the resource, add an optional descriptions, and then click Save.
Repeat the procedure to add additional resources to the list.
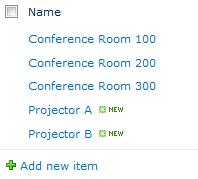
Following is an example of a Resource list created using the previous procedure,
Step 4: Group resources in the Resources list
If you have many items of one type, such as conference rooms, or many different types of resources, you might find it helpful to create groups for the resources. When someone is looking for a conference room or audio-visual equipment, they only have to view the type of resources they are looking for.
Note: To add items to a list, you must have at least the permissions obtained by being added to the default <Site Name> Members SharePoint group for the site.
-
From the Resources list, in the ribbon, point to New Item, click the down arrow, and then click Resource Group.
-
In the Resources – New Item dialog box, do the following:
-
Type the Name for the group, such as Conf Rooms.
-
Select the resources you want to add to the group and click Add. You can hold down the CTRL key to select multiple resources at the same time.
-
Type an optional description for the group.
-
Click Save .
-


