
Important: The SharePoint Slide library is only available in SharePoint 2010. For more info, see Discontinued features and modified functionality in Microsoft SharePoint 2013.
A Slide Library is a special type of library that you can use as a central location to share and reuse Microsoft Office PowerPoint 2007 or later slides. As a member of a workgroup or project team that often develops PowerPoint presentations, you will find a Slide Library very useful.
Instead of spending too much time searching for slides on file servers, you can quickly pull together PowerPoint presentations for conferences, sales pitches, and marketing campaigns — even at the last minute.
Note: To use a Slide Library, your computer must have PowerPoint 2007 or later installed. Slide Libraries support only .pptx files that contain multiple slides, or .ppt files that contain just one slide. You can also publish slides, add slides to your presentation, and check for slide changes directly from within PowerPoint. For more information on using Slide Libraries from PowerPoint, see the PowerPoint Help system.
What do you want to do?
Learn more about Slide Libraries
Slide Libraries help you share, store, and manage PowerPoint 2007 or later slides. After a Slide Library has been created, you can add PowerPoint slides to it, and reuse those slides to create a PowerPoint presentation directly from the Slide Library. Note that you can create Slide Libraries only in certain types of sites, such as a Team site and Document Workspace.
Publish slides You can the pubish individual slides or an entire presentation file to a library. When you publish an entire presentation to a Slide Library, the slides are automatically separated out from the presentation into individual files in the library. The Slide Library maintains a link to the presentation, so that you can be notified when slides change. Therefore, each slide is available for you or other people to modify it independently from the original presentation.
Edit slides You can easily edit slides in your Slide Library without having to leave your site. When you edit a slide in a Slide Library, the slide opens in PowerPoint. When you edit a slide and save your changes from within PowerPoint, the edited slide is saved to your Slide Library. If a slide in your presentation has been changed in the library, when you open the presentation in PowerPoint, you are given the opportunity to compare the new version of the slide with your current version or update your presentation automatically.
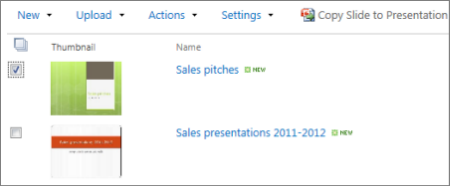
View slides After the slides are added to the library, the default view displays a thumbnail and properties for each slide. List columns, such as a thumbnail image of the slide, the name of the presentation it is part of, and a description of the slide, help you easily find slides, filter and sort columns, and create different views of the library. With some planning and by adding custom columns, you can even create presentations based on specific views. You can also take advantage of the standard features of most libraries. For example, you can track and restore versions, use check-in and check-out, require approval, and create workflows to help you manage the transition from drafts to final slides.
Create a Slide Library
Note: To create a Slide Library, you need to have at least Designer permissions.
-
Navigate to the site where you want to create the Slide Library.
-
Click Site Actions


Note: A SharePoint site can be significantly modified in appearance and navigation. If you cannot locate an option, such as a command, button, or link, contact your administrator.
-
Under Libraries, click Slide Library.
Note: Slide Libraries can be created in only certain types of sites, such as a Team site and Document Workspace. If you do not see Slide Library under Libraries, the type of site you are working on does not support Slide Libraries.
-
In the Name box, type a name for the library. The library name is required.
The name appears at the top of the library page, becomes part of the address for the library page, and appears in navigational elements that help users to find and open the library.
-
In the Description box, type a description of the purpose of the library. The description is optional.
-
Click Create.
Note: Avoid creating folders in a slide library if you know that content from this site will be deployed to another farm or site collection by content deployment. Sites that contain slide libraries with folders cannot be imported or exported.
Publish slides
-
Navigate to the site containing the Slide Library for which you want to publish slides.
-
Click the name of the library on the Quick Launch, or click Site Actions, click View All Site Content, and then in the Libraries section, click the name of the library.
Note: A SharePoint site can be significantly modified in appearance and navigation. If you cannot locate an option, such as a command, button, or link, contact your administrator.
-
Click Upload and then click Publish Slides.
If you have PowerPoint 2007 or later installed on your computer, the program opens and the Browse dialog box appears.
-
Locate and select the PowerPoint presentation that contains the slides that you want to add to your Slide Library, and then click Open.
-
In the Publish Slides dialog box, select the check boxes next to the slides that you want to publish to the Slide Library.
-
To select all of the slides, click Select All.
-
Click Publish.
After you publish your slides to the Slide Library, you may need to switch to your browser and then refresh your Slide Library Web page to view the newly added slides.
Edit a slide
-
Navigate to the site containing the Slide Library for which you want to edit a slide.
-
Click the name of the library on the Quick Launch, or click Site Actions, click View All Site Content, and then in the Picture Libraries section, click the name of the library.
Note: A SharePoint site can be significantly modified in appearance and navigation. If you cannot locate an option, such as a command, button, or link, contact your administrator.
-
Select the slide that you want to edit.
-
Hover over the name, click the dropdown arrow to display the Edit menu, and then click Edit in Microsoft PowerPoint.
Important: If you cannot locate the Edit menu, make sure the current view has the column, Name (linked to document with Edit menu) displayed.
-
Edit the slide in PowerPoint 2007 or later as necessary and then click Save.
View and edit slide properties
-
Navigate to the site containing the slide library for which you want to view and edit slide properties.
-
Click the name of the library on the Quick Launch, or click Site Actions, clickView All Site Content, and then in the Libraries section, click the name of the slide library.
Note: A SharePoint site can be significantly modified in appearance and navigation. If you cannot locate an option, such as a command, button, or link, contact your administrator.
-
To display the slide’s properties dialog box, hover over the name, click the dropdown arrow to display the Edit menu, and then select the View Properties or Edit Properties command.
Important: If you cannot locate the Edit menu, make sure the current view has the column, Name (linked to document with Edit menu) displayed.
-
Make changes to the name, presentation, and description slide properties.
Depending on how your slide library was set up, there may be more properties to view and edit.
-
Click Save.
Create a presentation
-
Navigate to the site containing the Slide Library for which you want to create a presentation.
-
Click the name of the library on the Quick Launch, or click Site Actions, click View All Site Content, and then in the Picture Libraries section, click the name of the library.
Note: A SharePoint site can be significantly modified in appearance and navigation. If you cannot locate an option, such as a command, button, or link, contact your administrator.
-
Select the check boxes next to the slides that you want to publish to a PowerPoint presentation.
-
Click Copy Slide to Presentation.
If you have PowerPoint 2007 or later installed on your computer, the program opens and the Copy slides to PowerPoint dialog box appears.
-
Select Copy to a new presentation, or if you have one or more presentations open in PowerPoint, select Copy to an open presentation, and then select the presentation that you want to incorporate slides into.
-
Do one of the following:
-
To retain the slide’s theme and add a new slide master to the presentation, select Keep Source Formatting.
-
To ignore the slide’s theme, and use the presentation’s current theme and slide master, clear Keep Source Formatting.
-
-
Select the Tell me when this slide changes check box if you want to be notified when someone changes a slide that you added to your presentation from a Slide Library.
-
Click OK.
Delete slides
-
Navigate to the site containing the slide library for which you want to delete slides.
-
Click the name of the library on the Quick Launch, or click Site Actions, click View All Site Content, and then in the Libraries section, click the name of the slide library.
Note: A SharePoint site can be significantly modified in appearance and navigation. If you cannot locate an option, such as a command, button, or link, contact your administrator.
-
Select one or more slides.
-
Click the Actions menu, and then click Delete.


