
There are three levels of navigation in SharePoint: global, hub, and local (teams sites and communication sites). Customize the navigation for your Microsoft SharePoint site to give users quick access to sites, pages, and targeted content.
This article introduces things you can do to customize your hub and local navigation:
-
Change the look of your page's navigation style, colors, and logo.
-
On a hub site, a team site or a communication site you can add, edit, or remove links on the navigation menu.
-
Edit the horizontal menu, footer menu (communication site only), or the hub site navigation bar that appears on all communication sites associated with a hub site.
-
Target navigational links to specific audiences with modern SharePoint in Microsoft 365 audience targeting.
-
Set up a multilingual site name, navigation, and footer on communication sites.
Notes:
-
The Navigation Pane can be located on the top (team sites and communication sites) or on the left (team sites only).
-
You need to be a site owner to make changes to the navigation of a site.
-
If your site has been customized by the site owner, the vertical menu or horizontal menu might not be available for editing.
Select your version of SharePoint below for the steps to customize the navigation on your SharePoint site.
Note: Some functionality is introduced gradually to organizations that have set up the targeted release options in Microsoft 365. This means that you may not yet see this feature or it may look different than what is described in the help articles.
-
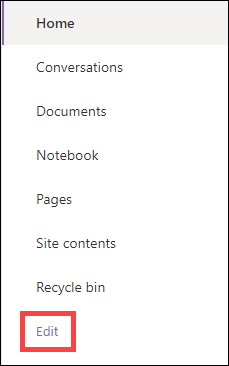
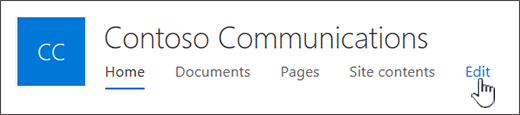
For a vertical navigation menu, select Edit at the bottom of the vertical navigation.
For a horizontal navigation menu, select Edit to the right of the horizontal navigation.

Note: If you don’t see Edit, you might not have permissions to customize the site navigation. You must have at least Manage Lists permissions. Contact the site owner either to get permissions to make the changes yourself or to have the changes made for you.
-
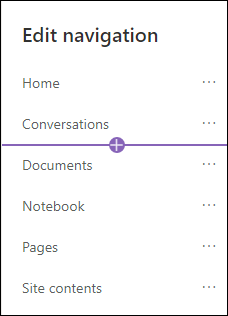
Hover in between the existing links in the menu where you want to add a link and select +.
-
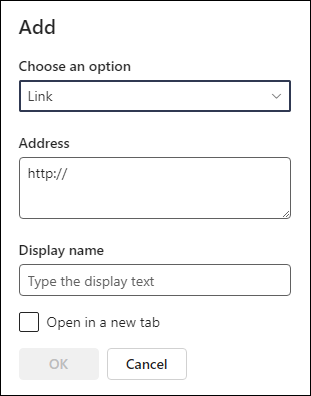
On the Add dialog box, choose one of the following link options:
-
Link will add a link to any site, internal or external to your company. Just enter the address and a display name for the link.
-
Label will add text to your navigation menu that is not hyperlinked. A label is useful if you want to organize or categorize your links.
-
Conversations will add a link to the Microsoft 365 group conversations associated with the team site. Just enter a display name for the link. The address is automatically added and cannot be edited.
-
Calendar will add a link to the Microsoft 365 group calendar associated with the team site. Just enter a display name for the link. The address is automatically added and cannot be edited.
-
Notebook will add a link to the OneNote notebook associated with the team site. Just enter a display name for the link. The address is automatically added and cannot be edited.
-
Planner will add a link to the Microsoft Planner instance associated with the team site. Just enter a display name for the link. The address is automatically added and cannot be edited.
-
Select the Open in a new tab checkbox to have the link open in a new browser tab.
-
-
Then, select OK.
You can also add a page to the menu from the Site Pages list by selecting Pages from the navigation menu or accessing the Site contents under Settings.
-
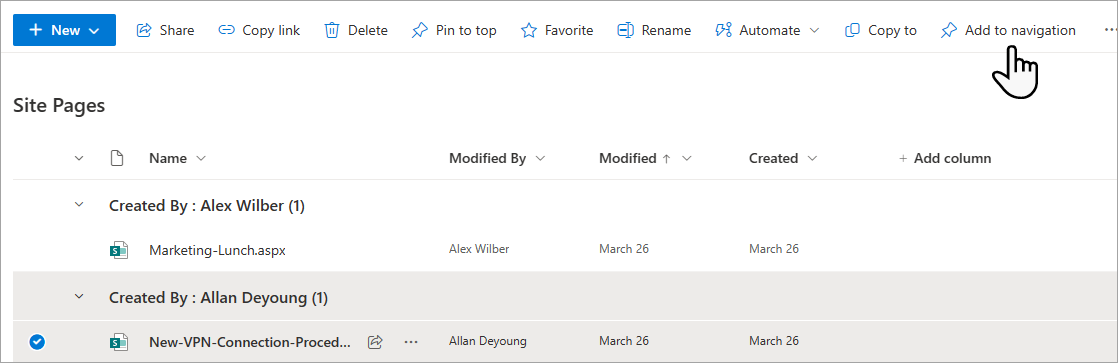
In Site Pages, select the page you want to add.
-
Select Add to navigation. When you navigate away from the Site Pages list, your changes will appear in the navigation menu.
Note: Recent items are handled automatically by SharePoint. You can't add links to the Recent menu.
-
Select Edit to the right of the navigation menu.
Note: If you don’t see Edit, you might not have permissions to customize the site navigation. You must have at least Manage Lists permissions. Contact the site owner either to get permissions to make the changes yourself or to have the changes made for you.
-
Hover in between the existing links in the menu where you want to add a link and select +.
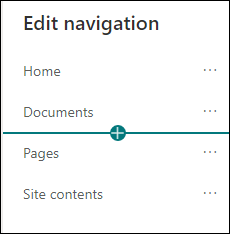
-
On the Add dialog box, choose one of the following link options:
-
Link will add a link to any site, internal or external to your company. Just enter the address and a display name for the link.
-
Label will add text to your navigation menu that is not hyperlinked; useful if you want to add a reminder within the navigation menu or categorize for your links.
-
Select the Open in a new tab checkbox to have the link open in a new browser tab.
-
-
In the Address box, enter the URL for the link you want to add if adding a link.
To add a link to a page, follow these steps:
-
Navigate to the page you want to add a link to.
-
Copy the URL from the address bar.
-
Paste the URL into the Address box.
-
-
In the Display name box, enter the display text that will show up on the navigation menu.
-
Select OK. The link will be added to the navigation menu.
-
When finished customizing the navigation, select Save or, to discard changes, select Cancel.
Note: You need to be a site owner to make changes to the navigation of a site. Depending on your permission level, you can change the navigation layout to Horizontal, Vertical, Mega menu, or Cascading by going to Settings, selecting Change the look, and then selecting Navigation.
Notes:
-
If you're a Global Administrator or SharePoint Administrator in Microsoft 365, you can convert any existing site to a hub site. For more information about planning and creating hub sites, see Planning your SharePoint hub sites.
-
It might take up to two hours for changes to the hub site navigation bar to appear on associated sites.
-
Select Edit to the right of the hub site navigation bar.

Note: If you don’t see Edit, you might not have permissions to customize the hub site navigation bar. You must have at least Manage Lists permissions. Contact the hub site owner either to get permissions to make the changes yourself or to have the changes made for you.
-
Hover in between the existing links in the menu where you want to add a link and select +.
-
On the Add dialog box, choose one of the following options:
-
Link will add a link to any site, internal or external to your company. Just enter the address and a display name for the link.
-
Associated hubs will add links to hub sites associated to the same parent hub.
-
Associated child hubs will add links to child hub sites associated to the same parent hub site, if available.
-
Label will add text to your navigation menu that is not hyperlinked. This is useful if you want to add a reminder within the navigation menu or categorize for your links.
-
Select the Open in a new tab checkbox to have the link open in a new browser tab.
-
-
In the Address box, enter the URL for the link you want to add if adding a link.
To add a link to a page, follow these steps:-
Navigate to the page you want to add a link to.
-
Copy the URL from the address bar.
-
Paste the URL into the Address box.
-
-
In the Display name box, enter the display text that will show up on the navigation menu.
-
Select OK. The link will be added to the navigation menu.
Note: You can add up to 2 levels of sub links to the hub site navigation bar by accessing ... next to your links.
-
When finished customizing the navigation, select Save or, to discard changes, select Cancel.
Note: Navigation layout for hub navigation leverages the same setting as the site navigation.
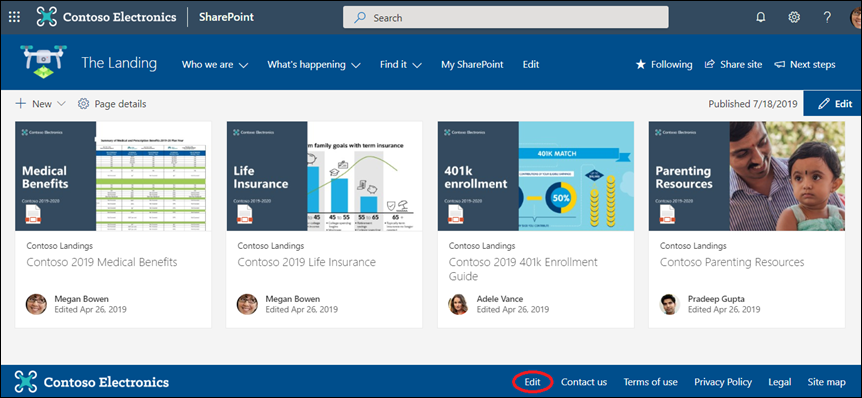
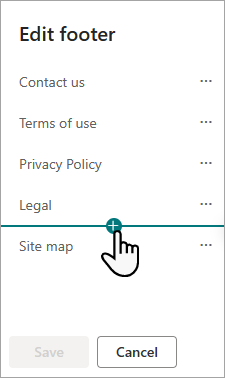
The following communication site shows a footer that's been added. Labels and links appear on the right side of the footer. When you add labels and links to your footer, they follow the Edit link and appear to the right.
-
On your site, select Edit on the right side of the footer (Edit appears on your footer after you've turned the footer control on). You can add one level of up to eight links or labels.
Note: The site footer feature is only available on communication site pages. This feature is not available for list pages, library pages, or other pages on your site.
-
Select + just above the buttons on the navigation menu.
-
On the Add dialog box, choose one of the following options:
-
Link will add a link to any site, internal or external to your company. Just enter the address and a display name for the link.
-
Label will add text to your navigation menu that is not hyperlinked. This is useful if you want to add a reminder within the navigation menu or to categorize your links.
-
Select the Open in a new tab checkbox to have the link open in a new browser tab.
-
-
In the Address box, enter the URL for the link you want to add if adding a link.
To add a link to a page, follow these steps:-
Navigate to the page you want to add a link to.
-
Copy the URL from the address bar.
-
Paste the URL into the Address box.
-
-
In the Display name box, enter the display text that will show up on the navigation menu.
-
Select OK. The link will be added to the footer.
-
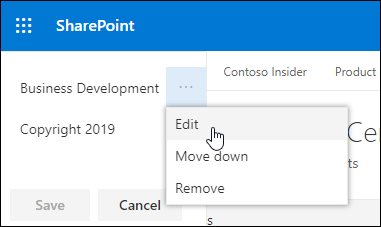
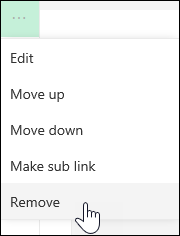
To edit an existing link or label, after selecting Edit on the right side of the footer, select the ellipses (...) next to the link that you want to edit.
-
On the menu, choose one of the following options:
-
Edit to change the link or label.
-
Move up or Move down to change the order that the link or label appears on the footer.
-
Remove to delete the link or label from the footer.
-
-
When done making your changes, select Save
Important:
-
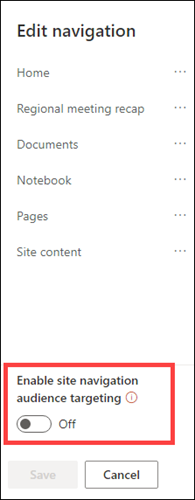
The site owner must enable audience targeting for site navigation.
-
Only site owners can turn audience targeting on and off. Once turned on, any site editor can target menu links to specific audiences.
-
An audience is defined by Microsoft 365 groups and security groups. If you need to, create a Microsoft 365 group for the members of your audience. Or, if you're an admin, you can create a security group from the Microsoft 365 admin center. Azure AD dynamic groups are not currently supported.
-
Select Edit within the navigational menu.
-
For a vertical navigation menu, select Edit at the bottom of the menu.
-
For a horizontal navigation menu, select Edit to the right of the menu.
Note: If you don’t see Edit, you might not have permissions to customize the site navigation. You must have at least Manage Lists permissions. Contact the site owner either to get permissions to make the changes yourself or to have the changes made for you.
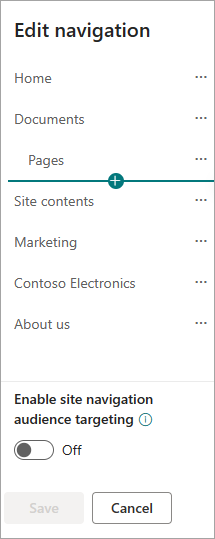
2. At the bottom of the Edit navigation pane, select the toggle for Enable site navigation audience targeting. When enabled, audience targeting will apply to all menus on the site including hub and footer menus.
3. Select the ellipses (...) next to the link that you want to edit, and select Edit.
4. In the Audiences to target box, enter up to 10 Microsoft 365 groups or security groups to target.
Note: When audience targeting is applied to a parent link, audience targeting also gets applied to the sub links and will only be visible to the groups you specify.
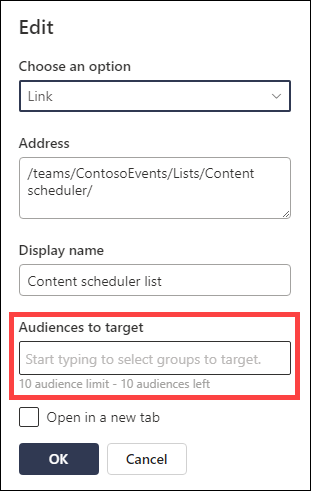
5. Select OK when you are done editing the link and an icon will confirm the links are being targeted.
Note: While editing the navigation, all links and sub links become visible to the editor including those that are targeted. Once saved, the navigation will display the targeted nodes.
6. Select Save when you are done or select Cancel to discard changes.
-
Select Edit within the navigational menu.
-
For a vertical navigation menu, select Edit at the bottom of the menu.
-
For a horizontal navigation menu, select Edit to the right of the menu.
Note: If you don’t see Edit, you might not have permissions to customize the site navigation. You must have at least Manage Lists permissions. Contact the site owner either to get permissions to make the changes yourself or to have the changes made for you.
2. Select the ellipses (...) next to the link that you want to edit.
3. Select Edit.
4. Make your changes in Display name and Address, and when you are done editing the menu link, select OK.
5. When finished customizing the navigation, select Save or, to discard changes, select Cancel.
-
Select Edit within the navigation menu.
-
For a vertical navigation menu, select Edit at the bottom of the menu.
-
For a horizontal navigation menu, select Edit to the right of the menu.
Note: If you don’t see Edit, you might not have permissions to customize the site navigation. You must have at least Manage Lists permissions. Contact the site owner either to get permissions to make the changes yourself or to have the changes made for you.
2. You can drag and drop menu items to reorder them. Select the menu item that you want to move, drag it to the new location, then release.
3. When finished customizing the navigation, select Save or, to discard changes, select Cancel.
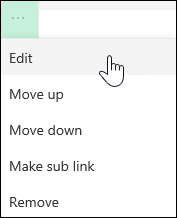
This creates an indented link under another link. You can add up to 2 levels of sub links to a vertical menu, a horizontal menu, or to the hub site navigation bar. When adding a sub link, create the link where you want it to appear and then make it a sub link of the one above it.
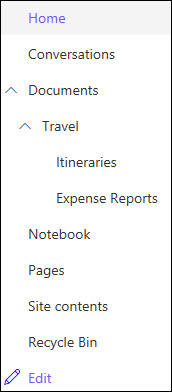
Vertical menu
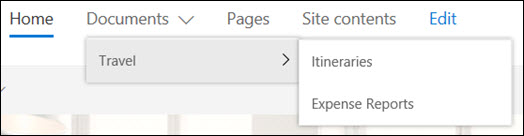
Horizontal menu
-
Select Edit within the navigational menu.
-
For a vertical navigation menu, select Edit at the bottom of the menu.
-
For a horizontal navigation menu, select Edit to the right of the menu.
Note: If you don’t see Edit, you might not have permissions to customize the site navigation. You must have at least Manage Lists permissions. Contact the site owner either to get permissions to make the changes yourself or to have the changes made for you.
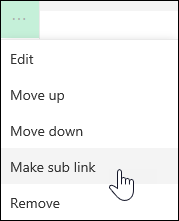
2. Select the ellipses (...) next to the link that you want to make a sub link.
3. Select Make sub link.
4. When finished customizing the navigation, select Save or, to discard changes, select Cancel.
This moves an indented link out from under another link.
-
Select Edit within the navigational menu.
-
For a vertical navigation menu, select Edit at the bottom of the menu.
-
For a horizontal navigation menu, select Edit to the right of the menu.
Note: If you don’t see Edit, you might not have permissions to customize the site navigation. You must have at least Manage Lists permissions. Contact the site owner either to get permissions to make the changes yourself or to have the changes made for you.
2. Select the ellipses (...) next to the sub link that you want to promote to a primary link.
3. Select Promote sub link.
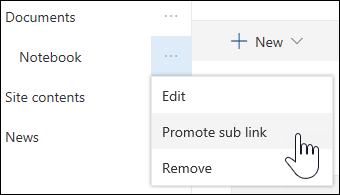
4. When finished customizing the navigation, select Save or, to discard changes, select Cancel.
Note: Some links, such as Recycle Bin are system links and can't be removed.
-
Select Edit within the navigational menu.
-
For a vertical navigation menu, select Edit at the bottom of the menu.
-
For a horizontal navigation menu, select Edit to the right of the menu.
Note: If you don’t see Edit, you might not have permissions to customize the site navigation. You must have at least Manage Lists permissions. Contact the site owner either to get permissions to make the changes yourself or to have the changes made for you.
2. Select the ellipses (...) next to the link that you want to remove.
3. Select Remove.
Note: The Recycle bin link is a system link and can’t be removed.
4. When finished customizing the navigation, select Save or, to discard changes, select Cancel.
If you have owner or admin permissions, you can show or hide the navigation menu for your team site.
-
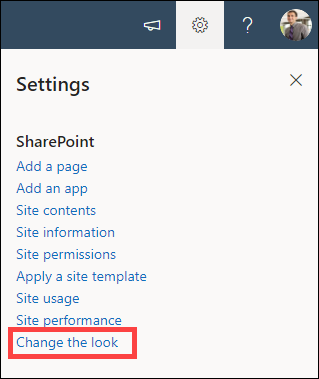
Select Settings, and then select Change the look.
-
In the Navigation settings, select the toggle to turn Site navigation visibility on or off.
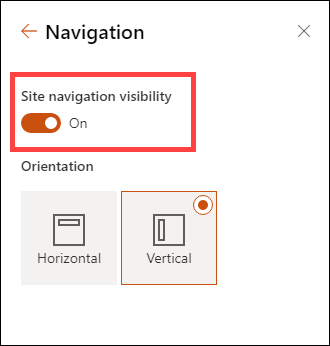
Note: When you disable the Quick Launch panel, you may still see the Recycle bin and the Edit links.
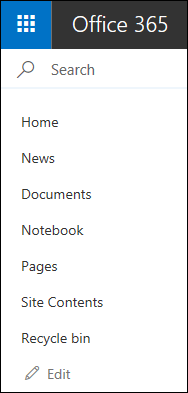
If you've enabled the publishing feature on your classic SharePoint experience site, the vertical menu will show links to modern experience lists or libraries if you've added them to your classic experience site in addition to showing items from the term store. For more information, see Enable managed navigation for a site in SharePoint and Enable publishing features.
-
Click Edit at the bottom of the left-hand menu.
Note: If you don’t see Edit, you might not have permissions to customize the site navigation. You must have at least Manage Lists permissions. Contact the site owner either to get permissions to make the changes yourself or to have the changes made for you.
-
Hover over the location in the menu where you want to add a link and click +.
-
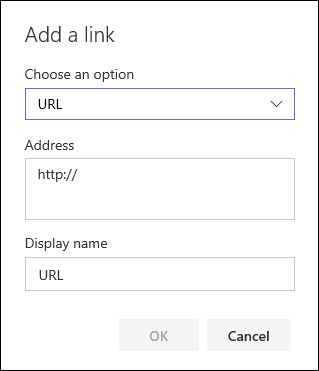
On the Add a link dialog box, choose one of the following link options:
-
URL to add a link to any item, internal or external to your company. Just enter the address and a display name for the link.
-
Conversations to add a link to the Microsoft 365 group conversations associated with the team site. Just enter a display name for the link. The address is automatically added and cannot be edited.
-
Calendar to add a link to the Microsoft 365 group calendar associated with the team site. Just enter a display name for the link. The address is automatically added and cannot be edited.
-
Notebook to add a link to the OneNote notebook associated with the team site. Just enter a display name for the link. The address is automatically added and cannot be edited.
-
Planner to add a link to the Microsoft Planner instance associated with the team site. Just enter a display name for the link. The address is automatically added and cannot be edited.
Then, click OK.
-
-
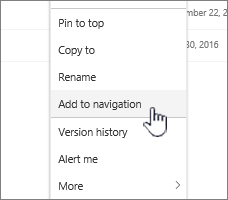
You can also add a page to the menu from the Site Pages list. Select Pages from the left-hand menu, select the page you want to add, and then click ... either next to the page in the list or in the top navigation bar.

Click Add to navigation.
-
When finished customizing the navigation, click Save or, to discard changes, click Cancel.
Note: Recent items are handled automatically by SharePoint. You can't add links to the Recent menu.
-
Click Edit to the right of the top menu.
Note: If you don’t see Edit, you might not have permissions to customize the site navigation. You must have at least Manage Lists permissions. Contact the site owner either to get permissions to make the changes yourself or to have the changes made for you.
-
Hover over the location in the menu where you want to add a link and click + .
-
On the Add a link dialog box, in the Address box, enter the URL for the link you want to add if adding a link.
To add a link to a page in the left-hand menu, follow these steps:
-
Navigate to the page where you want to add a link.
-
Copy the URL from the address bar.
-
Paste the URL into the Address box
-
-
In the Display name box, enter the display text for the link. This is the text that will show up on the menu. Then, click OK.
-
When finished customizing the navigation, click Save or, to discard changes, click Cancel.
Note: It may take up to two hours for changes to the hub site navigation bar to appear on associated sites.
-
Click Edit to the right of the hub site navigation bar.

Note: If you don’t see Edit, you might not have permissions to customize the hub site navigation bar. You must have at least Manage Lists permissions. Contact the hub site owner either to get permissions to make the changes yourself or to have the changes made for you.
-
Hover over the location in the menu where you want to add a link and click + and then the down arrow.

-
On the Add a link dialog box, in the Address box, enter the URL for the link you want to add.
To add a link to a page, follow these steps:
-
Navigate to the page you want to add a link to.
-
Copy the URL from the address bar.
-
Paste the URL into the Address box.
-
-
In the Display name box, enter the display text for the link. This is the text that will show up on the menu.
Then, click OK.
Note: You can add up to 2 levels of sub links to the hub site navigation bar.
-
When finished customizing the navigation, click Save or, to discard changes, click Cancel.
-
Click Edit at the bottom of the left-hand menu on a team site or to the right of the top menu on a communication site, hub site, or hub site navigation bar..
Note: If you don’t see Edit, you might not have permissions to customize the site navigation. You must have at least Manage Lists permissions. Contact the site owner either to get permissions to make the changes yourself or to have the changes made for you.
-
Click the ellipses (...) next to the link that you want to edit.
-
Click Edit.
-
When you are done editing the link, click OK.
-
When finished customizing the navigation, click Save or, to discard changes, click Cancel.
-
Click Edit at the bottom of the left-hand menu on a team site or to the right of the top menu on a communication site, hub site, or hub site navigation bar..
Note: If you don’t see Edit, you might not have permissions to customize the site navigation. You must have at least Manage Lists permissions. Contact the site owner either to get permissions to make the changes yourself or to have the changes made for you.
-
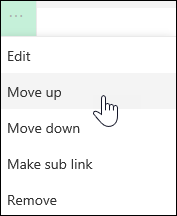
Click the ellipses (...) next to the link that you want to move.
-
Click either Move up or Move down.
-
Repeat these steps until the link is in the desired position.
-
When finished customizing the navigation, click Save or, to discard changes, click Cancel.
Note: You can't drag and drop items to reorder them in menus.
This creates an indented link under another link. You can add up to 2 levels of sub links to the left-hand menu of a team site, to the top menu of a communication site, or to the hub site navigation bar. When adding a sub link, create the link where you want it to appear and then make it a sub link of the one above it.
Left-hand menu
Top menu
-
Click Edit at the bottom of the left-hand menu on a team site or to the right of the top menu on a communication site, hub site, or hub site navigation bar.
Note: If you don’t see Edit, you might not have permissions to customize the site navigation. You must have at least Manage Lists permissions. Contact the site owner either to get permissions to make the changes yourself or to have the changes made for you.
-
Click the ellipses (...) next to the link that you want to make a sub link.
-
Click Make sub link.
-
When finished customizing the navigation, click Save or, to discard changes, click Cancel.
This moves an indented link out from under another link.
-
Click Edit at the bottom of the left-hand menu on a team site or to the right of the top menu on a communication site, hub site, or hub site navigation bar.
Note: If you don’t see Edit, you might not have permissions to customize the site navigation. You must have at least Manage Lists permissions. Contact the site owner either to get permissions to make the changes yourself or to have the changes made for you.
-
Click the ellipses (...) next to the sub link that you want to promote to a primary link.
-
Click Promote sub link.
-
When finished customizing the navigation, click Save or, to discard changes, click Cancel.
Some links, such as Recycle Bin are system links and can't be removed.
-
Click Edit at the bottom of the left-hand menu on a team site or to the right of the top menu on a communication site, hub site, or hub site navigation bar.
Note: If you don’t see Edit, you might not have permissions to customize the site navigation. You must have at least Manage Lists permissions. Contact the site owner either to get permissions to make the changes yourself or to have the changes made for you.
-
Click the ellipses (...) next to the link that you want to remove.
-
Click Remove.
Note: You can't remove the Recycle bin link at this time.
-
When finished customizing the navigation, click Save or, to discard changes, click Cancel.
Show/Hide the navigation menu for a SharePoint in Microsoft 365 team site.
If you have owner or admin permissions, you can turn the left-hand menu off for your team site.
Note: If you have owner or admin permissions, you can turn the left-hand menu off for your team site.
-
Click Settings

-
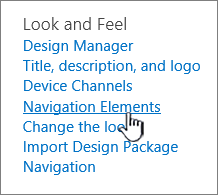
Under Look and Feel on the Site Settings page, click Navigation Elements.
-
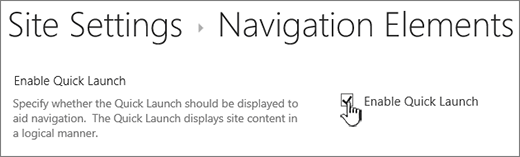
Check or clear the Enable Quick Launch setting to turn it off or on, and then click OK.
Note: When you disable the Quick Launch panel, you may still see the Recycle bin and the Edit button.
If you've enabled the publishing feature on your classic SharePoint experience site, the left-hand menu will show links to modern experience lists or libraries if you've added them to your classic experience site in addition to showing items from the term store. For more information, see Enable managed navigation for a site in SharePoint and Enable publishing features.
Editing links in SharePoint Server 2016
To get started editing the links on your site, click one of the EDIT LINKS options on the page.
|
|
1. To change the links in the Top link bar, click EDIT LINKS to the right of the menu. 2. To change links in the Left-hand menu (also known as Quick launch bar), click EDIT LINKS beneath the menu. |

Note: If you don’t see EDIT LINKS, you might not have permissions to customize the site navigation. You must have at least Manage Lists permissions. Contact the site owner either to get permissions to make the changes yourself or to have the changes made for you.
-
Click Settings
-
Click EDIT LINKS on the Quick Launch or Top link bar, depending on where you want to add a link.
-
Click the app you want to add, and then drag it to where you want it to be on the Quick Launch or Top link bar.
-
Click Save.
To add a link to another site, type in the URL.
-
Click EDIT LINKS on the Quick Launch or Top link bar, depending on where you want to add a link.
-
Click + link.
-
Enter a display name for the link and a target location, making sure you include the http://.
-
Click OK to add the new link to the Quick Launch or Top link bar.
-
Click Save.
Note: You can't rename or remove Recycle Bin.
-
Click EDIT LINKS on the Quick Launch or Top link bar, depending on where you want to edit a link.
-
Rename: Click directly on the link you want to rename and start typing the new name. Click outside the name, and then click Save.
-
Remove: Click the X corresponding to the link to remove it from the navigation panel, then click Save.
Renaming a link doesn't affect the page address or URL that the link references, only the menu.
-
Click EDIT LINKS on the Quick Launch or Top link bar depending on the location of the link that you want to move.
-
Select the link that you want to move, and then drag it to its new position in the navigation area.
To indent or create a sub link, drag the link under and slightly to the right of the link you want as the top link.
-
Repeat these steps for each link you want to move.
-
When finished, click Save.
Note: You can drag items out of Recent to the main Quick Launch bar. However you can't drag items into Recent.
For sites in site collections where publishing features are enabled, you have more navigation options to choose from, including showing subsites and displaying the same navigation as a site's parent site navigation (also called inheriting parent navigation). If you don't see these options, check with your site administrator.
-
On the site where you want to change navigation settings, click Settings
-
On the Site Settings page, click Look and Feel, and then click Quick Launch or Top Link bar..
-
Choose options for the Quick Launch or Top Link bar, for example, to show subsites or to display the same navigation as the parent site (inherit parent navigation).
The links that appear on the left side of your site are called Quick Launch links. By default, Quick Launch includes links to recent items as well as important items like lists and libraries. The links at the top, in the Top Link bar, typically show subsites under your site.
Quick Launch
When you create a new list or library, a new link appears automatically under Recent on Quick Launch. Only the five newest links appear in the Recent section.
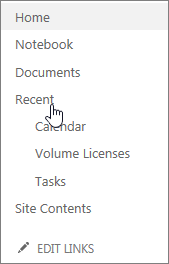
Note: When you create a new page, it doesn't automatically appear in Quick Launch. You have to create a link to the page and add it yourself.
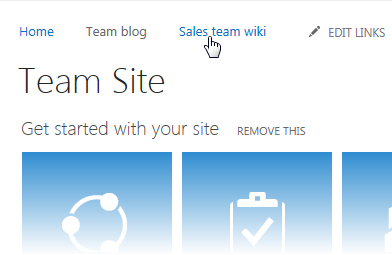
Top Link bar
You can also customize the navigation links on the Top Link bar of your site to change capitalization, rearrange the order, or add links to the subsites that users visit most often.
Related links
To add links to your page rather than the vertical menu or horizontal menu, see Add a link to a page.
To create new pages that you can link to, see Add a page to a site.
To change colors, background, and how your site looks, see Change the look of your SharePoint site.
To change the name, description, logo, or other site settings, see Change a site's title, description, logo, and site information.
To create a site in SharePoint in Microsoft 365, see Create a team site in SharePoint or Create a communication site in SharePoint.


