
A template is a pre-designed layout that you can apply to a new page to provide a level of consistency and save time. OneNote comes with several built-in templates, including decorative page backgrounds and to-do lists. You can create your own template or customize an existing one.
You can use OneNote templates as they are, change them as you like, or create your own.
Create a new page template
-
In the list of pages on the right side of your screen, choose Add Page.

-
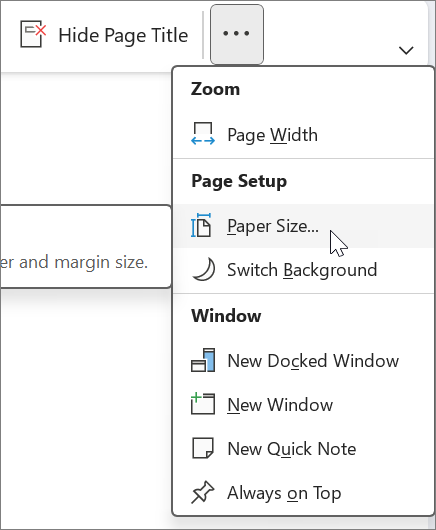
Choose View > Paper Size.
-
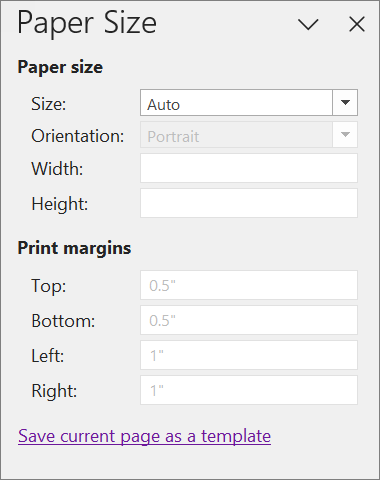
In the Paper Size task pane, set the paper size and print margins.
-
Add any content that you want to appear in the template.
Every new page that you create using this template will have this information on it.
-
When you’re done, choose Save current page as a template at the bottom of the Paper Size task pane.
-
In the Save As Template dialog box, give the template a name and select Save.
Note: When you apply a template to a page, you’ll be able to choose your template from the My Templates list in the Templates task pane.
Customize a page template
-
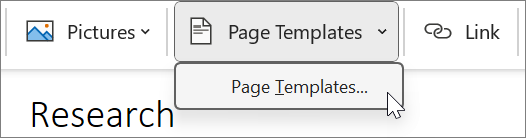
Choose Insert > Page Templates > Page Templates.
-
In the Templates task pane, select the small arrows next to the category names to expand them.
-
Choose the name of the template you want to customize.
The template will be applied to a new, blank page.
-
On the ribbon, choose View > Paper Size.
-
In the Paper Size task pane, set the paper size and print margins.
-
Edit or delete the existing page content and then choose Save current page as a template at the bottom of the Paper Size task pane.
-
In the Save As Template dialog box, give the template a name and select Save.
Note: When you apply a template to a page, you’ll be able to choose the customized template from the My Templates list in the Templates task pane.
Best practices for creating page templates
-
Turn on rule lines (View > Rule Lines) to make it easier to align text boxes, pictures, and other content in your template. Turn the rule lines off again before you save your work, unless you want them to be part of the template.
-
Use paragraph styles (Home > Styles) to format text and headings to keep your styles consistent.
-
Don’t use a picture as a background image unless it’s essential to your template’s design. Background images affect the file size and can cause text placed on top of the picture to be converted to an image if you email the page. Consider placing pictures at the top, bottom, or sides instead of behind text.
-
Make sure placeholder text is clear and easy to identify, so anyone using the template can tell what information each placeholder should contain. For example, a text box intended to contain a company name, could be called “[Company name]”.
-
Make sure tables and pictures are clearly positioned and that their headings are kept separate from text that will be entered later on. Text boxes expand when they’re filled with content and a page could quickly get cluttered.
-
Choose a font color that will be visible without the background color, in case the template is printed.
-
Position text and objects within the print margins of your page.


