
Columns in a list or library help you group, categorize, and track information. Column types include a single line of text, a drop-down list of options, a number that is calculated from other columns, and a column that allows you to select a person's name.
Add a column to a list or library
You can add most types of columns without leaving your list or library.
-
Navigate to the list or library you want to create a column in.
-
To the right of the last column name at the top of the list or library, select + Add column or +.
Note: Does your SharePoint screen look different than the examples here? If so, select the Classic tab earlier in this article. You'll find alternate instructions there that'll match your experience better if your administrator set the classic experience on the list or document library, or if you're using an earlier version of SharePoint Server. See Which version of SharePoint am I using?
-
In the dropdown, select the type of column you want.
-
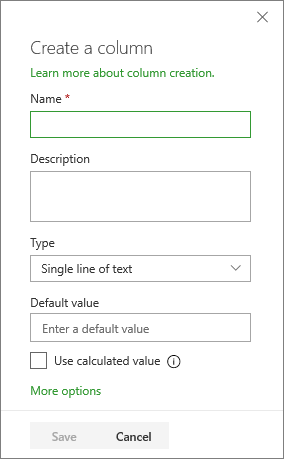
In the Create a column panel, in the Name field, enter a title or column heading.
-
Enter any other required information. The number of fields will vary with column type you choose. The above example is for a 'number' field.
-
Select Save.
-
Navigate to the list or library where you want to create a column.
-
In the All items or All documents view of the list or library you want to add a column, select Add column

-
In the Name and Type section, enter the name that you want for the column in the Column name field.
-
Under The type of information in this column is, select the type of information that you want to appear in the column. For more info about column types, see Site column types and options.
-
In the Additional Column Settings section, enter a description in the Description field to help people understand the purpose of the column and what data it should contain. This description is optional.
Depending on the type of column that you selected, more options may appear in the Additional Column Settings section. Select the additional settings that you want. For more info about column settings, see Site column types and options.
-
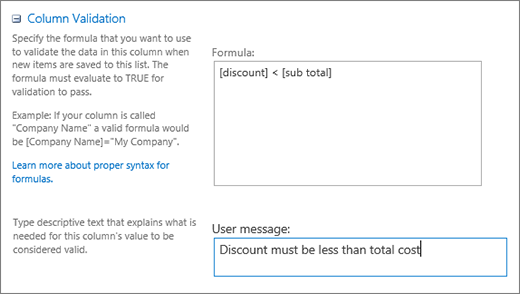
You can add validation to make sure the column entry matches what's expected. To expand the section, select Column Validation, and enter the Formula that you want to use to validate the data. Add a User message that describes what valid data should look like to help users enter valid data. For info about validation and formula syntax, see Examples of common formulas in lists.
The Column Validation section is not available for all types of columns.
-
To save, select OK.
-
On the home page, select Settings

-
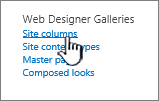
On the Site Settings page, under Web Designer Galleries, select Site columns.
-
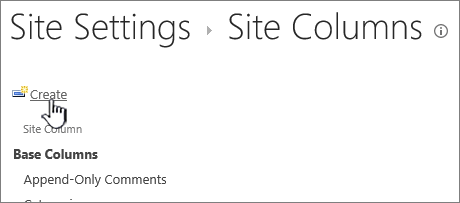
On the Site Columns page, select Create.
-
In the Name and Type section, enter the name that you want in the Column name box.
-
Select the type of information you want to store in the column. To learn more, see Site column types and options.
-
In the Group section, select the existing group in which to store the new site column, or create a new group to store the column.
The list of Existing groups can vary with the version of SharePoint, and what groups have been added.
-
In the Additional Column Settings section, select the additional column settings you want. The options available in this section differ depending on the type of column that you select in the Name and Type section.
For more info about column settings, see Site column types and options.
-
Select OK.
-
Navigate to the list or library you want to create a column in.
If the name of your list or library does not appear on a page, select Settings

-
Select Settings
-
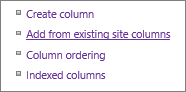
On the Settings page, scroll down to the Columns section, and then select Add from existing site columns.
-
On the Add Columns from Site Columns page, in the Select Columns section, select the group of site columns to choose from in the Select site columns from dropdown.
When you select a column group from the list, the available site columns appear in the Available site columns list.
Note: The Available site column list defaults to All Groups, but you can narrow the number of fields by choosing groups that may contain what you're looking for (for example, Core Document Columns or Custom Columns).
-
Select the site columns you want to add, and select Add. The columns appear in the Columns to add list box. To add the column to the default view, which people on your site automatically see when they first open a list or library, make sure Add to default view is selected. Some lists such as the Tasks list also have the option Add to all content types, which is selected by default. If you want to add the column to all content types, make sure Add to all content types remains selected.
Depending on the type list or library, there may be more settings in the Options section. Select the additional options that you want.
-
To save, select OK.
Create a column in a list or library with SharePoint Server 2016, 2013, or 2010
-
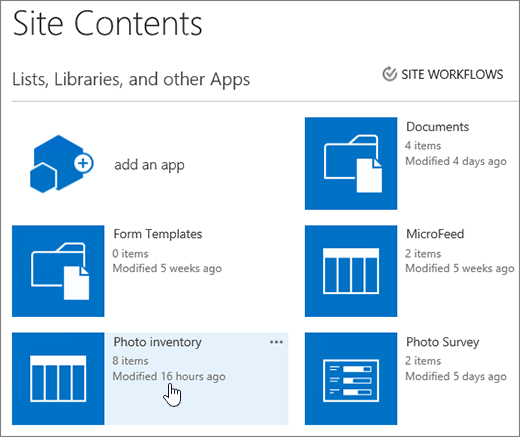
If the list or library is not already open, select its name on the page or in the Quick Launch.
-
In SharePoint Server 2016 or 2013, if the name of your list or library does not appear on a page, select Settings

-
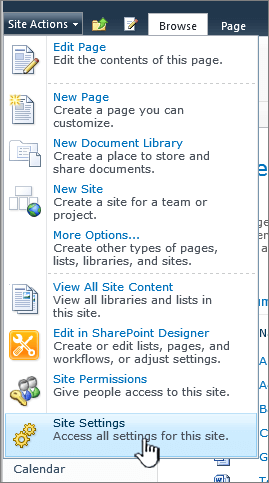
In SharePoint Server 2010, if the name of your list or library does not appear, select Site Actions

-
-
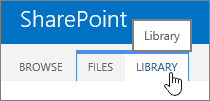
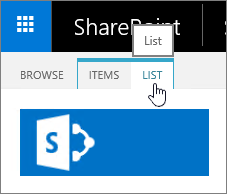
In the ribbon, select the List or Library tab.
-
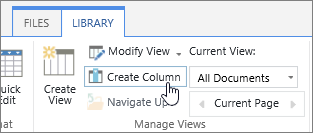
In the Manage Views group, select Create Column.
-
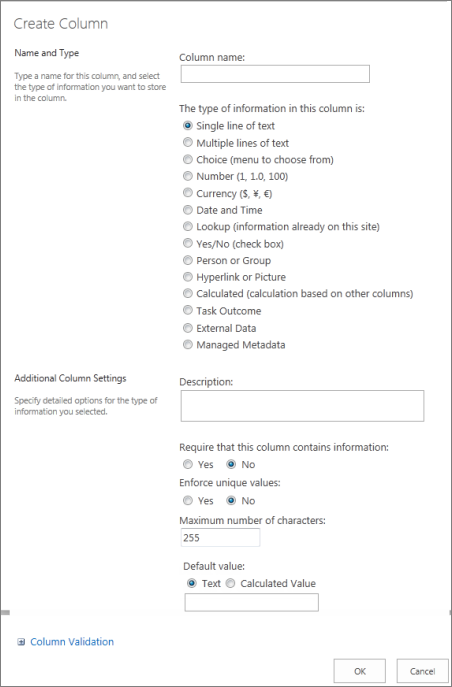
In the Name and Type section, enter the name that you want for the column in the Column name box.
-
Under The type of information in this column is, select the type of information that you want to appear in the column. For more info about column types, see Site column types and options.
-
In the Additional Column Settings section, enter a description in the Description box to help people understand the purpose of the column and what data it should contain. This description is optional.
-
Depending on the type of column that you selected, more options may appear in the Additional Column Settings section. Select the additional settings that you want. For more info about column settings, see Site column types and options.
-
-
You can add validation to make sure the column entry matches what's expected. Select Column Validation to expand the section, and enter the Formula that you want to use to validate the data. Add a User message that describes what valid data should look like to help users enter valid data. For info about validation and formula syntax, see Examples of common formulas in SharePoint Lists.
-
The Column Validation section is not available for all types of columns.
-
-
To save, select OK.
-
From the site where you want to create a site column, navigate to the Site Settings page:
-
In SharePoint Server 2016 or 2013, on the site home page, select Settings
-
In SharePoint Server 2010, select Site Actions
-
-
On the Site Settings page, under Web Designer Galleries, select Site columns.
-
On the Site Columns page, select Create.
-
In the Name and Type section, enter the name that you want in the Column name box.
-
Select the type of information you want to store in the column. For more info about column types, see Site column types and options.
-
In the Group section, select the existing group in which to store the new site column or create a new group to store the column.
-
The list of Existing groups can vary with version of SharePoint, and what groups have been added.
-
In the Additional Column Settings section, select the additional column settings you want. The options available in this section differ depending on the type of column that you select in the Name and Type section.
-
For more info about column settings, see Site column types and options.
-
-
Select OK.
-
If the list or library is not already open, select its name on the page or in the Quick Launch.
-
In SharePoint Server 2016 or 2013, if the name of your list or library does not appear on a page, select Settings
-
In SharePoint Server 2010, if the name of your list or library does not appear, select Site Actions
-
-
On the ribbon, select the List or Library tab.
The name of the tab may vary depending on the type of list or library. For example, if your list is a calendar, the name of the tab is Calendar.
-
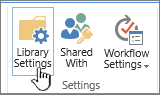
In the Settings group, select List Settings or Library Settings.
-
On the Settings page, scroll down to the Columns section, and then select Add from existing site columns.
-
On the Add Columns from Site Columns page, in the Select Columns section, select the group of site columns to choose from in the Select site columns from dropdown.
-
The Available site columns list defaults to All Groups, but you can narrow the number of fields by choosing groups that may contain what you're looking for (for example, Core Document columns or Custom columns).
-
-
When you select a column group from the list, the available site columns appear in the Available site columns list.
-
Select the site columns you want to add, and select Add.
-
The columns appear in the Columns to add list box. To add the column to the default view, which people on your site automatically see when they first open a list or library, make sure Add to default view is selected. Some lists such as the Tasks list also have the option Add to all content types which is selected by default. If you want to add the column to all content types, make sure Add to all content types remains selected.
-
Depending on the type list or library, there may be more settings in the Options section. Select the additional options that you want.
-
-
Select OK.
-
For an alternative to deleting a column from a page or site, see Show or hide a column in a list or library on a page.
-
To add a list to a page or site, see Create a list.
-
To delete a list from a page or site, see Delete a list.
We're listening!
Was this article helpful? If so, please let us know at the bottom of this page. Let us know what was confusing or missing. If you got here from a search and it wasn't the information you wanted, let us know what you were searching for. Please include your SharePoint, OS, and browser versions. We'll use your feedback to double-check the steps and update this article.


