
When you create a publication, for example, Banners, and select a size larger than 8.5-by-11 inches in Page Setup, Publisher prints a publication that is larger than a single sheet of paper. In Publisher, you can print publications as large as 240 by 240 inches.
Important: Some features, such as gradients, lines, and border art, may not be printed correctly on banners that are larger than 10 feet.
What do you want to do?
Create a banner
-
Click File > New and choose Built-in to use one of the templates installed in Publisher.
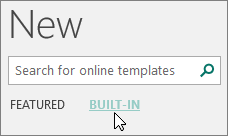
Tip: Using Publisher 2010? Click File > New and select Installed and Online Templates under Available Templates.
-
Select the Banners category, then click the banner design that you want — for example, Baby Congratulations.
-
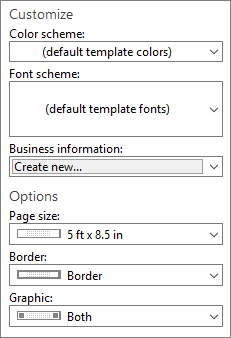
Under Customize and Options, select any options you want.
-
Click Create.
-
On the Page Design tab, do any of the following:
-
To change the width and height of the banner, click Size, then choose the page size, or click Create new page size.
-
To change the banner's color scheme, select color scheme in the Schemes group.
-
To change the banner's font scheme, click Fonts, then choose a font pair.
-
-
In your banner, replace the placeholder text and pictures with the text and pictures or other objects that you want.
-
Click File > Save As, then click the location or folder where you want to save the new banner.
-
In the File name box, type a name for your banner.
-
In the Save as type box, click Publisher Files.
-
Click Save.
Create a poster
To create a poster in Publisher, first create a banner. Then, change the page size of the banner to the poster size you want.
-
On the Page Design tab, click Size > More Preset Page Sizes.

-
Under Publication Types, select Posters, then choose the size you want.
-
Click OK.
-
On the Page Design tab, do any of the following:
-
To change the width and height of the banner, click Size, then choose the page size, or click Create new page size.
-
To change the banner's color scheme, select color scheme in the Schemes group.
-
To change the banner's font scheme, click Fonts, then choose a font pair.
-
-
In your banner, replace the placeholder text and pictures with the text and pictures or other objects that you want.
-
Click File > Save As, then click the location or folder where you want to save the new banner.
-
In the File name box, type a name for your banner.
-
In the Save as type box, click Publisher Files.
-
Click Save.
Add images to a banner or poster
Add pictures
-
On the Insert tab in the Illustrations group, do one of the following:
-
To add a picture from your computer, click Pictures, then browse to the picture you want to insert, select it, and then click Insert.
-
To add an online picture, click Online Pictures, then choose Bing Image Search. In the search box, type a word or phrase that describes the image you want, then click Insert.
Note: You can filter search results to CC (Creative Commons) Only (learn more here) or you can choose to see all images. If you choose All Images, your search results will expand to show all Bing images. You're responsible for respecting the rights of others' property, including copyright. To better understand the licensing options, see Filter images by license type.
-
You can also add pictures from a web page and replace existing pictures. Learn more.
Adjust the overlap
If you are printing a large banner or poster that is made up of many horizontal or vertical pages, you can increase or decrease the margin between the pages so that you can tape the pages together without covering some of the printed area.
-
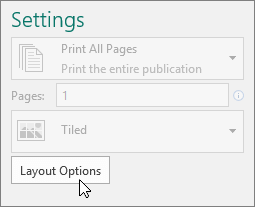
Click File > Print, then click Layout Options under Settings.
-
In the Layout Options dialog box, do one of the following:
-
To increase the paper margin that overlaps between the horizontal printed area on a page of the banner, poster, or large publication, change the Horizontal overlap settings.
-
To increase the paper margin that overlaps between the vertical printed area on a page of the banner, poster, or large publication, change the Vertical overlap settings.
-
To print a single page of the large publication, check the Print a single tile box, then select the Row and/or Column number of the tile you want to print.
-
-
Click Close > Print.
Note: All desktop printers have a nonprinting region at the margins.
Print a banner or poster
To print a banner or poster, click File > Print. Select your printer and adjust your settings, then click Print.
Note: To print a banner on banner paper, you must use a printer that supports banner paper size. To determine whether the printer that you are using supports banner paper, check the options under Paper on the Publication and Paper Settings tab in the Print dialog box.
These instructions are specific to Publisher 2007.
What do you want to do?
Create a banner
-
In the Publication Types list, click Banners.
-
In the Banners gallery, do one of the following:
-
Click the banner design that you want — for example, Apartment for Rent.
-
Click View templates from Microsoft Office Online, click the banner design that you want to download, and then go to step 4.
-
-
Under Customize and Options, select any options that you want.
-
Click Create.
-
In the Format Publication task pane, do any of the following:
-
To change the width and height of the banner, click Change Page Size in the task pane, and then choose the page size, or click Create custom page size.
-
To change the banner's color scheme, click Color Schemes in the task pane, and then choose the scheme that you want.
-
To change the banner's font scheme, click Font Schemes in the task pane, and then choose the scheme that you want.
-
-
In your banner, replace the placeholder text and pictures with the text and pictures or other objects that you want.
-
On the File menu, click Save As.
-
In the Save in box, click the folder where you want to save the new banner publication.
-
In the File name box, type a name for your banner publication.
-
In the Save as type box, click Publisher Files.
-
Click Save.
Create a poster
To create a poster in Publisher, create a banner, and then change the page size to the poster size that you want.
-
In the Publication Types task pane, click Banners, do one of the following:
-
Under Banners, click Blank Sizes.
-
Click View templates from Microsoft Office Online, click the poster design that you want to download, and then go to step 3.
-
-
Under Blank Sizes, click the paper size that you want, or click Create custom page size and create a custom page size.
-
Click Create.
-
In the Format Publication task pane, do any of the following:
-
To change the color scheme, click Color Schemes in the task pane, and then choose the scheme that you want.
-
To change the font scheme, click Font Schemes in the task pane, and then choose the scheme that you want.
-
-
On the File menu, click Save As.
-
In the Save in box, click the folder where you want to save the new publication.
-
In the File name box, type a name for your publication.
-
In the Save as type box, click Publisher Files.
-
Click Save.
Add images to a banner or poster
Add clip art
-
On the Objects toolbar, click Picture Frame, click Empty Picture Frame, and then click your publication to place the empty picture frame.
-
Right-click the empty picture frame, point to Change Picture, and then click Clip Art.
-
In the Clip Art task pane, in the Search for box, type a word or phrase that describes the clip that you want.
To narrow your search, do one or both of the following:
-
To limit search results to a specific collection of clips, in the Search in box, select the collection that you want.
-
To limit search results to a specific type of media file, in the Results should be box, select the check box next to the types of clips that you want.
When you search for clip art and pictures online, you'll be directed to Bing. You're responsible for respecting copyright, and the license filter in Bing can help you choose which images to use.
-
-
Click Go.
-
In the search results window of the Clip Art task pane, click the picture that you want.
Add a picture from a file
-
On the Objects toolbar, click Picture Frame, click Empty Picture Frame, and then click your publication to place the empty picture frame.
-
Right-click the picture frame, point to Change Picture, and then click From File.
-
In the Insert Picture dialog box, locate the folder that contains the picture that you want to insert, and then click the picture file.
-
Do one of the following:
-
To embed the picture, click Insert.
-
To link the picture to the picture file on your hard disk, click the arrow next to Insert, and then click Link to File.
Note: If you plan to have a commercial printer print your publication, such as a banner on a single large piece of paper, invitations on embossed paper, or pictures on a T-shirt, or if you plan to move your publication to a different computer, use the Pack and Go Wizard to include linked graphics.
If you do not use the Pack and Go Wizard, the graphics may not be copied with the file. Find links to more information about linking and embedding graphics and the Pack and Go Wizard in the See also section.
-
Add a picture directly from a scanner or digital camera
-
On the Objects toolbar, click Picture Frame, click Empty Picture Frame, and then click your publication to place the empty picture frame.
-
Right-click the picture frame, point to Change Picture, and then click From Scanner or Camera.
-
If you have more than one device attached to your computer, select the device that you want to use.
-
Do one of the following:
-
Add a picture from a scanner If you use default settings for scanning the image, click Web Quality for pictures that you are adding to an online publication, or click Print Quality for pictures that you are adding to a print publication. Then click Insert to scan your picture.
Note: The Insert button might be unavailable with some scanners because the scanner software doesn't support an automatic scan. Click Custom Insert instead.
-
Add a picture from a camera or another device If the selected device is a camera or another device (not a scanner), or if you want to customize any settings before you scan the picture, click Custom Insert, and then follow the instructions that come with the device that you are using.
-
Add a picture by using the Graphics Manager
-
On the Objects toolbar, click Picture Frame, click Empty Picture Frame, and then click your publication to place the empty picture frame.
-
Right-click the picture frame, point to Change Picture, and then click Graphics Manager.
-
In the Graphics Manager task pane, under Select a picture, point to the name of the empty picture frame that you want to replace, click the arrow, and then click Insert Picture in this Frame.
-
In the Insert Picture dialog box, click the picture that you want.
If you don't see the picture you want, browse to the folder that the picture is in.
-
Do one of the following:
-
To embed the picture, click Insert.
-
To link the picture to the picture file on your hard disk, click the arrow next to Insert, and then click Link to File.
-
Change the overlap
-
On the File menu, click Print.
-
To increase the paper margin that overlaps between the horizontal printed area on a page of the banner, poster, or large publication, change the Horizontal overlap settings under More print options.
For example, if you are printing a large banner that is made up of many horizontal pages, you can increase or decrease the margin between the pages so that you can tape the pages together without covering some of the printed area.
-
To increase the paper margin that overlaps between the vertical printed area on a page of the banner, poster, or large publication, change the Vertical overlap settings under More print options.
For example, if you are printing a large banner that is made up of many vertical pages, you can increase or decrease the margin between the pages so that you can tape the pages together without covering some of the printed area.
-
To print a single page of the large publication, select the Print a single tile check box, and then select the row and column number of the tile that you want to print.
-
-
Click Print.
Note: All desktop printers have a nonprinting region at the margins.
Print a banner or poster
To print a banner or poster, click Print on the File menu, and then click OK.
Note: To print a banner on banner paper, you must use a printer that supports banner paper size. To determine whether the printer that you are using supports banner paper, check the options under Paper on the Publication and Paper Settings tab in the Print dialog box.
See also
Find more poster, social media, Facebook, Instagram, LinkedIn, Twitter templates on Microsoft Create


