
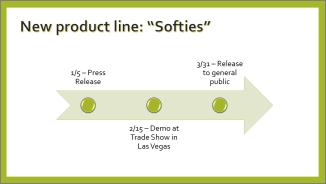
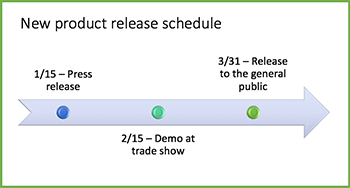
If you want to create a graphical representation of a sequence of events, such as the milestones in a project or the main events of a person's life, you can use a SmartArt graphic timeline. After you create the timeline, you can add more dates, move dates, change layouts and colors, and apply different styles.
Create a timeline
-
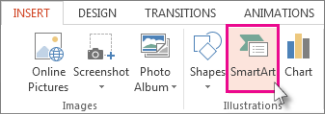
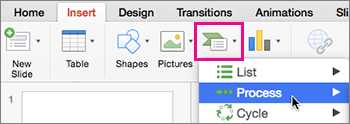
On the Insert tab, click SmartArt.
-
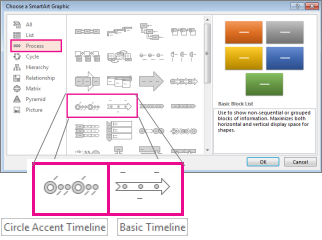
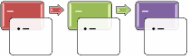
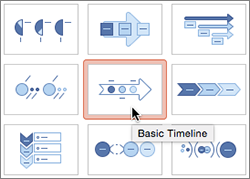
In the Choose a SmartArt Graphic gallery, click Process, and then double-click a timeline layout.
Tip: There are two timeline SmartArt graphics: Basic timeline and Circle Accent Timeline, but you can also use almost any process-related SmartArt graphic.
-
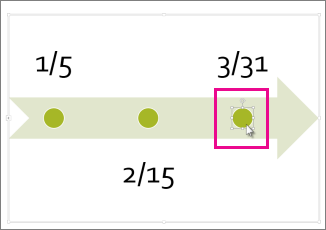
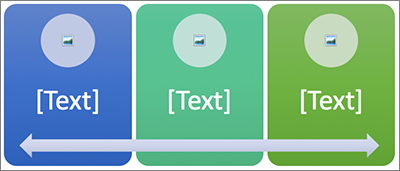
Click [Text], and then type or paste your text in the SmartArt graphic.
Note: You can also open the Text Pane and type your text there. If you do not see the Text Pane, on the SmartArt ToolsDesign tab, click Text Pane.
-
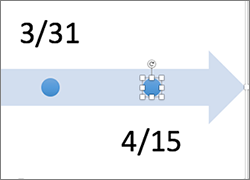
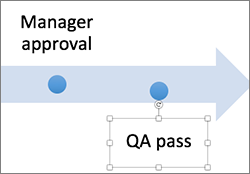
Click a shape in the timeline.
-
On the SmartArt ToolsDesign tab, do one of the following:
-
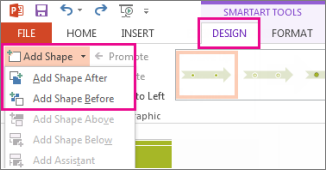
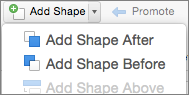
To add an earlier date, click Add Shape, and then click Add Shape Before.
-
To add a later date, click Add Shape, and then click Add Shape After.
-
-
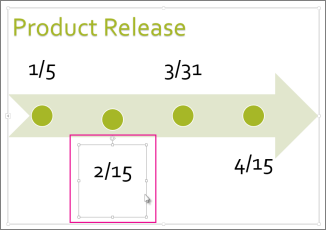
In the new date box, type the date that you want.
-
On the timeline, click the date you want to move.
-
On the SmartArt ToolsDesign tab, do one of the following:
-
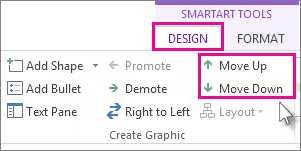
To move a date sooner than the selected date, click Move Up.
-
-
To move a date later than the selected date, click Move Down.
-
Click the SmartArt graphic timeline.
-
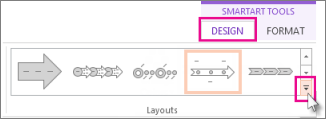
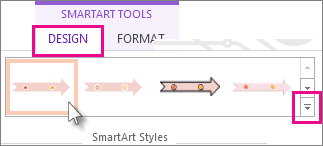
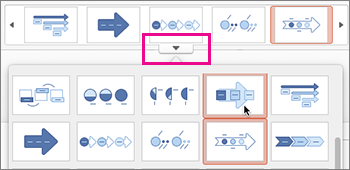
On the SmartArt ToolsDesign tab, in the Layouts group, click More

Note: To view only the timeline and process-related layouts, at the bottom of the layouts list, click More Layouts, and then click Process.
-
Pick a timeline or process-related SmartArt graphic, like the following:
-
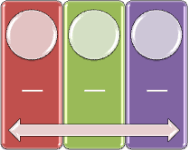
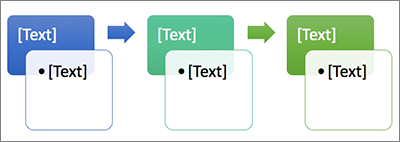
To show progression in a timeline, click Accent Process.
-
To create a timeline with pictures or photos, click Continuous Picture List. The circular shapes are designed to contain pictures.
-
-
Click the SmartArt graphic timeline.
-
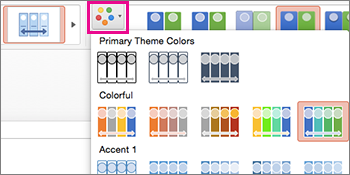
On the SmartArt ToolsDesign tab, click Change Colors.
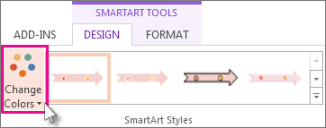
Note: If you don't see the SmartArt ToolsDesign tab, make sure you’ve selected the timeline.
-
Click the color combination that you want.
Tip: Place your pointer over any combination to see a preview of how the colors look in your timeline.
A SmartArt style applies a combination of effects, such as line style, bevel, or 3-D perspective, in one click, to give your timeline a professionally polished look.
-
Click the timeline.
-
On the SmartArt ToolsDesign tab, click the style you want.
Tip: For more styles, click More
See also
Create a timeline
When you want to show a sequence of events, such as project milestones or events, you can use a SmartArt graphic timeline. After you create the timeline, you can add events, move events, change layouts and colors, and apply different styles.
-
On the Insert tab, click SmartArt > Process.
-
Click Basic Timeline or one of the other process-related graphics.
-
Click the [Text] placeholders and enter the details of your events.
Tip: You can also open the Text Pane and enter your text there. On the SmartArt Design tab, click Text Pane.
-
Click a shape in the timeline.
-
On the SmartArt Design tab, click Add Shape, and then click Add Shape Before or Add Shape After.
-
Enter the text you want.
-
On the timeline, click the text of the event you want to move.
-
On the SmartArt Design tab, click Move Up (left), or Move Down (right).

-
Click the timeline.
-
On the SmartArt Design tab, point to the layout panel and click the down arrow.
-
Pick a timeline or process-related SmartArt graphic, like the following:
-
To show progression in a timeline, click Accent Process.
-
To create a timeline with pictures or photos, click Continuous Picture List. The circular shapes are designed to contain pictures.
-
-
Click the timeline.
-
On the SmartArt Design tab, click Change Colors, and then click the color combination you want.
Give your timeline a professional look by using a SmartArt style to apply a combination of effects, such as line style, bevel, or 3-D perspective.
-
Click the timeline.
-
On the SmartArt Design tab, click the style you want.


