
SharePoint lists and libraries contain list forms that allow users to display, edit, and add items to a list or library. With Microsoft SharePoint Designer 2010, you can create and customize these forms to make it easier for users to add and update items in a list. If the list form is part of a solution you've designed, you'll want to customize the form so that it's targeted toward the solution and collects the relevant data to support your solution.
In a custom list form, you can show or hide certain fields, reorganize those fields, change the layout of the form, add formatted text and graphics, and ultimately, change the XSL, HTML, or ASP used by the form. You can only perform these tasks by creating a custom list form in SharePoint Designer 2010.
This article describes the default forms associated with a list and how you can create your own custom forms for the list or library.
Note: If you’re using SharePoint Online, and the information in this article doesn’t match what you’re seeing, you may be using Microsoft 365 after the service upgrade. Some features in SharePoint Designer are not supported in the next version of SharePoint Online. See What's changed in SharePoint Designer 2013.
In this article
Review the default list forms
List forms are located in the same folder as their associated SharePoint list. Using SharePoint Designer 2010, you can quickly and easily review the default list forms associated with the list.
The easiest way to view the default forms associated with a list is to open the summary page for the list.
-
With your site open in SharePoint Designer 2010, click Lists and Libraries in the Navigation pane.
-
Click the desired list from the gallery, for example, Announcements.
-
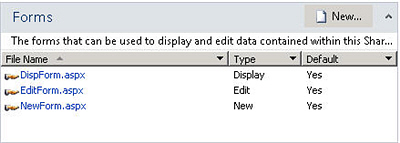
On the summary page, under Forms, you see the forms associated with the list.
Another way to view the default forms associated with a list is to open your site hierarchy using the All Files tab in the Navigation pane.
-
With your site open in SharePoint Designer 2010, click All Files in the Navigation pane.
Note: If the All Files isn't visible, contact your site administrator about enabling your web site structure in SharePoint Designer 2010.
-
For SharePoint lists, click the Lists folder and then click the desired list, for example Announcements.
From here, you see the forms associated with the list as well as any views associated with the list, like AllItems.aspx. (Find links to more information on views in the See Also section.)
Note: In addition to viewing and opening forms from here, you can use the site hierarchy that displays below the Navigation pane to explore the list. Just click the click the plus sign (+) to expand the Lists folder and the plus sign (+) to expand the desired list.

-
For SharePoint libraries, open the Shared Documents folder and then the Forms folder to find the associated forms.
The DispForm.aspx, EditForm.aspx, and NewForm.aspx list forms
By default, there are three forms associated with a list: DispForm.aspx, EditForm.aspx, and NewForm.aspx. The following three illustrations show the default list forms for an Announcements list.
-
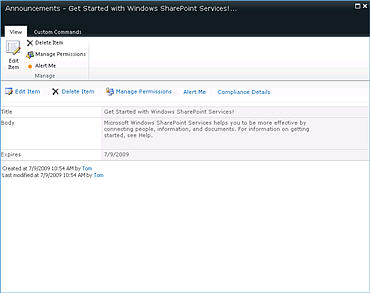
The DispForm.aspx page provides the Display Item form that appears when you view a single item from a list.
-
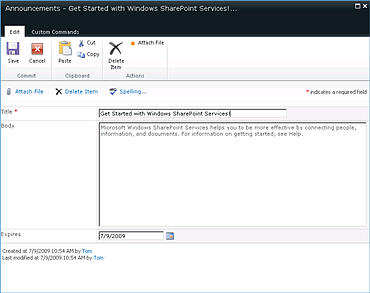
The EditForm.aspx page displays the Edit Item form that appears when you edit an item in a list.
-
The NewForm.aspx page displays the New Item form that appears when you add a new item to a list.
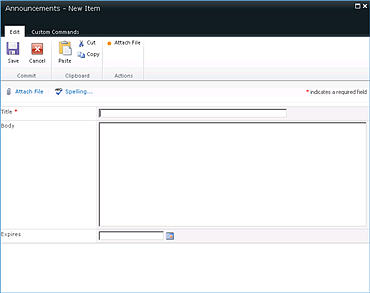
Note: SharePoint libraries use a different form, Upload.aspx, instead of NewForm.aspx to add new items to the library.
Create new list forms
The default list forms (the Display Item form, the Edit Item form, and the New Item form) are stored in a Web Part called the List Form Web Part (LFWP). The LFWP uses CAML (Collaborative Application Markup Language) to render the form, and this cannot be customized in SharePoint Designer 2010.
To customize the form, you insert a Data Form Web Part (DFWP). It uses XSLT that can be customized in SharePoint Designer 2010. In sum, you're replacing the default form with a DFWP, and there are two ways to do this.
Create a new list form and associate it with a list
The easiest and quickest way to create a custom list form is to create a new form and make it the default form for the list.
-
With your site open in SharePoint Designer 2010, click Lists and Libraries in the Navigation pane.
-
Click the desired list from the gallery, for example, Announcements.
-
On the summary page, under Forms, click New.
Note: Alternatively, you can click List Form in the ribbon on the List Settings tab.
-
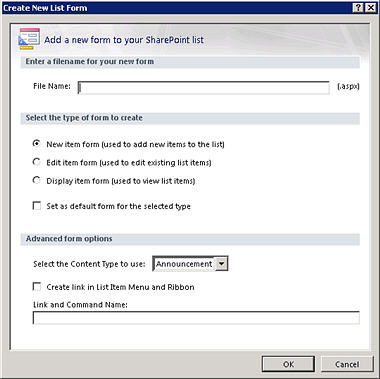
In the Create New List Form dialog box, specify a file name for the new form. (Do not use names that will conflict with the default forms: DispForm.aspx, EditForm.aspx, and NewForm.aspx.)
-
For the type of form, specify New item form, Edit item form, or Display item form.
-
To make this form the default form associated with your list, click Set as default form for the selected type. When you do this, your custom form will be used for this list instead of the original default form.
-
For advanced options, choose the content type to use for the form, typically the one that corresponds with your list.
Note: Every list or library can be configured to allow multiple content types, which then appear in this menu. You can use a distinct set of custom list forms for each content type available for a list or library. For example, if your list has both a Press Releases content type and an Industry News content type, you can create and use two separate sets of custom list forms, one for each of the two content types. The advantage to using a separate set of custom list forms for each content type is that then each custom list form is designed to display only the fields that are appropriate for that content type. Find more information about content types in the See Also section.
-
To add a custom link to your form, select the option Create link in List Item Menu and Ribbon and specify a link and command name.
Find links to more information about custom actions associated with a list in the See Also section.
-
Click OK to create the new form and return to the summary page for your list.
Your new form appears with the other forms associated with the list.
Edit an existing list form
Another way to create a custom list form is to directly edit one of the default forms associated with the list. When you do this, you insert a new form (the Data Form Web Part) on the page that replaces the default form on the page.
Note: You could, in effect, perform these steps on any ASPX page in SharePoint Designer 2010. The advantage of editing an existing form is that it is already associated with the list.
-
With your site open in SharePoint Designer 2010, click Lists and Libraries in the Navigation pane.
-
Click the desired list from the gallery, for example, Announcements.
-
On the summary page, under Forms, click the desired form, for example NewForm.aspx to open it for editing.
-
With NewForm.aspx open in the page editor, place your cursor immediately below the default form and press Enter a few times to create a extra spaces below the form.
Another way to quickly place your cursor at this location is to click on the default list form and press the Esc and right-arrow key at the same time.
-
On the Ribbon, click the Insert tab and in the Data Views & Forms group, click the desired form, for example New Item Form.
-
Choose the list or library you want to associate the form with, for example, Announcements.
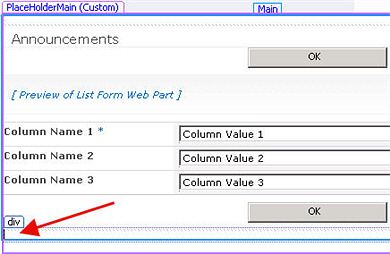
The New item form appears on the page, directly below the default form.
The next step is to hide the default list form so that only your new form appears on the page. This also ensures that the page's connection to the SharePoint list is intact, and the link to this page works correctly on the site.
-
Click the default list form to select it.
-
Click the Format tab in the Ribbon and in the Web Part group, choose Properties.
Alternatively, you can right-click the default web part and choose Web Part Properties.
-
In the Web Part dialog box, click the plus sign next to Layout, check the option Hidden, and click OK.
Do not delete the default web part in the page; you must only hide it. Deleting the default web part will break the page's connection to the list. Find links to more information about hiding Web Parts in the See Also section.
Both forms display on the ASPX page in SharePoint Designer 2010. When you preview the form, however, you see only your new form.
Use Office InfoPath 2010 to replace default forms
As an alternative to using the list form editor in SharePoint Designer 2010, you can use use Microsoft InfoPath 2010 to create, edit, and design forms. InfoPath 2010 is a powerful tool used to create highly customized forms that can be used for SharePoint lists, libraries, and workflows.
Find links to more information about Office InfoPath 2010 forms in the See Also section.
Next steps
Once you've created a custom form for a list or library, the next step is to start customizing the form to suit your needs. You can add or remove columns, change the layout of the fields, apply different fonts or styles, add custom images, and so on. You can use the Ribbon in SharePoint Designer 2010 to perform this customization. If there's a change you can't make by using the Ribbon, you can edit the form XSL directly in Code view. Find links to more information about customizing list forms in the See Also section.
To delete a form, highlight it on the summary page and then in the Ribbon, choose Delete. This deletes the form from the server, and it can no longer be accessed by users.


